3 operation, 1 typical operation, Chapter 3 operation – Dillon Quick Balance Tension Meter User Manual
Page 11: Typical operation
Quick Balance User Instructions
11
3 Operation
Typical operation of the Quick Balance is covered below, followed by explanations of
the various display modes, how to change wire size, how to change the unit of
measure, etc.
3.1 Typical Operation
To perform a typical tension measurement, see the note above and follow these steps:
1.
Turn the unit on by pressing the ON/OFF key…
The display shows DILLON briefly, then, in this example, the screen
shows the following:
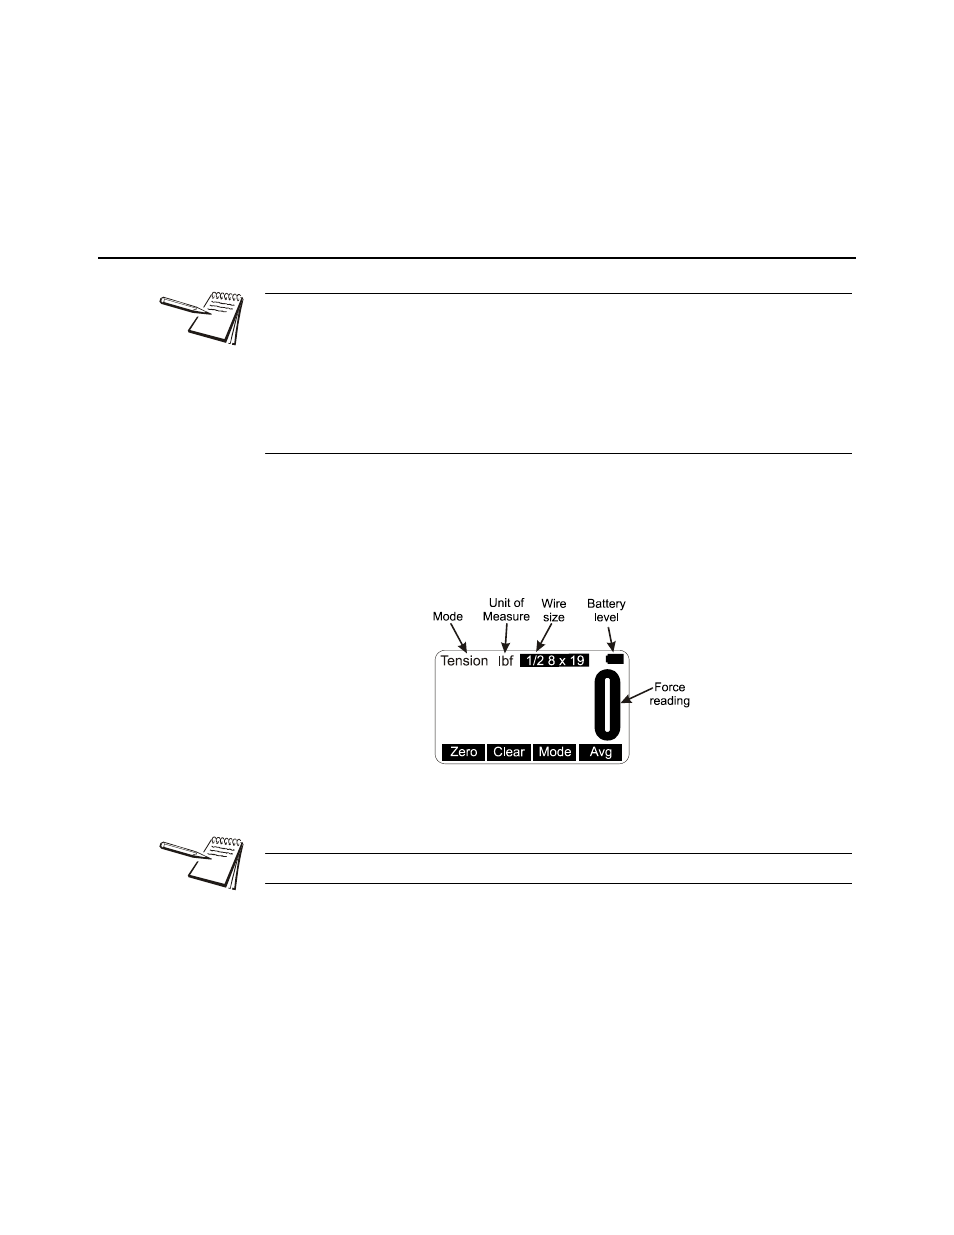
Figure 3.1 Sample display
2.
This example shows the wire is a 1/2”, 8 X 19 stranded cable and the unit of
measure is lbf. Place the Quick Balance so the two outside sheaves hang on
the wire. Insure that the wire rope is riding in the groove of all three sheaves.
See Figure
. Press the Zero softkey to zero the display.
0 should be displayed.
3.
Raise the lever arm until it locks in the upright position to apply tension to the
wire. Read the line tension on the display.
Take readings at three different places along the cable, moving the tension meter at
least four inches for each reading. Take the average of the readings. The built-in
average function is ideal for this task.
The handle quick release pin should be used when the Quick Balance is attached to a
cable that will be de-tensioned and retensioned. The pin prevents the handle from
opening once the tension falls to a small level. The pin should also be used if the
Quick Balance will be installed for a prolonged period.
Press the WIRE key to list the stored calibrations.