Kidde KN-COPE-I User Manual
Page 18
Operating and Installation Instructions
13
2. After selecting the proper location for your Smoke/CO
Alarm, as described on Pages 8-11, and wiring the AC
QUICK CONNECT harness as described in the WIRING
INSTRUCTIONS, attach the mounting bracket to the elec-
trical box. To ensure aesthetic alignment of the alarm
with the hallway, or wall, the “A” line on the mounting
bracket must be parallel with the hallway when ceiling
mounted, or horizontal when wall mounted.
3. Pull the AC QUICK CONNECTOR through the center hole
in the mounting bracket and secure the bracket, making
sure that the mounting screws are positioned in the small
ends of the keyholes before tightening the screws.
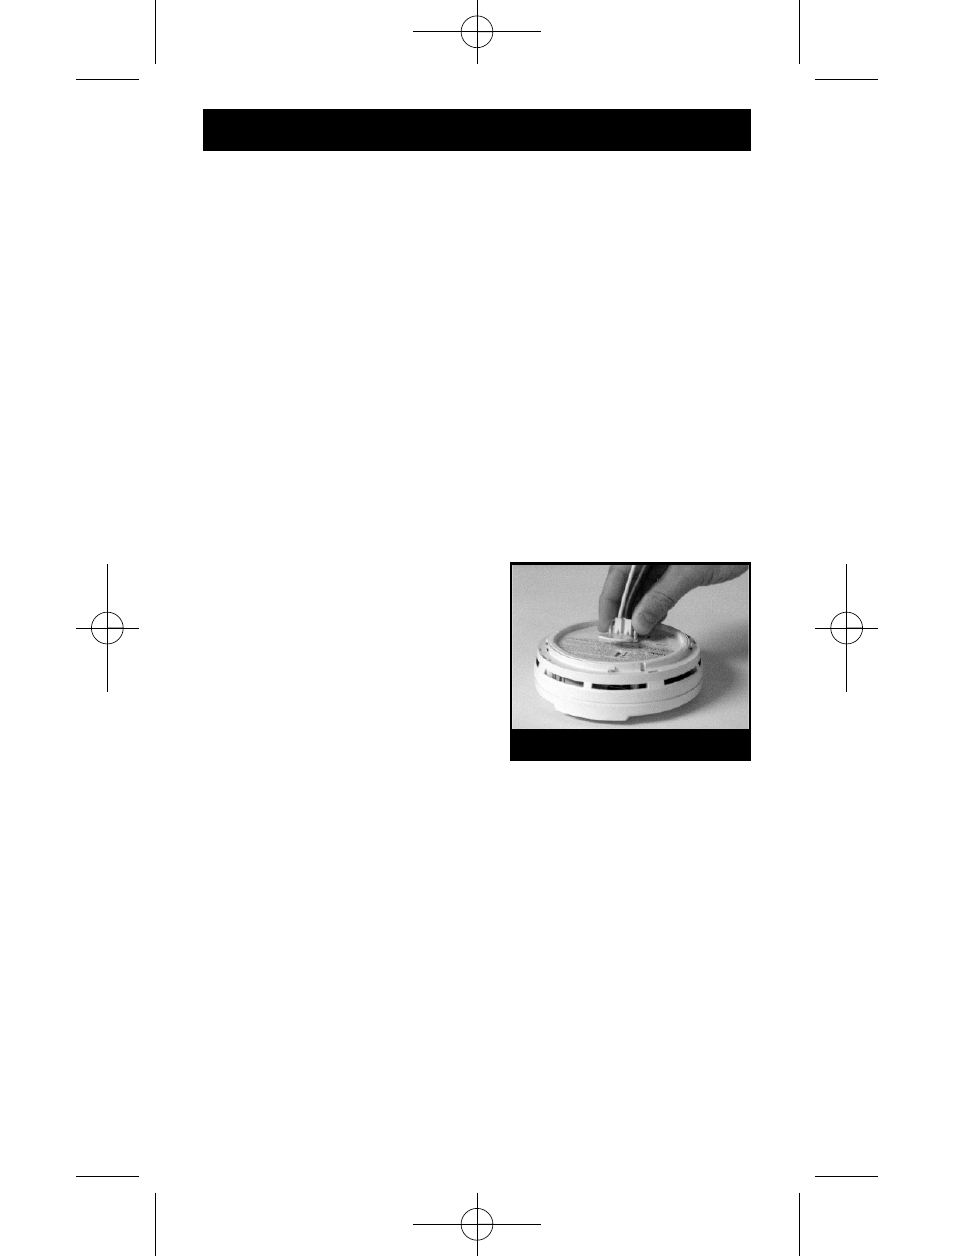
4. Remove the cardboard square from the connector pins.
Plug the AC QUICK CONNECTOR into the back of the
alarm (see Figure 4) making sure the locks on the con-
nector snap into place. Then push the excess wire back
into the electrical box through
the hole in the center of the
mounting bracket.
5. Turn on the AC power. The
green AC Power On Indicator
should be lit when the alarm
is operating from AC power.
6. Two labels are included with
your alarm. They have impor-
tant information on what to do in case of an alarm. Add
the phone number of your emergency service provider
(Fire Department or 911) in the space provided. Place one
label next to the alarm after it is mounted, and one label
near a fresh air source such as a door or window.
7. Pull the Battery Pull Tab (yellow tab protruding from unit)
completely out of unit. This will automatically connect
the battery.
FIGURE 4
2528-7207-01(820-1669Rev.B).qxd:_ 2013.5.10 4:42 PM Page 18