Set-up – Wilbur Curtis WB-14-11 User Manual
Page 2
SET-UP
TO RE-CALIBRATE THE THERMOSTAT
The Unitrol thermostat is built to the most
exacting standards and is a precision instru-
ment which should never need re-calibration.
However through tampering, misuse or other
reasons, if the thermostat is found to be more
than 10º from normal, a re-calibration may be
performed by a qualified service technician.
The following are the steps for this procedure:
1. Turn the thermostat to OFF to allow the unit to cool down.
2. When the water temperature is room temperature, turn the thermostat dial until the main burner
ignites.
3. Slowly, turn the thermostat dial counterclockwise until the flame on the burner goes out.
4. Place a thermometer into the water jacket to determine the temperature of the water.
5. Pull off the thermostat dial and lift off the outside cover.
6. Turn the temperature stop to correspond to the actual water temperature. Mark the location of the stop
for reference.
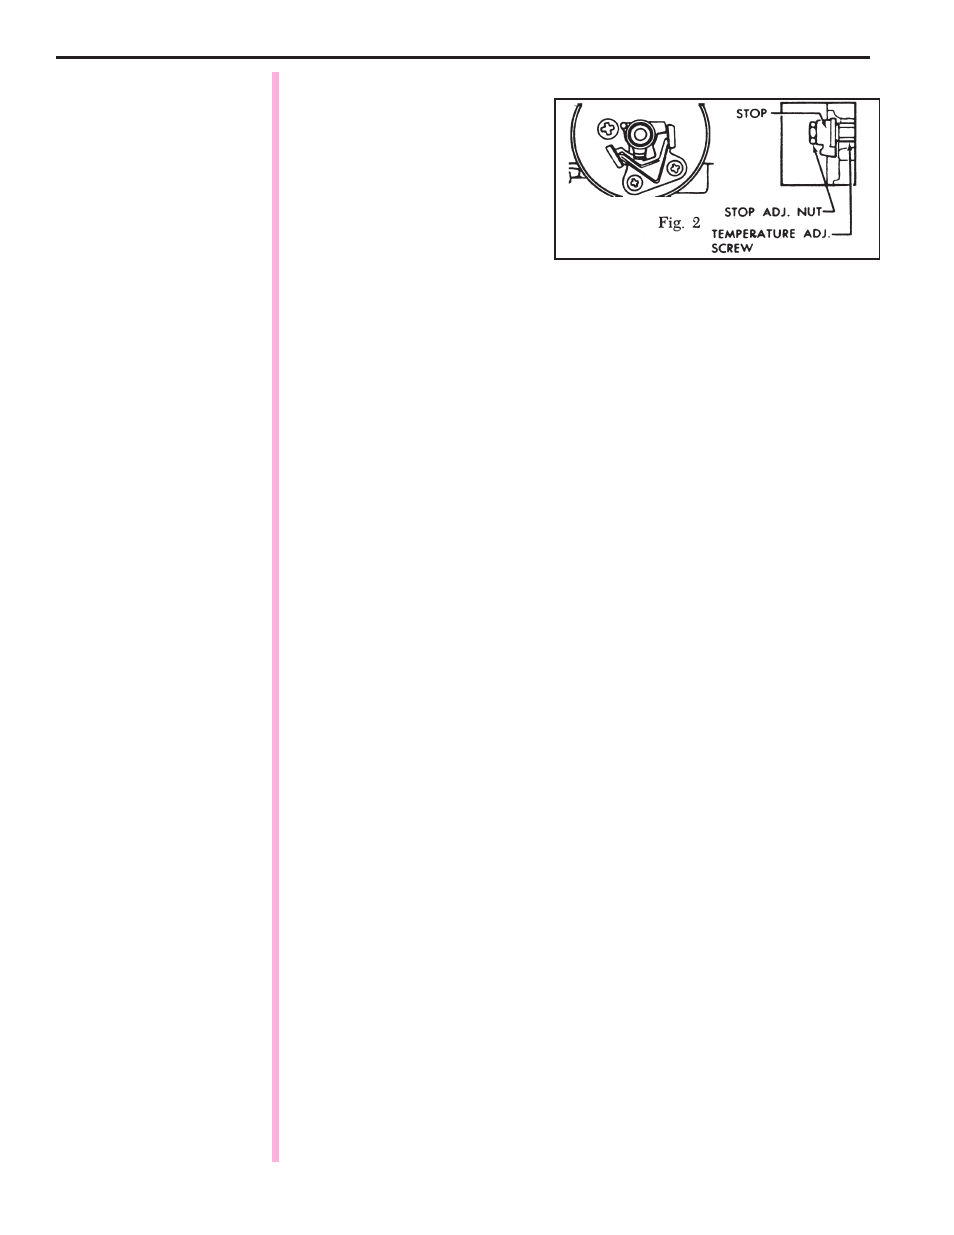
7. Turn the stop slowly until the control snaps off. Holding the stop to prevent rotation, carefully loosen
the stop adjustment nut (see figure 2).
8. Taking care not to move the temperature adjusting screw, turn the stop until it lines up with the tick
mark previously made.
9. Hold the stop in place and tighten the stop adjustment nut.
10. Recheck the OFF temperature.
11. Replace the outside cover and thermostat dial.
THERMOCOUPLE CONNECTION
Poor contact between the thermocouple lead and the magnet assembly may cause the valve to be inop-
erative even when the pilot is in proper adjustment and position. If this is the problem, clean and tighten the
contact points. Remove the thermocouple and carefully clean the parts that make contact with the magnet
assembly.
PROCEDURE FOR LIGHTING OR RELIGHTING PILOT
1. Turn GAS COCK handle to “OFF” position, and DIAL ASSEMBLY to lowest temperature position.
2. Wait sufficient length of time to allow gas which may have accumulated in burner compartment to
escape.
3. Turn GAS COCK handle to “Pilot” position.
4. Fully depress SET button, and light pilot burner (adjust if necessary, refer to “Pilot Burner Adjustment”).
5. Allow pilot to burn approximately ½ minute before releasing SET button. If pilot flame does not remain
lit, repeat operation allowing longer period before releasing SET button.
6. Turn GAS COCK handle to “ON” position and turn dial assembly to desired position.. The main burner
should now ignite.
PROCEDURE FOR ADJUSTING PILOT
1. Remove pilot adjustment cap. Adjust pilot key, allowing flame to completely envelop the end ( ⅛ ”) of the
Thermocouple.
2. Adjust pilot burner air shutter (if provided) to obtain a soft blue flame.
2