Anti-tip brackets – Wilbur Curtis PCGT6 User Manual
Page 5
5
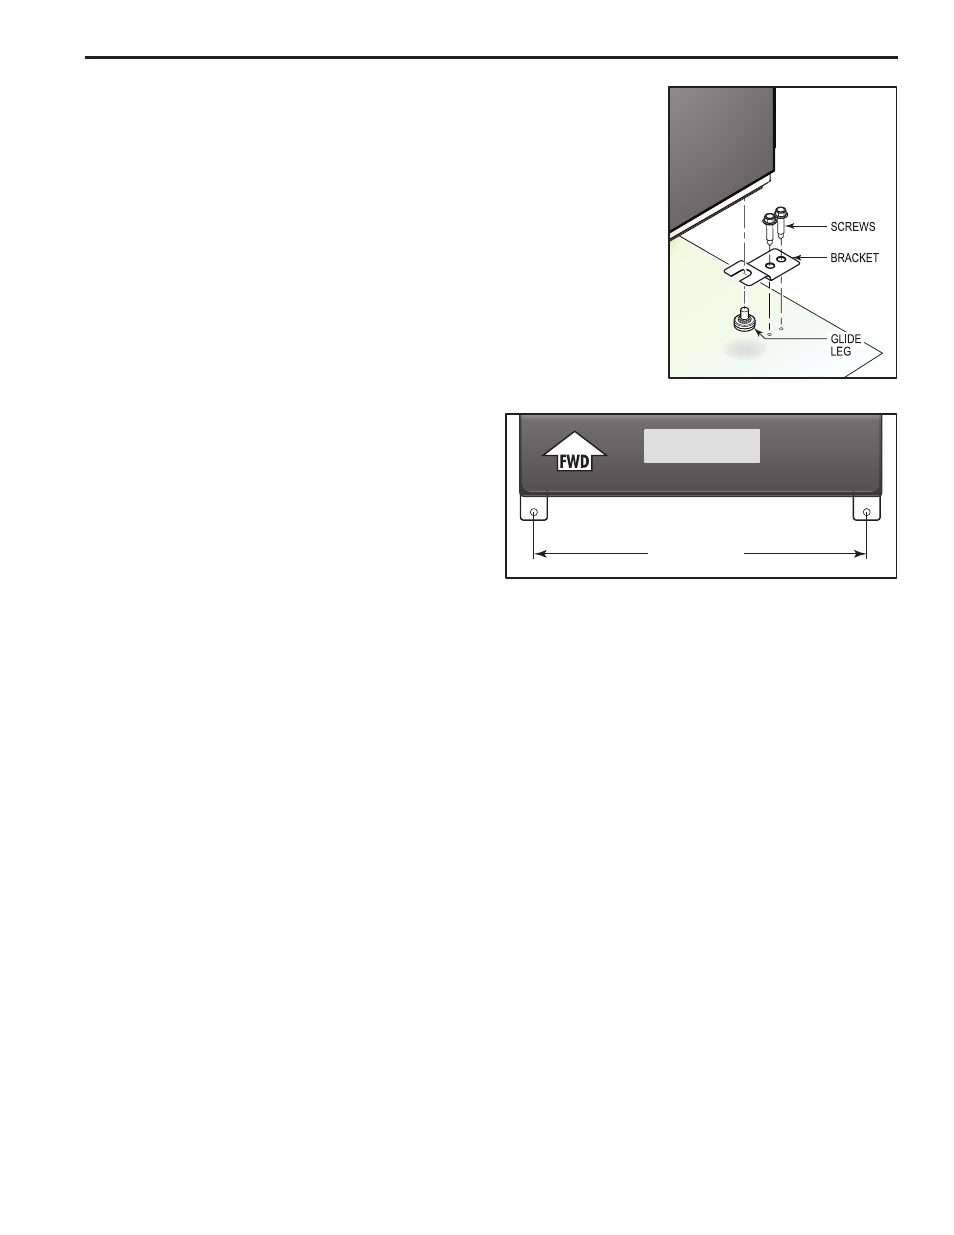
18” TO CENTER
OF HOLES
PCGT6 UNIT
VIEWED FROM TOP
To reduce the risk of tipping of the unit when the front door is opened, the unit must be
secured to the counter by properly installed anti-tip brackets. Failure to install the anti-tip
brackets will allow the unit to tip over if excessive weight is placed on the front of the unit.
Serious injury might result from spilled hot liquids or from the unit itself.
Whenever the unit is ever moved to a different location, the anti-tip brackets must also be
moved and installed with the unit.
This kit consists of two brackets, four screws, and these instructions.
Installation Steps:
1. Install the unit in a location near a water source and a 120 volt electrical outlet.
2. The unit should be level (left to right - front to back), on a secure surface.
3. Water hook-up tubing should be sized to sufficiently provide a minimum flow rate of one
gallon per minute.
4. Find the location of the brackets. Mark the screw hole locations 18 inches apart. If the
unit will be installed against a wall, mark the bracket locations to allow 1¼” of a gap
between the rear of the unit and the wall. One bracket is required, two are optional.
5. Drill pilot holes. Drill a ⅛” pilot hole where the screws fasten
the bracket to the counter top.
6. Mount the bracket onto the counter top.
a. Insert the two screws into the holes on the bracket and
secure the bracket fasten the bracket with the screws.
b. Because the unit has rubber feet in the front and gliding
feet in back the unit can be slid backwards easily. Lift
slightly on the front of the unit and slide it back into the
brackets.
c. Slide the unit back so that the stud of the glide leg is
inserted into the U shaped hook on the bracket.
7. The bracket kit is now installed and the unit can be placed into service.
Anti-Tip Brackets