Rough-in drawing, Cleaning the coffee brewer, Cleaning the satellite server – Wilbur Curtis GEMSS User Manual
Page 9
9
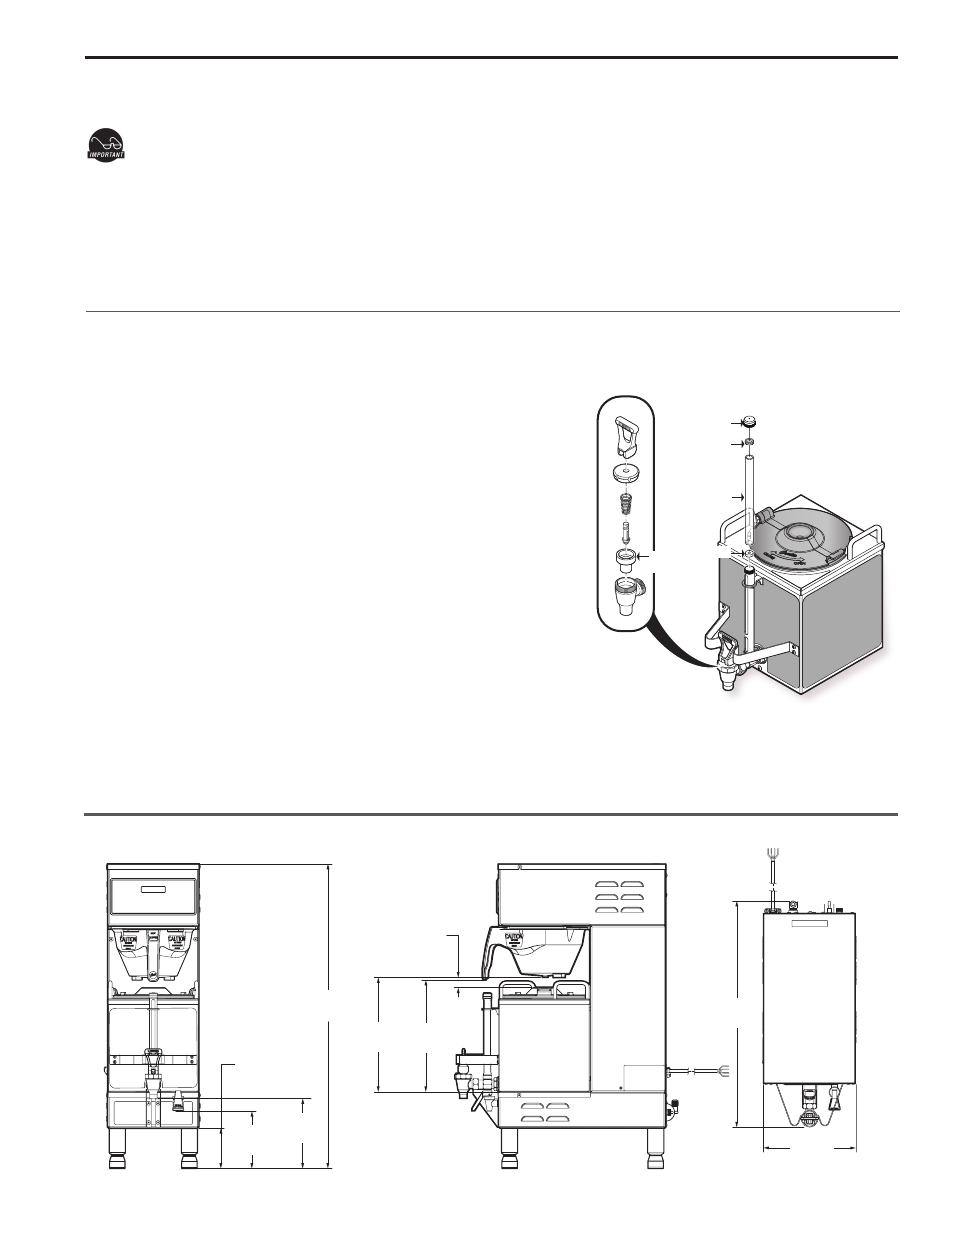
CAP
WASHER
GLASS TUBE
WASHER
SEAT
CUP
29.75”
(75.6 cm)
4.00”
(10.2 cm)
5.63”
(14,3 cm)
6.88”
(17.5 cm)
1.00”
(2.5 cm)
11.13”
(28.3 cm)
10.88”
(27.6 cm)
22.00”
(55.9 cm)
9.13”
(23.2 cm)
Cleaning the Coffee Brewer
Regular cleaning and preventive maintenance is essential in keeping your coffee brewer looking and working like new.
CAUTION – Do not use cleansers, bleach liquids, powders or any other substance containing chlorine. These
products promote corrosion and will pit the stainless steel. USE OF THESE PRODUCTS WILL VOID THE
WARRANTY.
1. Wipe exterior surfaces with a moist cloth, removing spills and debris.
2. Slide the brewcone out and clean it. Clean the sprayhead area with a moist clean cloth.
3. Rinse and dry the brewcone.
4. Drain drip tray of coffee. Wash out the drip tray. Dry the tray.
5. Rub a stainless steel polish on the outside surfaces to protect the brewer.
Rough-In Drawing
Cleaning the Satellite Server
To clean the Satellite components, prepare a mild solution of detergent and warm water.
DO NOT immerse the Satellite in water or any other liquid.
1. Remove lid from Satellite. Clean the lid at the funnel area with a
spiral brush and detergent solution.
2. Rinse the lid, removing all traces of cleaning solution.
3. Clean inside of the Satellite. Remove coffee residue with the
detergent solution.
4. Thoroughly rinse out the Satellite with clean warm water.
5. Unscrew the handle/bonnet assembly and remove it from the
dispensing faucet.
6. Inspect the silicone seat cup for wear, cracks, or hardening. If
okay, then leave the seat cup attached on the handle/bonnet as-
sembly. Soak then wipe clean. Replace the seat cup if damaged.
7. Remove the gauge glass tube by unscrewing the gauge glass
cap.
8. Clean the gauge glass tube with a gauge brush soaked with
detergent solution. Soak and wipe the two washers. Rinse with
clean water. Dry the parts and assemble them onto the Satellite. Hand tighten the cap.
9. Clean all parts. Thoroughly rinse with clean warm water.
10. Dry and assemble the parts. Hand-tighten when the assembling.