Vermont castings vigilant, Securing the connector to a prefabricated chimney, Securing the connector to a masonry chimney – Vermont Casting 2310 User Manual
Page 14
14
Vermont Castings Vigilant
2000898
Securing the Connector to
a Prefabricated Chimney
Follow the installation instructions of the chimney
manufacturer exactly as you install the chimney. The
manufacturer of the chimney will supply the accesso-
ries to support the chimney, either from the roof of the
house or at the ceiling of the room where the stove is
installed.
Again, your dealer can supply a variety of specialty
pieces to simplify the installation. Some adaptors, for
example, enable you to make an attachment directly
to the chimney or to the chimney’s ceiling support
package. The bottom of the adaptor is screwed to the
chimney connector. (Fig. 18)
Some pieces are designed so the top end will fit outside
the inner wall of the chimney, and the bottom end will
fit inside the first section of chimney connector. In this
way, any soot or creosote falling from the inner walls of
the chimney will stay inside the chimney connector.
NOTE: For double-wall chimneys with an outside
dimension greater than 10¹⁄₄", or with triple-wall chim-
neys, check with the manufacturer of the chimney for
the right trim collar to finish the installation.
ST694
Prefab
chimney connector
8/7/01 djt
ST693
Prefab
chimney connector
8/7/01 djt
Prefabricated
Chimney
Prefab Con-
nector
Collar
Roof Support
Package
ST693
ST694
Prefabricat-
ed Chimney
Prefab Con-
nector
Chimney
Support
Package
Fig. 18 Special pre-fab chimney connectors may be available
from the chimney manufacturer.
Securing the Connector to
a Masonry Chimney
Both freestanding masonry chimneys and fireplace
masonry chimneys may be used for installation of your
Vigilant II Coal Stove.
Freestanding: If the chimney connector must pass
through a combustible wall to reach the chimney, follow
the recommendations in the Wall Pass-Through sec-
tion.
ST243
thinble connection
12/13/99 djt
Thimble Sleeve
Chimney Connector
Flue
Keep sleeve
end flush
with flue tile
ST243
Fig. 19 The thimble, made of either ceramic or metal, must
be cemented securely in place.
The opening through the chimney wall to the flue (the
“breech”) must be lined with either a ceramic or metal
cylinder, called the “thimble”, which is securely cement-
ed in place. Most chimney breeches incorporate thim-
bles, but check to be sure the fit is snug and the joint
between thimble and chimney wall firmly cemented.
A thimble sleeve, available from your local dealer, will
facilitate the removal of the chimney connector for
inspection and cleaning. The thimble sleeve is slightly
smaller in diameter than standard connector pipe and
most thimbles.
It is installed by sliding it into the breech until it is flush
with the inner wall. It should not extend into the actual
flue passage, however, since this could interfere with
the draft.
The thimble sleeve should protrude 1-2” (25-50 mm)
into the room, and should be sealed in place with fur-
nace cement and thin gasketing.
Once it the thimble sleeve is installed, the chimney con-
nector should be attached to it with sheet metal screws.
Lacking a thimble, a suitable length of chimney con-
nector can be extended through the breech to the inner
face of the flue liner, and securely cemented in place.
Additional pieces of connector are then attached with
sheetmetal screws.
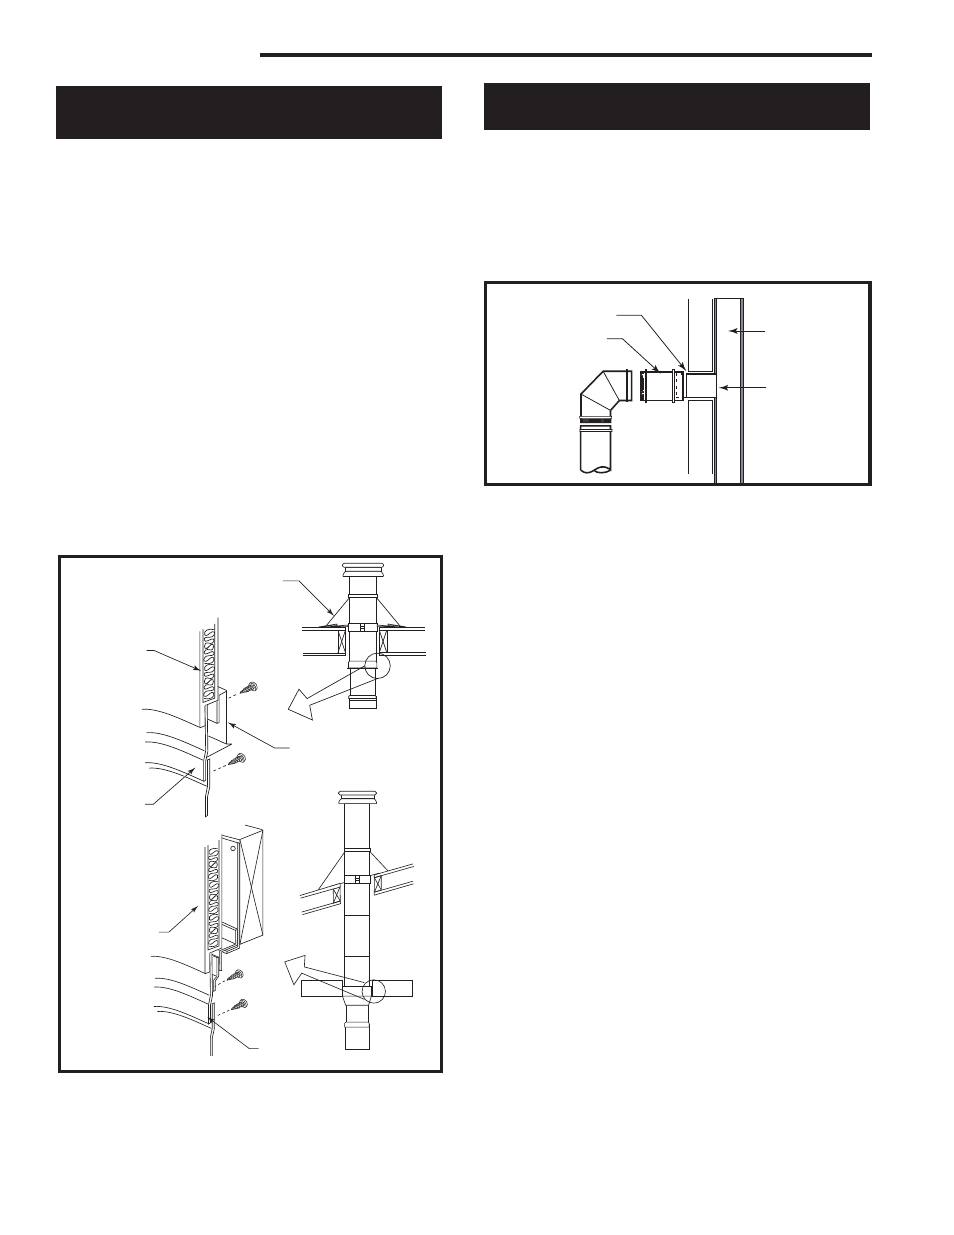
Above a fireplace
In this installation, the chimney connector goes up from
the stove, turns 90 degrees, and goes back into the
fireplace chimney. The liner of the fireplace chimney
should extend at least to the point at which the chimney