Petsafe Innotek Smart Dog® Rechargeable In-Ground Pet Fencing System User Manual
Page 14
Innotek, Inc. (800)-826-5527 www.innotek.net
Repeat the test from Step H.3 until you are satisfied with the
field width setting. As you approach the boundary wire, place
a flag where the receiver first detects the warning sound.
Continue placing the flags at 6 to 8 foot intervals around the
entire containment area using this technique.
If the field adjustment knob position is altered, you must test
the containment field for the desired setting and reposition the
flags as necessary.
4. Plug the holes
With the twisted wire in place near the wall transmitter, caulk
and seal the interior and exterior holes to prevent damage
from moisture and insects.
SECTION 5.
USING THE
CONTAINMENT SYSTEM
Collar Receiver
A. Fitting the Collar Receiver to Your Dog
1. Probes
Use short probes for shorthaired dogs. Use long
probes for longhaired dogs. Finger tighten the probes,
then turn one additional revolution with the probe
wrench. Do not over-tighten the probes.
2. Collar Strap
The collar receiver should fit snugly at the top of your
dog's neck where the neck is most narrow and has the
least fur. Adjust the collar so it's just snug enough to
slide one finger between the strap and the dog’s skin at
the back of its neck. To work properly, both probes
must contact your dog's skin. Periodic adjustment of
the collar's fit may be necessary as your dog's coat,
weight, and age change.
You may think a properly fitted collar receiver is too
tight or too high. Although this is a collar, it is not like
any other, and to work properly it must fit high and
snug. For the safety of your dog, we recommend that
you perform this check each time you place the collar
receiver on your dog.
Remove the collar and trim any excess strap length,
leaving 4 to 6 inches. Then seal the end with a lighted
match for 1-2 seconds. This will prevent fraying.
Never leave the collar receiver on your dog for longer
than 12 hours a day. Leaving the collar on your dog for
extended periods could result in irritation around the
neck or at the site where the probes make contact with
the skin. check your dog’s neck weekly for signs of skin
irritation.
B. Setting the Transmitter Controls
1. Stimulation Level Settings
Always use the lowest stimulation level necessary to
contain your dog. The goal is for your dog to associate
an unpleasant consequence with ignoring the training
and straying outside the boundary you have defined.
2. Charge Reminder Settings
The REMINDER switch allows you to select a reminder
interval of 60 (Labeled A) or 30 (Labeled B) days or turn
the function OFF. The timer starts when the collar
receiver is removed from the charger. This switch
should be set at a time interval that will remind you to
check the collar receiver and verify that it has an ade-
quate charge to contain your dog. During the initial
training period or if your dog frequently "challenges" the
containment system boundary, we recommend that you
set the reminder switch to the B position and check the
collar receiver indicator light weekly for a low battery
indication. Once your dog is trained or rarely "chal-
lenges" the system boundary, you may be able to set
the reminder switch to the A position and charge the
collar receiver less frequently.
NOTE: The timer is automatically reset when the collar
receiver is placed in the charging cradle for greater than
5 minutes.
3. Alarm Volume Setting
Your transmitter contains an audible alarm to warn you
if there is a break in your boundary wire, a low backup
battery condition, a transmitter power outage or to
remind you to check your receiver battery status. The
volume of the alarm tone can be adjusted using the
ALARM VOLUME knob. Set the alarm volume at a
level that you can easily hear when you are in the vicin-
ity of the transmitter. To test the alarm volume, discon-
nect one of the loop wires at the transmitter. This will
cause the wire break alarm to activate and produce an
alarm tone. Reconnect the loop wire after you have set
the alarm volume.
14.
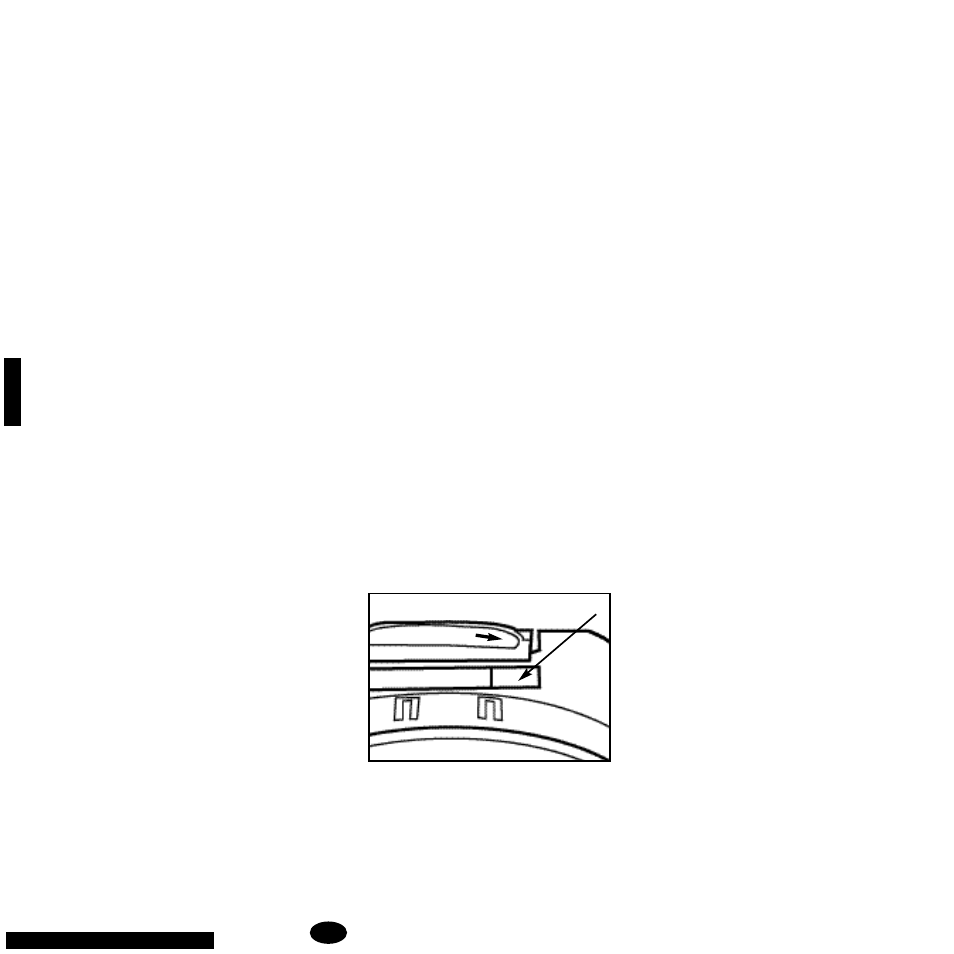
collar receiver light to this end
APPLICATION