Operating guide, Step 1, Prepare the handheld remote – Petsafe Elite Big Dog Add-A-Dog® Extra Receiver Collar User Manual
Page 9: Charge the handheld remote, Turning on the remote, Remote digital display
www.petsafe.net 9
Operating Guide
Step 1
Prepare the Handheld Remote
Charge the Handheld Remote
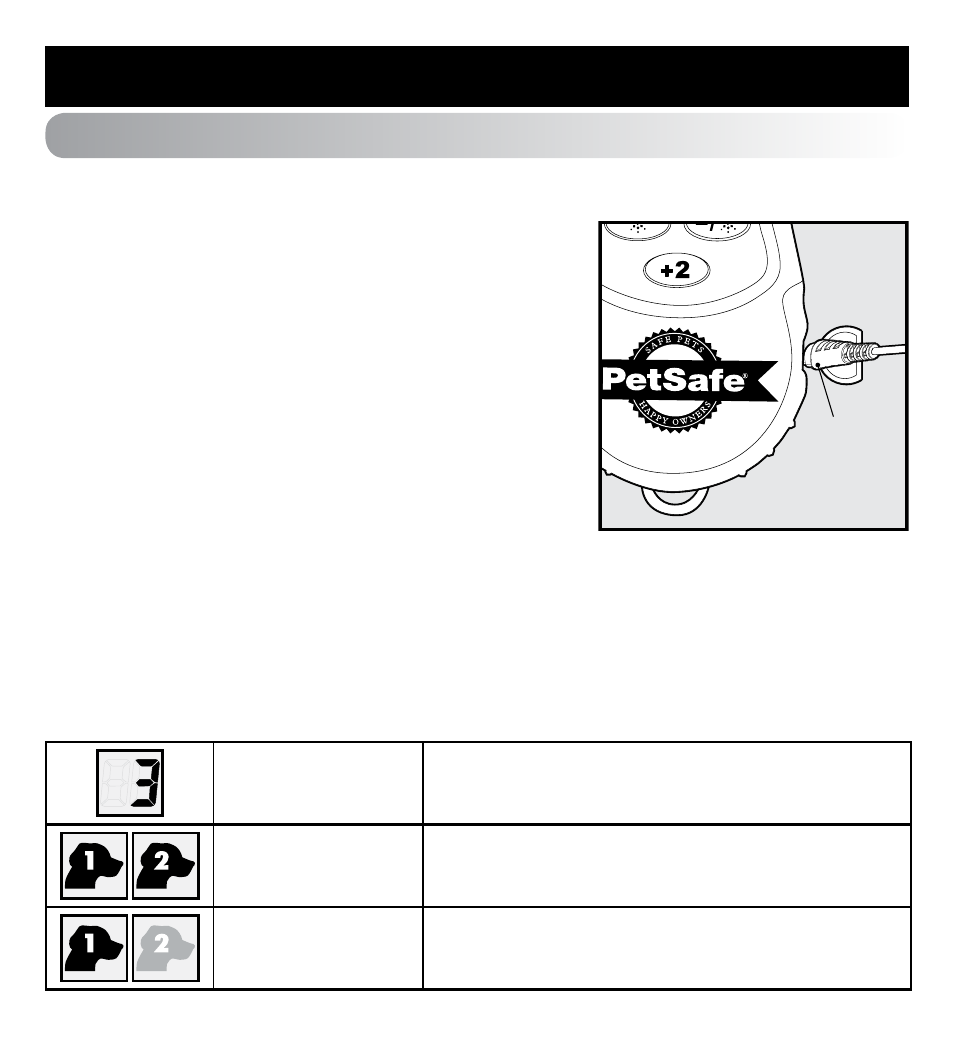
1. Lift the rubber cover protecting the Handheld Remote
Charging Jack.
2. Connect one of the charger connectors to the Handheld
Remote Charging Jack.
3. Plug the charger into a standard wall outlet.
4. Charge the Handheld Remote for 5 hours for the first
charge. Recharges take only 3-4 hours. Note: The Battery
Indicator will scroll while charging and will become solid
when fully charged.
5. When charging is completed, replace the rubber cover.
Note: Approximate battery life between charges is 40 to 60
hours, depending on frequency of use.
Turning ON the Remote
Power up the Remote by pressing any button. The display turns on when you press any button.
Remote Digital Display
The display stays on for 1 minute after a button is pressed. After 1 minute with no buttons pressed,
the display shuts off and the Remote goes into battery conservation mode. Pressing any button
will cause the display to turn back on. The various display symbols are explained below.
Numeric readout
Displays the stimulation level for Dog 1 or Dog 2.
Dog 1/ Dog 2
The symbol displayed is the active dog receiver
collar. See Two Dog System on page 14.
Tone or Stimulation When pressing Tone or Stimulation the Dog 1 or
Dog 2 symbol will appear in bold or emphasized.
Charger
connector
placed in the
Handheld
Transmitter
Charging Jack