Fig 3 fig 4, Fig 3b – PDR Mounts upm50 User Manual
Page 4
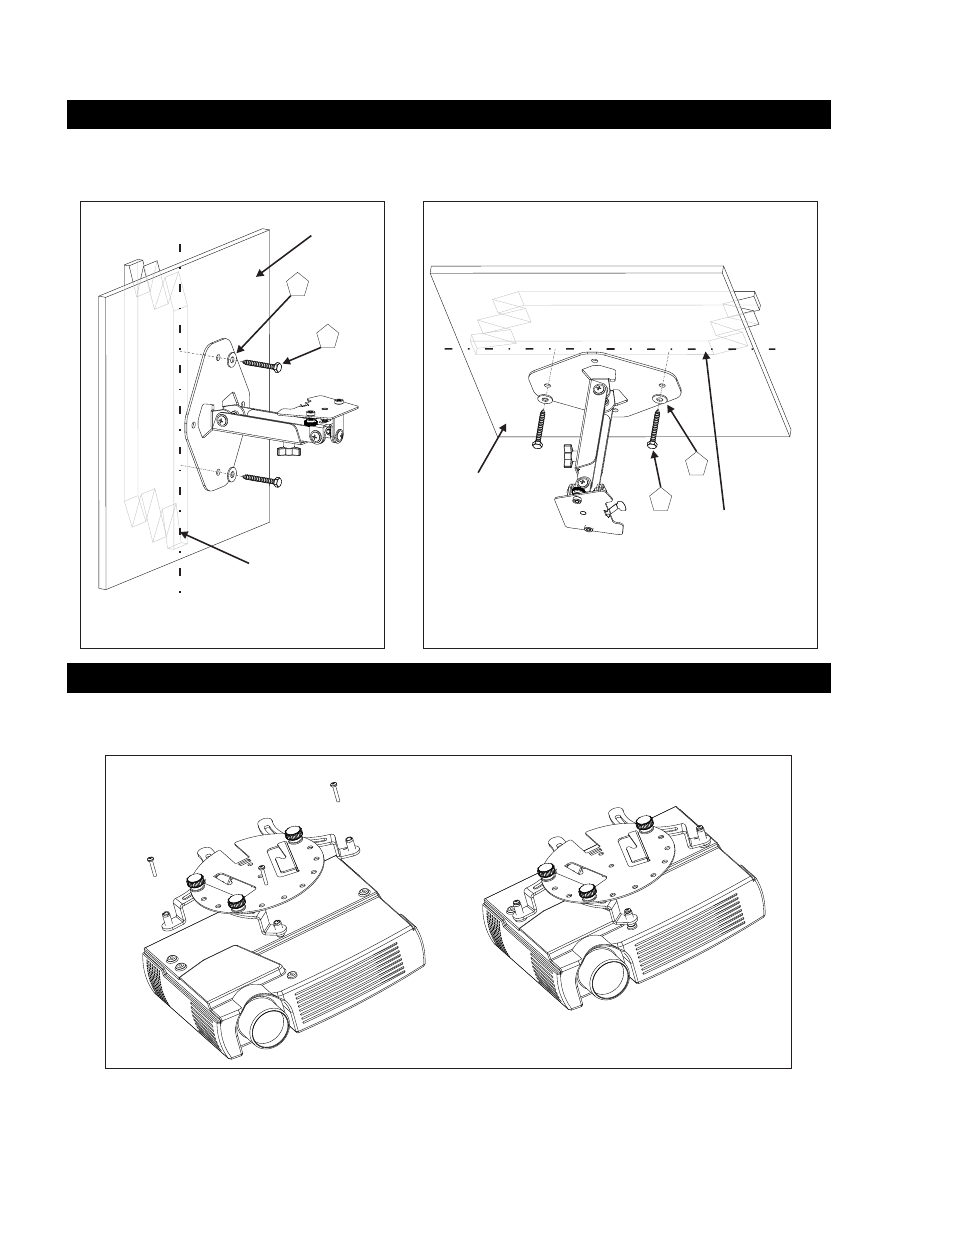
1. FASTEN THE PROJECTOR MOUNT TO WALL
Fig 3
Fig 4
NOTE: Do not over tighten the bracket mounting screws as damage to the projector’s internal mounting threads could occur.
4
The bracket must be secured to the wall studs capable of at least
you find the center of the stud. Using at least two of the four lag bolts
and washers supplied
secure the mounting plate to the center of the studs. Pre drill
3/16” (5mm) hole for lag bolts. Vertical and horizontal holes are provided to suite alternate mounting applications.
fig.3 Shows wall mount application. fig 3b shows
ceiling mount application. Other hardware may be purchased from your local hardware supplier for hard surface mounting.
Note: slide adjustment knob faces down
on the wall mount application.
(5) times the weight of the projector + mount. Locate the wall or ceiling stud using a stud finder. Insure
( D )
( C )
Fig 3b
WALL MOUNT APPLICATION
CEILING MOUNT APPLICATION
Attach the adapter plate assembly to the projector
( screws L,M,O or P) (washers I or J )
Using the proper hardware supplied
Fig 4
D
C
D
C
Centerline
of ceiling 2”x4” wood stud
Centerline of 2”x 4” wood
stud
2. ATTACH THE ADAPTER PLATE TO THE PROJECTOR.
Projector assembly
½” Wall board
½” Wall board