Assembly instructions 4/5, Step 5, Step 6 – Home Styles 5541-10 User Manual
Page 5
O
P
STEP 5
Assembly Instructions 4/5
Figure 4
STEP 6
Figure 7
Figure 6
Figure 5
Figure 4
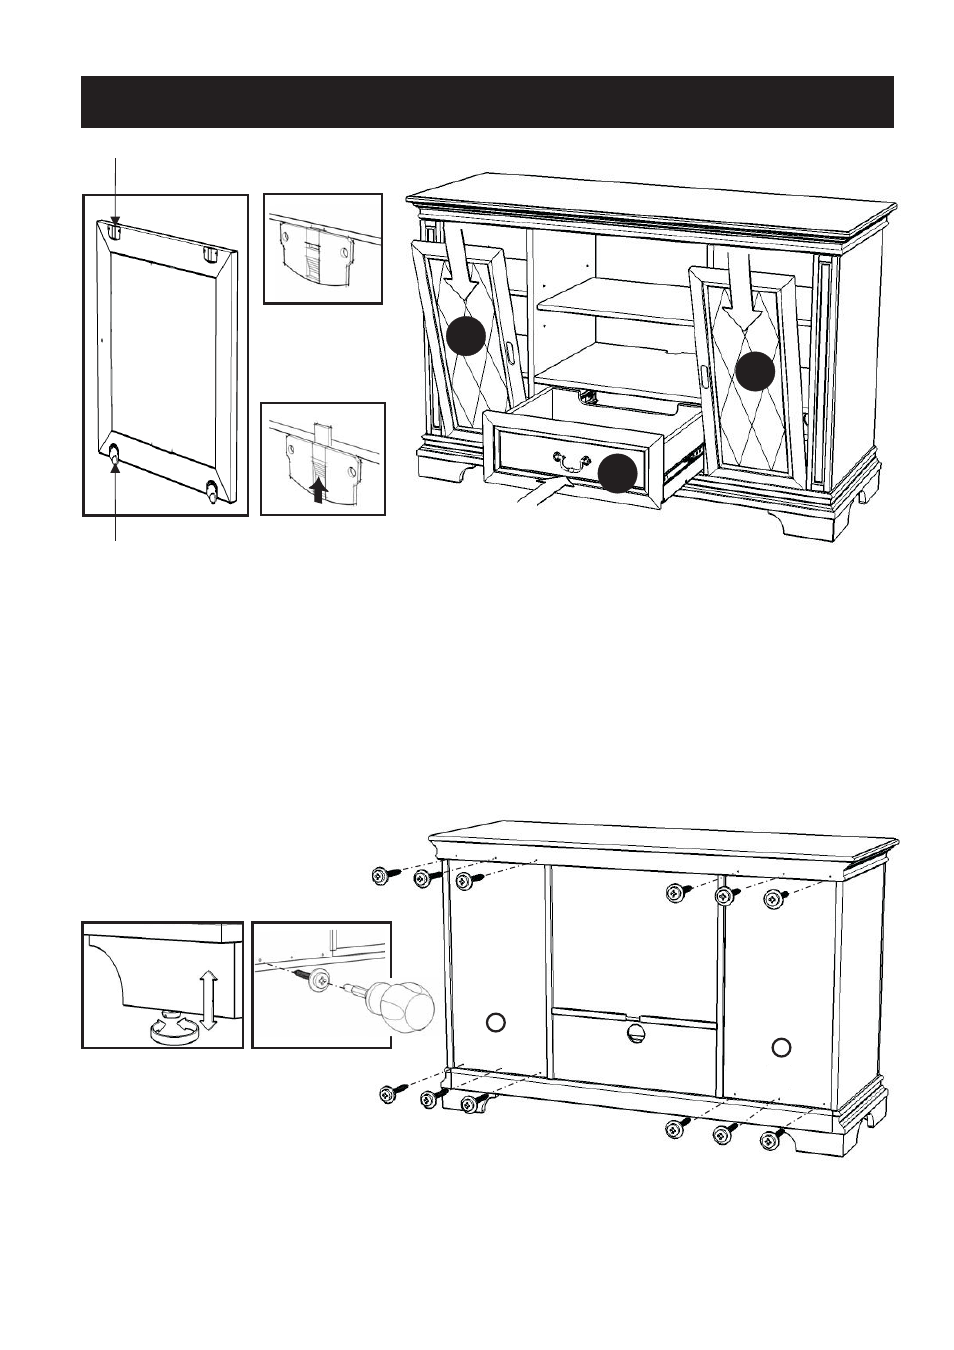
To level the unit, adjust the adjustable levelers on the bottom of legs. (See figure 6)
Insert 12X Wood Screws from the back of the unit,
tighten up all the Wood Screws. (see Figure 7)
Note: Please make sure unit is level before tightening these screws.
Guide
Bottom roller
P
Q
Guide
unlocked position
Guide
locked position
Before installing the doors, make sure the door Guides are in the unlocked position.
(See figure 4)
Place the bottom rollers of Door (P) in the bottom groove, then align top of the door with the
upper groove and push up the lock tabs of the Guides. (See figure 5)
Place the bottom rollers of Door (Q) in the bottom groove, then align top of the door with the
upper groove and push up the lock tabs of the Guides. (See figure 5)
Slide Drawer (O) into position.