Warning – Bradford White PDV-100S-250-3X User Manual
Page 11
11
238‐49754‐00B 2/12
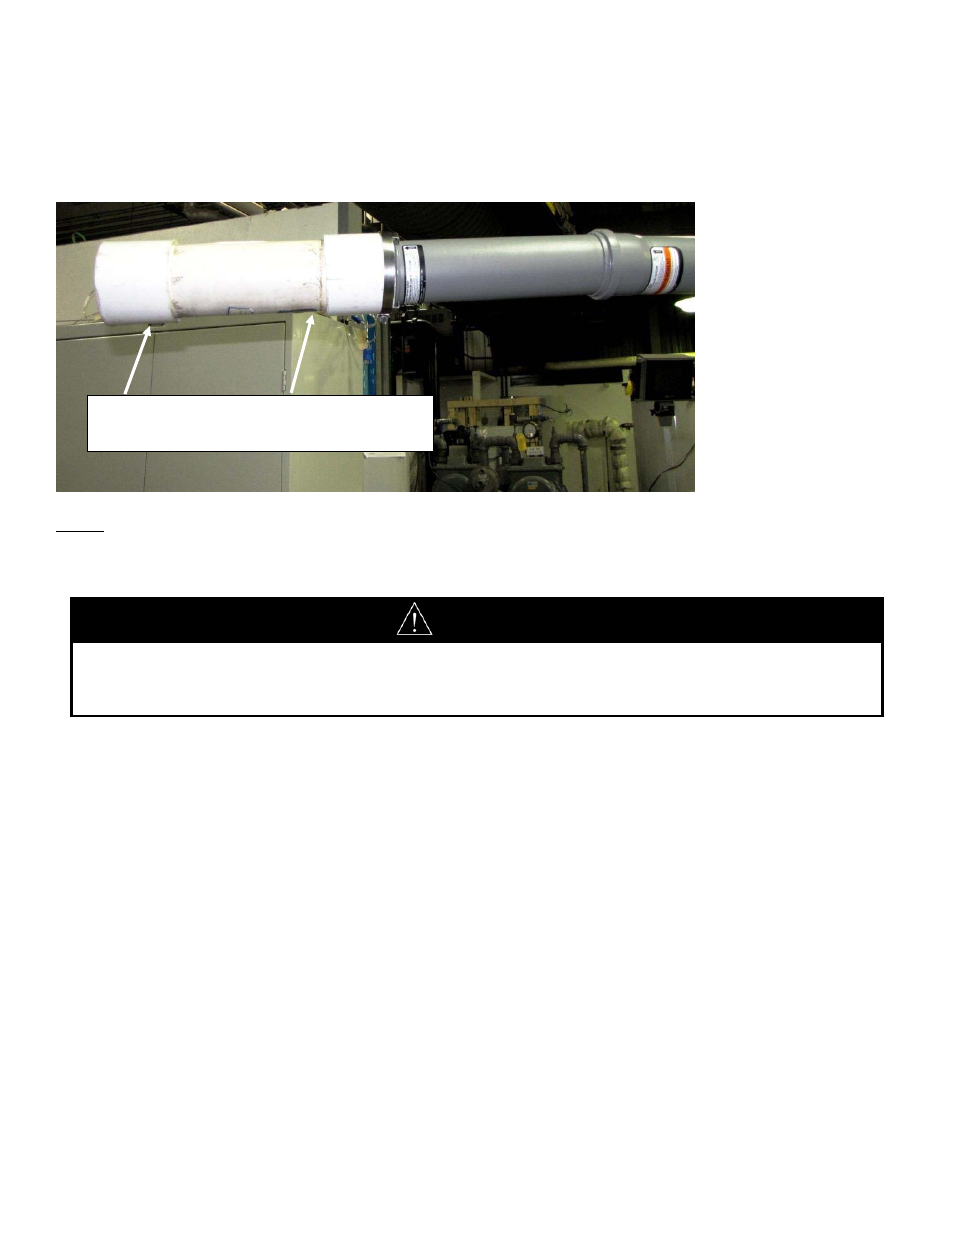
Secure the PVC coupling to the PVC Terminal Adapter with the Centrotherm Flue Pipe Clamp. Cement a short section of
PVC pipe into the PVC pipe coupling. Cement the supplied PVC exhaust terminal coupling onto the PVC pipe.
Step 8: After the venting system installation is completed, start the water heater and check all joints for leaks using a
soapy water solution. Any leaks found must be repaired. If a gasket is damaged, replacement gaskets may be obtained
from the local Centrotherm supplier.
WARNING
All of the exhaust venting connections must be leak checked with a soap solution upon initial start-up of the water
heater. Any leaks must be repaired before continuing operation of the water heater.
Periodically check all venting system connections for leakage. Replace any defective venting components. Refer
to the maintenance section of the Installation and Operating Instructions for further details.
Supplied PVC Exhaust Terminal cemented to
PVC pipe. Cement PVC pipe into PVC coupling
- PDV-100S-200-3X PDV-100S-150-3X PDV-80S-250-3X PDV-80S-200-3X PDV-80S-150-3X EF-100T-399-3X EF-100T-300-3X EF-100T-250-3X EF-100T-199-3X EF-100T-150-3X EF-60T-199-3X EF-60T-150-3X EF-60T-125-3X PDX-75S-70FB-3X PDX-65S-65FB-3X PDX-50S-60FB-3X TW4-75S-76B-3X TW4-65S-70FB-3X TW4-50S-67FB-3X TW-55X-78B-3X TW-25X-76B-3X EF-100T-399E-3N EF-100T-300E-3N EF-100T-250E-3N EF-100T-199E-3N EF-100T-150E-3N EF-60T-199E-3N EF-60T-150E-3N EF-60T-125E-3N PDV-100S-250-3N PDV-100S-200-3N PDV-100S-150-3N PDV-80S-250-3N PDV-80S-200-3N PDV-80S-150-3N PDX-75S-70FB-3N PDX-65S-65FB-3N PDX-50S-60FB-3N TW4-75S-76B-3N TW4-65S-70FB-3N TW4-50S-67FB-3N TW-55X-78B-3N TW-25X-76B-3N S-2-TW75T6BN S-2-TW65T6FBN PDX2-75T6FSX PDX2-65T6FSX