Workrite Sierra HX Crank Assembly Instructions for 3-Leg Front-Crank models User Manual
Page 4
4
Workrite Ergonomics | 800.959.9675 www.workriteergo.com
Workrite Sierra HX™ 3-Leg Crank Workcenters - Assembly Instructions
3
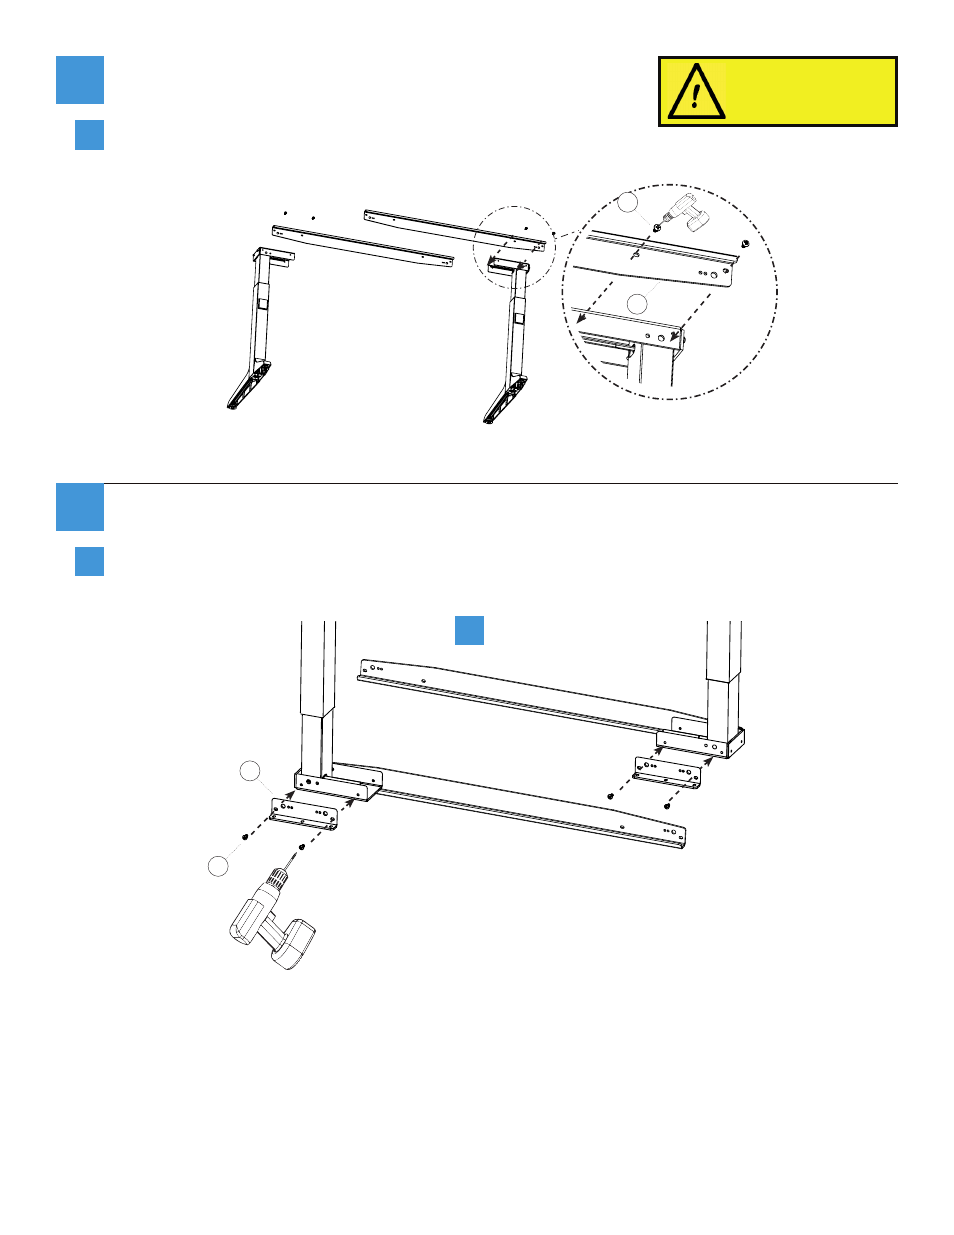
Attach Long Braces to Side Legs
With legs on their sides, attach one Long Brace (B) to back of each
Side Leg Cap using Button Head Screws (J). The Braces should have the lip on top, facing away
from the legs. Do not tighten screws completely - allow them to slide left and right in
brace.
a
front
back
Left Leg
B
J
Right Leg
a
4
Attach Short Braces to Side Legs
Use power drill to attach Short Braces (C) to Side Legs using Button Head Screws (J). Do not
tighten screws completely - allow them to slide left and right in brace.
a
J
C
Left Leg
Right Leg
To avoid stripping the threads,
always insert and make the
first few turns of the screw BY
HAND with an Allen wrench
(N), ensuring it is in straight.