Setting the camera number – Vinten Radamec Fusion FHR-100 User Manual
Page 31
Operators guide
29
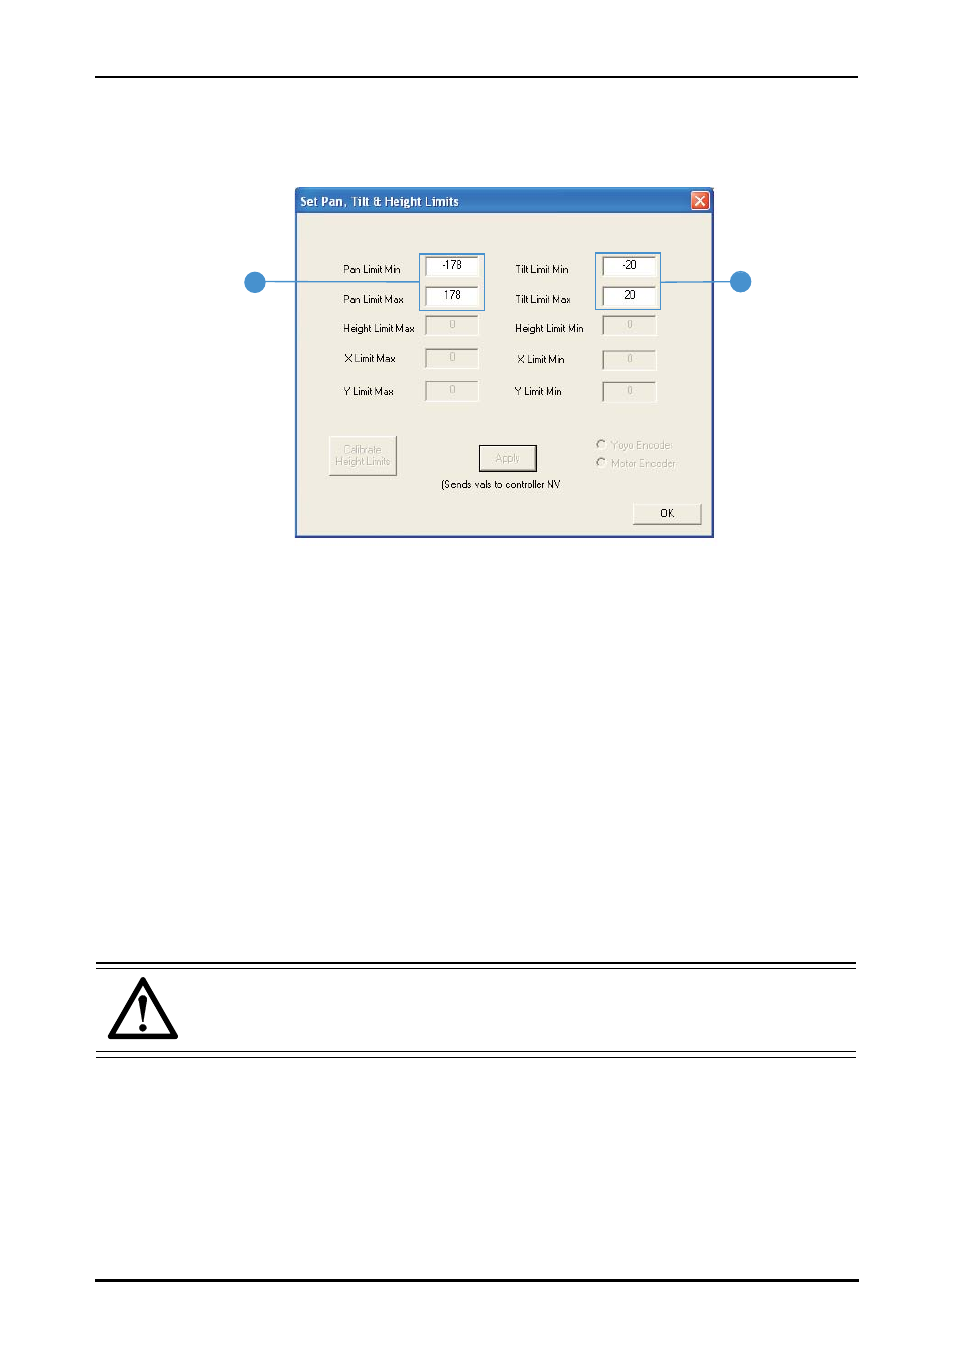
11. Click Set Pan, Tilt and Height Limits (d) to set the limits for the pan and tilt axes.
The Set Pan, Tilt & Height Limits dialog box is displayed (Fig. 14).
12. Enter the angle of travel (in degrees) either side of the zero datum position (limit min/
max) for both the pan and tilt axis. The positive direction of travel on the pan axis is
in a clockwise direction and the positive direction of travel for the tilt axis is a clockwise
rotation where the camera is pointing downward (see Fig. 12).
13. When done, click Apply and then OK to close the dialog box.
14. Click OK to close the Vinten Fusion Robot Control window.
15. Switch OFF power to the head, then disconnect the lead from the USB port and
reconnect the Ethernet cable.
16. Switch ON power to the head.
17. From the control panel, carefully drive the head to its limits in both pan and tilt axis.
Using the joystick determine if the limits have been correctly set.
Setting the camera number
Each head in a system is uniquely identified, so that when a camera channel is selected on the
control panel communication is established with the correct channel. This identification is factory
set, but may be reassigned later if required.
Fig. 14 Set Pan, Tilt and Height Limits dialog
(f) Pan maximum and minimum limits, (g) Tilt maximum and minimum limits
WARNING!
Closely observe the camera movement while checking the axis limits
to avoid potential personal injury or damage to the equipment.
f
g