Cool side, Troubleshooting guide, Preparing for installation – Vintage Cellars KoolR1800 User Manual
Page 2
CENTER
COOL SIDE
TROUBLESHOOTING GUIDE
CONDITION
CHECK
SOLUTIONS
COOLING UNIT
DOES NOT RUN
WHEN PLUGGED IN
Shipping damage?
Contact courier company for shipping damages.
Unit plugged in?
Unit has a 1-min. cautionary delay between plugging in and
full start-up; this is a built-in safeguard to protect compres-
sor in case of a sudden power failure.
LED display ON?
Unplug unit, remove controller, check/replace fuse (0.5A
slow blow, 250V, 5X20mm).
see manuals at www.koolrproducts.com
COOLING UNIT
RUNS BUT DOES
NOT COOL SUFFI-
CIENTLY
Storage temperature properly set?
Unit may take a few days to achieve the desired storage
temperature. Decrease your set temperature to cool.
Room properly constructed with all joints airtight?
Seal all cracks and joints. Check insulation requirements.
Door insulated properly?
If gaps are visible, then seal door so it is airtight.
Airflow to and from the cooling unit unobstructed?
Improve circulation of air to and from the unit as directed in
instructions.
Ambient air temperature within the specified range? Make sure ambient temperature is below 80º
Clean the unit regularly, every 3 to 4 months vacuum the
cooling unit coils.
Additional Trouble-Shooting information and downloadable documents are available in the “Support” area of our web site:
www.koolrproducts.com
WARNING:
If unit is in “Alarm”, unplug the unit immediately. See controls table.
IMPORTANT NOTE:
• Have your wine collection adequately insured.
• Install a battery-powered heat-sensitive alarm to warn of any loss of cooling due to power interruption.
• Monitor your storage and ambient conditions on a regular daily basis.
Be advised Koolr Products Inc. or Shanghai Koolspace Co. Ltd. cannot in any event be liable or responsible for incidental or consequential damages.
ONE YEAR LIMITED WARRANTY
If your Koolr cooling unit or cabinet fails to perform as designed within one year of the date of purchase, Shanghai Koolspace Co. Ltd. warrants that, upon
your request, it will be replaced, during the one year warranty period. This warranty applies only to the first end-user purchaser of a Koolr cooling unit that
is purchased and used in the continental United States or Canada (excludes Alaska and Hawaii). It is not valid for subsequent purchasers, nor for units in use
outside North America. The warranty period for your Koolr cooling unit commences on the date you purchased it and expires one year thereafter.
PROOF OF PURCHASE
Within 10 days of purchase, complete and mail, fax or e-mail the registration sheet to Shanghai Koolspace Co. Ltd. Alternately, you may register your warranty
on our Internet website,
www.koolrproducts.com. When you make a warranty claim, you must forward a copy of your original dated bill of sale to establish
your date of purchase.
WHAT THE WARRANTY DOES NOT COVER
This warranty covers only defects in materials and workmanship provided by Shanghai Koolspace Co. Ltd. and does not cover equipment damage or malfunction
from misuse, abuse, accident, act of God, or any unauthorized alteration or modification. The product must have been installed and operated precisely as directed
in the manual which acompanies each product. Return shipping charges are not covered. Improper return shipping, inadequate packaging or shipping damage
is not covered unless the unit is packaged and shipped in accordance with Shanghai Koolspace Co. Ltd. replacement procedures. Third party servicing of this
product during the warranty period will also void the warranty, as will any evidence of tampering or alteration to the serial number and or the original dated bill of
sale.
GO ONLINE FOR MORE WARRANTY INFORMATION AT www.koolrproducts.com.
• Display will show detected temperature until temperature falls within 3º of SET POINT.
• If temperature is above default 57º F + 1º or other preset value, after a delay of 1
minute fan will start, followed by compressor in next minute.
• Unit will cycle ON/OFF based on temperature reading. Fan speeds are automatically
set by controller to achieve optimum performance.
• Minimum ON and OFF cycle times are imposed by software, to prevent “short cycling”.
AL
KEYS
DISPLAY:
CLEANING THE COIL:
VACUUM PERIODICALLY
OPERATION:
PREPARING FOR INSTALLATION
INSULATION :
VAPOR BARRIER :
SEAL :
POWER SUPPLY :
MARK SLITS
Floor, ceiling and all walls of the enclosure must be insulated to minimum R-20 rating, although R-30 is recommended.
Best material is foil-backed urethane foam, sealed at all joints with thermal tape. Build a proper sub-floor with a vapor
barrier, and insulate to at least R-20, especially if floor is concrete. Use an insulated door.
All surfaces of the enclosure must be protected by a proper vapor barrier, ideally on both inside and outside of wine/
pantry room.
Seal corners, joints, gaps, vents, electrical outlets and switches, and especially around door and frame. Pack larger
gaps with insulation. Seal all seams with silicone caulking. Seal drywall with odorless waterproof paint.
This unit must be installed in accordance with national wiring regulations. Do not use if power cord is damaged; it must
be replaced by the manufacturer or its service agent or by a qualified person to avoid a hazard. Plug must remain
accessible after installation. Electrical service must be a dedicated, separately fused and grounded 15 Amp, 115V line
(Europe; 10-Amp 220 Volt). Test line voltage before operating, and do not use if line voltage is less than 105V. The unit
must be protected against power surges and spikes. Use a good quality surge suppressor.
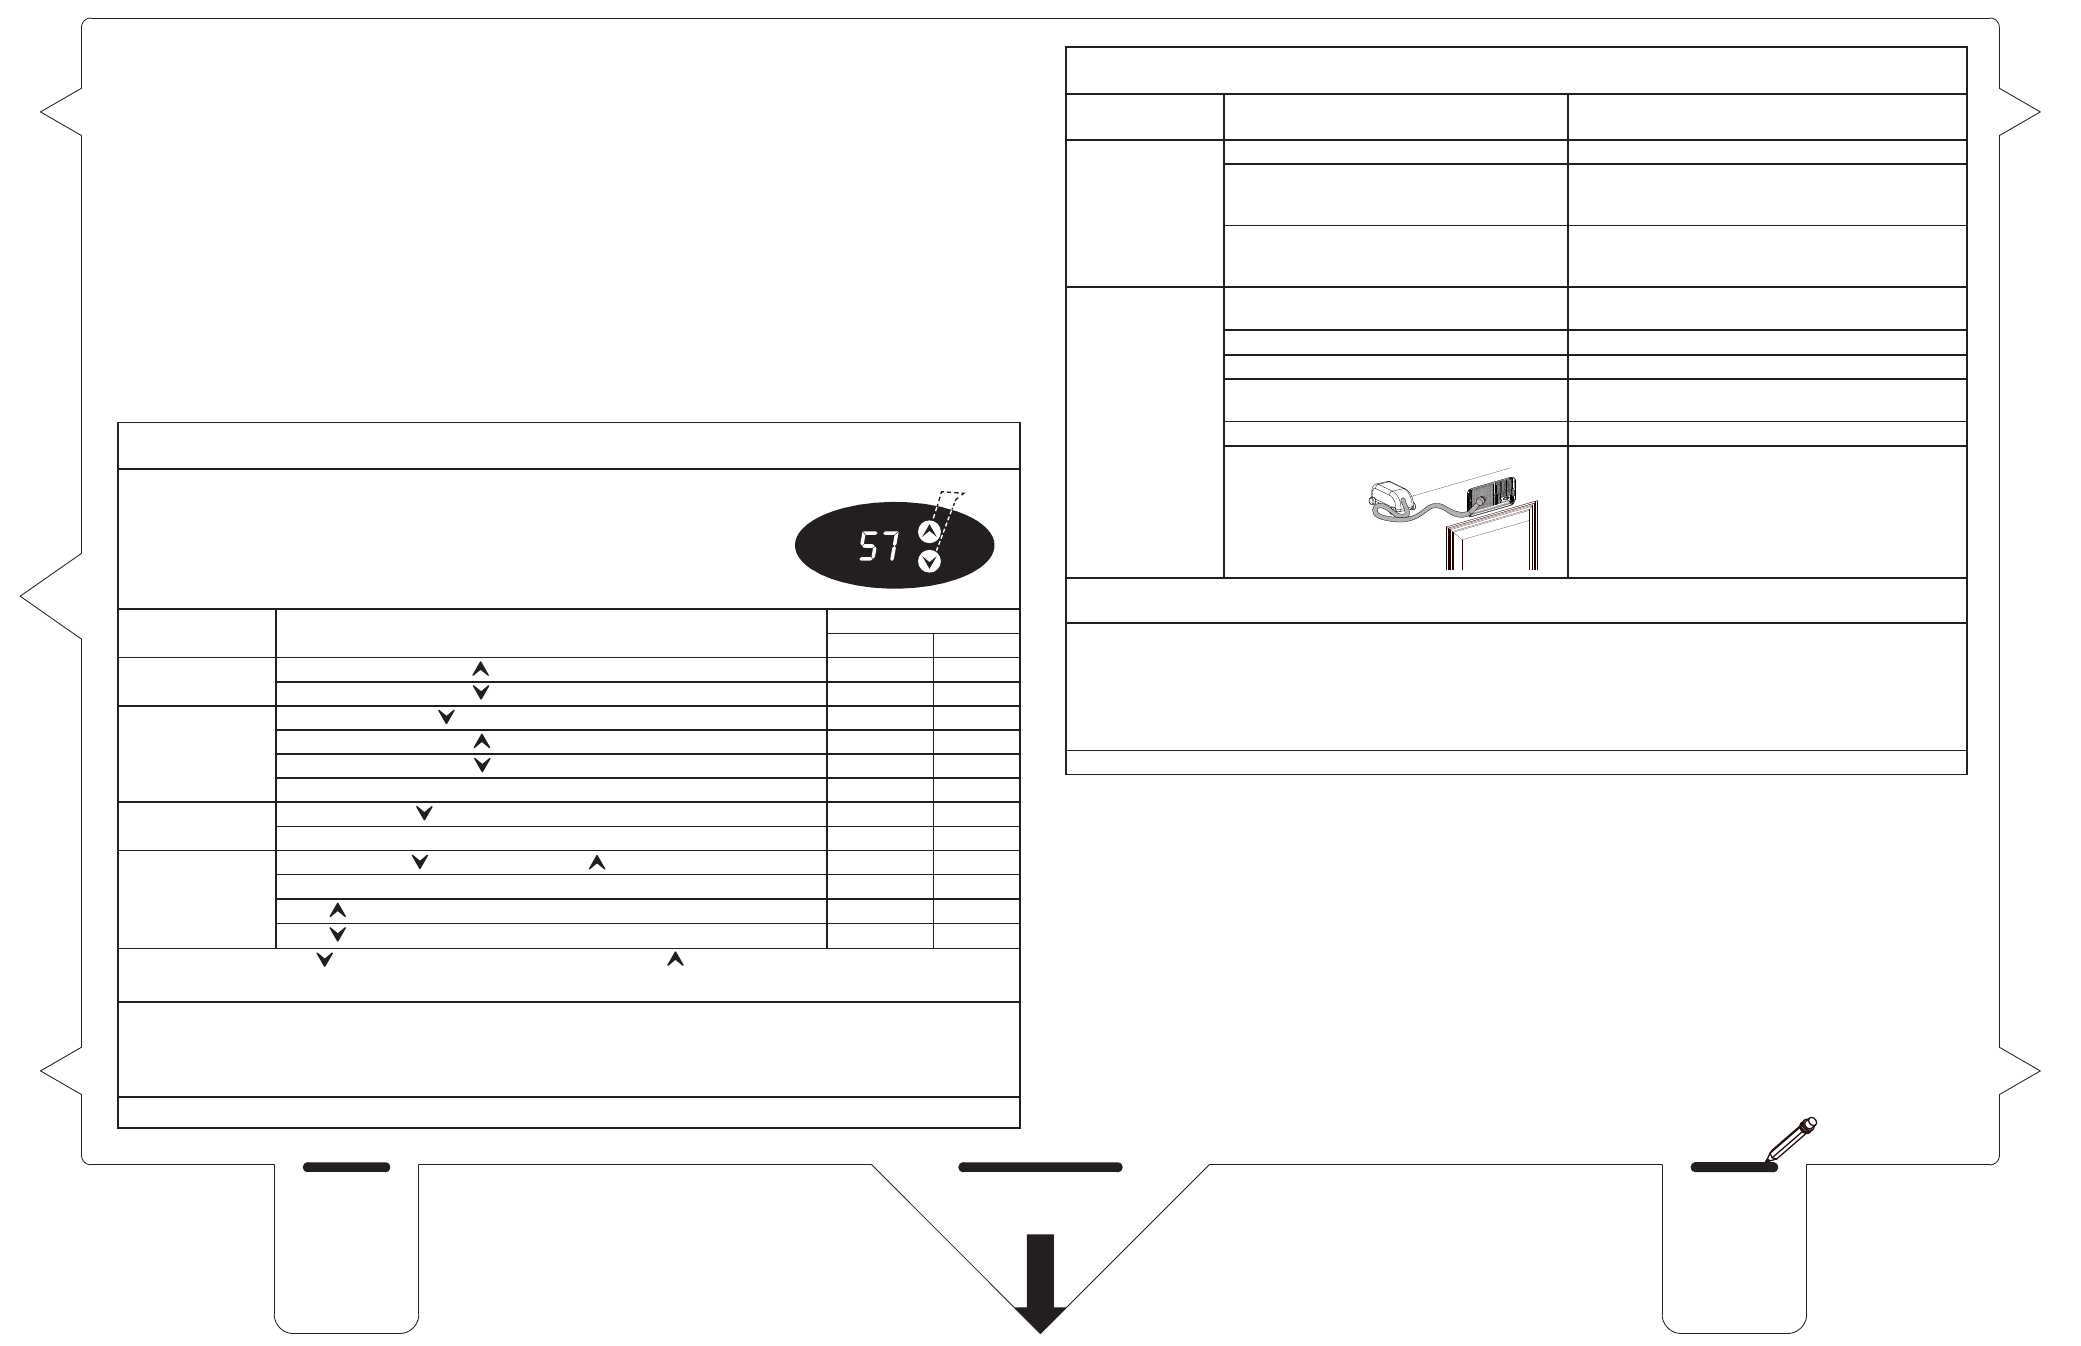
CONTROLS : PLUG IT IN ( WAIT ONE MINUTE ) AND ENJOY!
CONTROLLER
OPERATION
ACTION
DISPLAY EXAMPLE
BEFORE AFTER
TO DISPLAY:
Actual temperature:
PRESS
57º
56º
SET temperature:
PRESS
70º
57º
TO MODIFY SET
TEMPERATURE
(range is 52-64ºF):
PRESS and RELEASE
57º
57º
To increase:
PRESS once per degree
57º
58º
To decrease:
PRESS once per degree
57º
56º
The new value will be memorized and the controller will reset automatically.
TO CHANGE FROM
ºF to ºC or ºC to ºF
PRESS and HOLD until buzzer sounds in 5 seconds
57º
14º
The new value will be memorized and the controller will reset automatically.
TO CALIBRATE:
PRESS and HOLD while holding PRESS and RELEASE BOTH QUICKLY
57º
57º
Wait 5 seconds
57º
F0
USE
for each degree of positive offset
F0
F1
USE
for each degree of negative offset
F0
-1
NOTE: A negative offset will result in a warmer cabinet and a positive offset will result in a cooler cabinet. The new value will
be memorized and the controller will reset automatically.
ALARM: • If the temperature exceeds 72º F the unit will shut down, a warning sound will start and the display will blink
alternating with the temperature reading.
• This function is disabled in the first 4 hours “ Cool Down” period or after any reset for another 4 hours.
• The unit will restart and continue the cooling and cycling if the temperature falls below 72º F.
TO RESET: Unplug and re plug the unit.