VintageView WSPR - Presentation Rack User Manual
Page 2
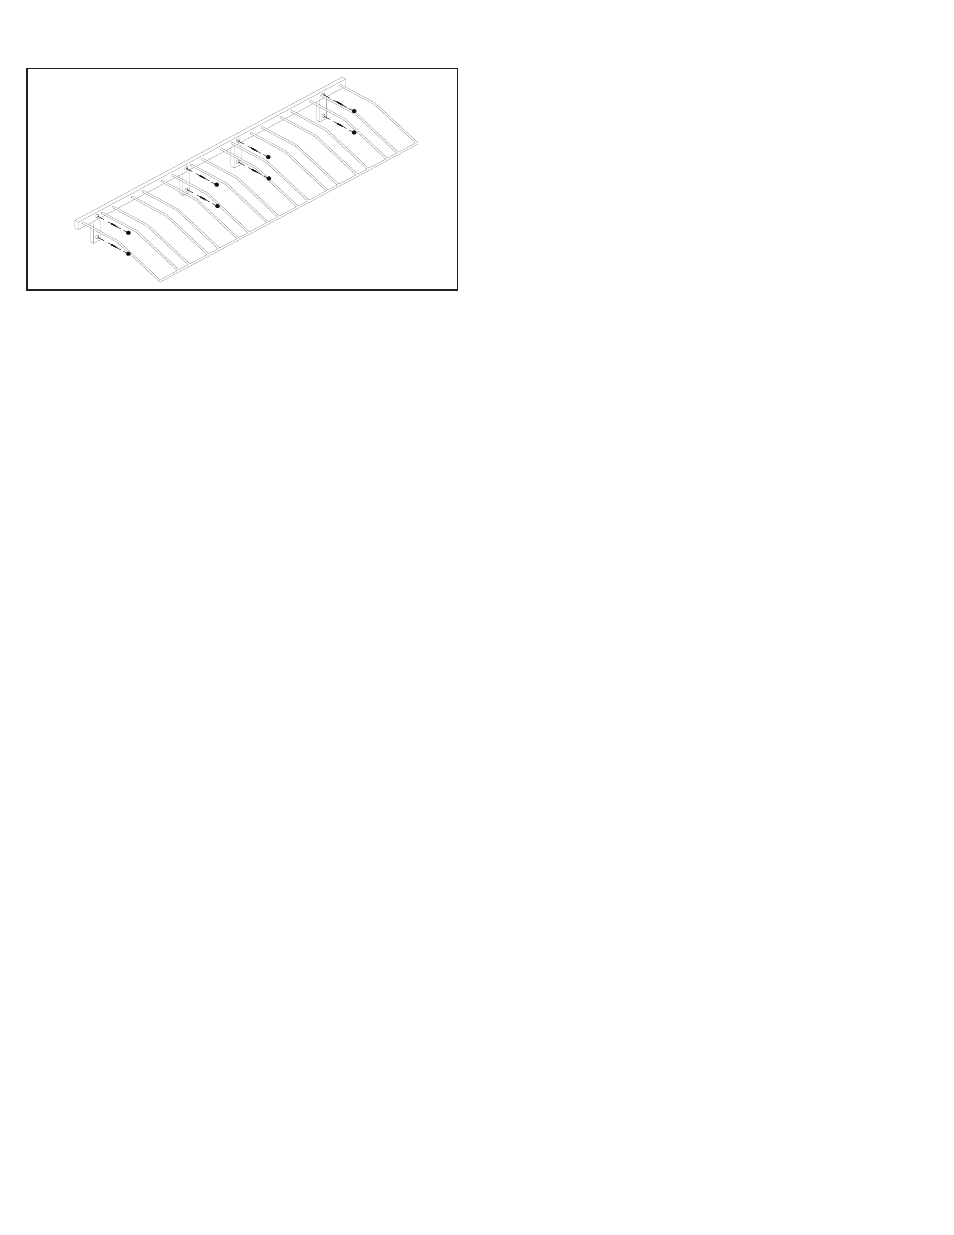
2.1 Align the WS-PR below the WS Series Wall Strips and make note
of the Wall Strips that correspond to the Mounting Braces of the
WS-PR.
2.2 With a tape measure, measure 8 inches down from the bottom
of the two outermost corresponding Wall Strips of the WS Series
Racks that are placed above the location you wish to install the WS-
PR. Mark those spots on the wall with a marking pen or pencil.
2.3 Align the bottom of the legs of the Mounting Braces to the
marks that you made.
2.4 Using the appropriate fastener mount the WS-PR to the wall
through one of the outer Mounting Holes. Do Not fully Tighten.
2.5 Using a level make sure that the WS-PR is level and then mark
the wall through the other seven Mounting Holes with a marking
pen or pencil.
2.6 Mount the WS-PR to the wall with the fasteners through the
seven remaining Mounting Holes on the WS-PR to the locations indi-
cated by your markings. Fully tighten all fasteners.
2.7 Attach the Black Plastic Mounting Hole Caps over the fasteners
in the 8 Mounting Holes.
Installation to a Wall (cont.)
NOTE: If you will be installing the WS-PR next to other WS-PRs
remove the Black Plastic End Caps on both sides of the WS-PR and
insert a Black Plastic Coupler into one side of the WS-PR.
3.1 Place the WS-PR against the wall where you would like to install
it and attach one appropriate fastener to the wall through a Mount-
ing Hole on the WS-PR. Do not fully tighten.
3.2 Using a level make sure that the WS-PR is level and then mark
the wall through the other seven Mounting Holes with a marking pen
or pencil.
3.3 Mount the WS-PR to the wall with the fasteners through the
seven remaining Mounting Holes on the WS-PR to the locations indi-
cated by your markings. Fully tighten all fasteners.
3.4 Attach the Black Plastic Mounting Hole Caps over the fasteners
in the 8 Mounting Holes.
3 – Installation to a Wall with no WS Series Racks
1 - Installation to an FCF above WS Series Racks
Installation to an FCF
1.1 Remove the Black Plastic End Cap that is attached to the bottom
each of the four Mounting Braces on the WS-PR.
NOTE: If you will be installing the WS-PR next to other WS-PRs also
remove the Black Plastic End Caps on both sides of the WS-PR and
insert a Black Plastic Coupler into one side of the WS-PR
.
NOTE: If you will be installing the WS-PR next to other WS-PRs
remove the Black Plastic End Caps on both sides of the WS-PR and
attach a Black Plastic Coupler to one side of the WS-PR.
2.1 Align the WS-PR below the WS Series Strips and make note of
the Strips that correspond to the Mounting Braces of the WS-PR.
2.2 With a tape measure, measure 8 inches down from the bottom
of the two outermost corresponding Strips of the WS Series Racks
that are placed above the location you wish to install the WS-PR.
Mark those spots on the FCF with a marking pen or pencil.
2.3 Align the bottom of the legs of the Mounting Braces to the marks
that you made.
2.4 Using the Self-drilling Screws mount the WS-PR to the FCF
through one of the outer Mounting Holes. Do Not fully Tighten.
2.5 Using a level make sure that the WS-PR is level and then mark
the FCF through the other seven Mounting Holes with a marking pen
or pencil.
2.6 Mount the WS-PR to the FCF with the Self-drilling Screws
through the seven remaining Mounting Holes on the WS-PR to the
locations indicated by your markings. Fully tighten all Self-drilling
Screws.
2.7 Attach the Black Plastic Mounting Hole Caps over the Self-drilling
Screws in the 8 Mounting Holes.
NOTE: If you will be installing the WS-PR next to other WS-PRs also
remove the Black Plastic End Caps on both sides of the WS-PR and
attach a Black Plastic Coupler to one side of the WS-PR.
3.1 Place the WS-PR against the FCF where you would like to install
it and attach one Self-Tapping Screw to the FCF through a Mounting
Hole on the WS-PR. Do not fully tighten.
3.2 Using a level make sure that the WS-PR is level and then mark
the FCF through the other seven Mounting Holes with a marking pen
or pencil.
3.3 Mount the WS-PR to the FCF with the Self-drilling Screws
through the seven remaining Mounting Holes on the WS-PR to the
locations indicated by your markings. Fully tighten all Self-drilling
Screws.
3.4 Attach the Black Plastic Mounting Hole Caps over the Self-drilling
Screws in the 8 Mounting Holes.
2 – Installation to an FCF below WS Series Racks
3 – Installation to an FCF with no WS Series Racks
1.2 Remove the Black Plastic End Caps on top of the vertical Strips
attached to the FCF of the WS Series Racks that correspond to the
Mounting Braces on the WS-PR.
1.3 Insert the Black Plastic Couplers into the top of the WS Series
Strips. 1.4 Align the WS-PR Mounting Braces directly over the WS
Series Strips and attach to the Strips by sliding the WS-PR onto the
Couplers fixed into the WS Series Strips.
1.5 Using the Self-drilling Screws; mount the WS-PR to the FCF
through the Mounting Hole in each of the 4 WS-PR Mounting Braces,
and the Mounting Hole above each Mounting Brace.
1.6 Attach the Black Plastic Mounting Hole Caps over the Self-Tapping
Screws in the 8 Mounting Holes.