Symtech HBA 5 User Manual
Page 10
10
3.4.3 POSITIONING THE ALIGNMENT HEAD BEFORE THE VEHICLE
Move the alignment head in front of the headlamp, and observe the indicator arrows on the control panel. The indicator arrows will inform the operator
which direction to move the alignment head. The alignment head is in position when the green center LED lights up
indicating that it is in position to audit or adjust the headlamp.
NOTE: When positioning the alignment head take caution not to rotate the alignment head out of position as determined by
the mirror.
3.5 HEADLAMP ALIGNMENT
The purpose of headlamp alignment is to align the vehicle headlamp such that the driver of the vehicle has the most effective lighting of the road and its
conditions, while still being safe for both the driver and oncoming traffic.
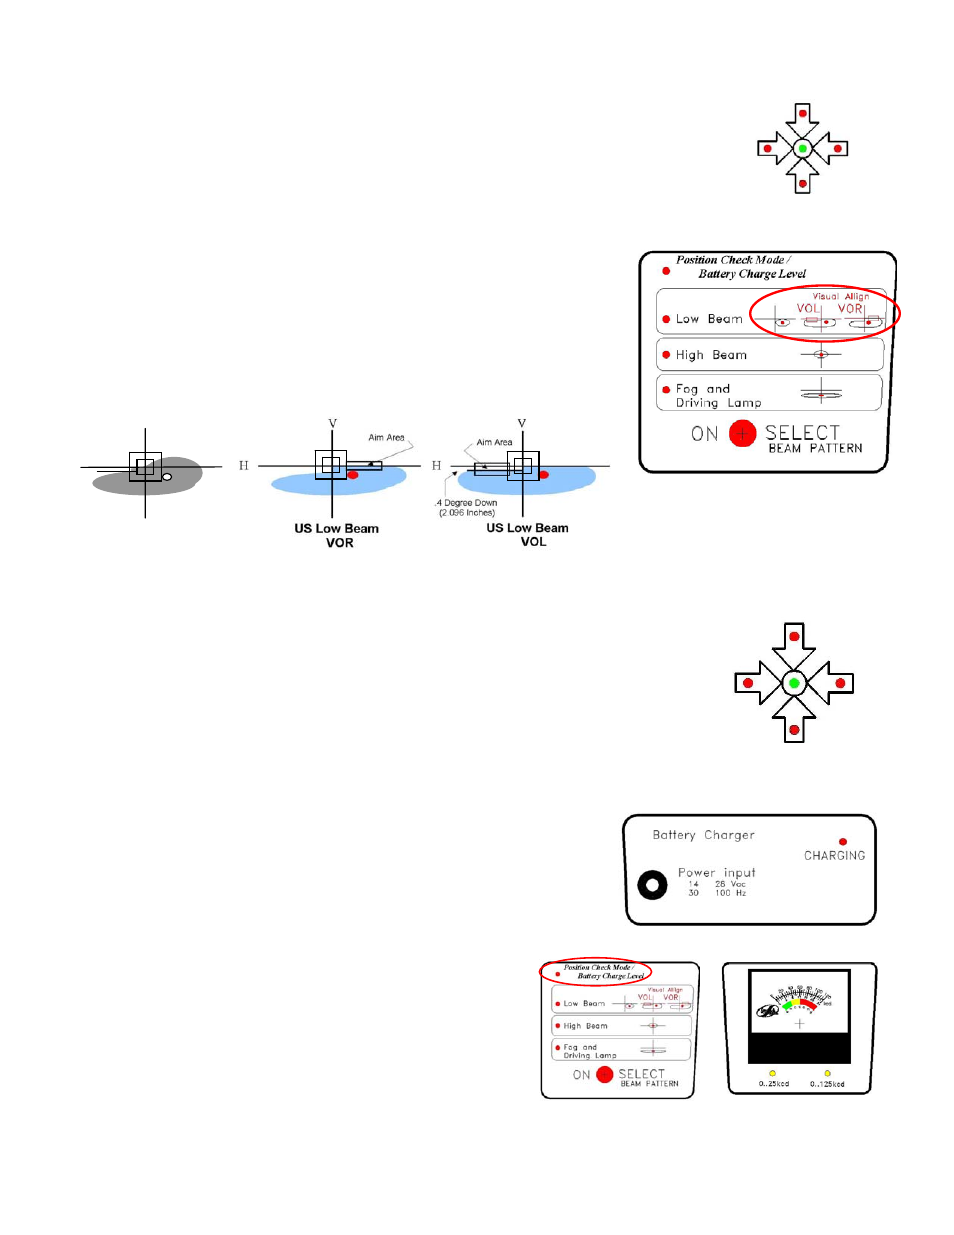
3.5.1 CHOOSING THE HEADLAMP BEAM TYPE
Before aligning the headlamp the operator must designate which beam type is to be aimed. From the
control panel locate the “ON/SELECT” button. The select button provides a choice between low, high
and fog beam patterns. To choose a beam pattern press the select button until the LED next to the
selected beam pattern lights. To visually aim the VOR and VOL low beam patterns select low beam
and proceed to visually aim the lamp per pictorials. Letters marked on headlamp cover should
properly identify VOL and VOR lamps. NOTE: If attempting to align a composite or sealed beam
lamp with high & low beam within the same housing, align only the low beam. If aligning a 4-lamp
system with high & low beams in separate housings it is necessary to cover the low beam while
aligning the high beam if all four lamps are on at the same time.
3.5.2 ALIGNING THE HEADLAMP
Adjusting the headlamp with the HBA 5 can be accomplished in either Audit Adjustment or Fine Adjustment modes with the use of the indicator arrows.
3.5.2.1 USING THE INDICATOR ARROWS
With the alignment head aligned, and beam type selected. The arrow LED’s should be lighting up in one or two directions
revealing which directions to adjust the headlamp. While observing the indicator arrows, adjust the vehicle headlamp until
the arrows red LED’s go off, and the green center LED lights up. This indicates that the headlamp is now properly
aligned.
Note: Audit Adjustment mode adjusts lamps to within a window +/- 4 inches from center. Fine Adjustment mode
adjusts lamps to within a +/- 1 inch window.
Note: Observe the intensity meter during adjustment. If meter is rising, adjustment is being performed in the
correct direction.
3.6 MAINTAINING POWER
The HBA 5 is designed to run on an internal battery powered by an AC power supply. The
batteries are charged by way of a battery charger that takes power from an AC power supply
adapter. The adapter is plugged into any 110 VAC wall socket, and into the charge socket
identified on the control panel. The HBA 5 should be charging during non-use hours A red LED
labeled “CHARGE” will light up to indicate that the battery is charging. The internal batteries are
set to provide power for 8 hours if used non-stop, and normal charge time is from 12 - 14 hours for
a full battery recharge. HBA 5 is designed with an automatic power off function after
approximately 5 minutes . To bring power back up, all that is needed is to press the “ON /
SELECT” button. It is recommended to plug in the charger and allow a full days charging time
before expected use.
3.6.2 CHECKING THE BATTERY CHARGE STATUS
To check the status of the battery press the “SELECT” button until the red LED
nest to the “Position Check +battery Check” mode is lit. When in the “Position
Check + Battery Check” mode the intensity meter functions as a battery charge
gauge. The bottom scale on the meter is the battery charge scale. If indicator needle
is in the green, the battery is fully charged.
3.7 OPERATING PROCEDURE STEP BY STEP
V
H
US Low Beam