QOMO QRF500 V7 User Manual
Page 3
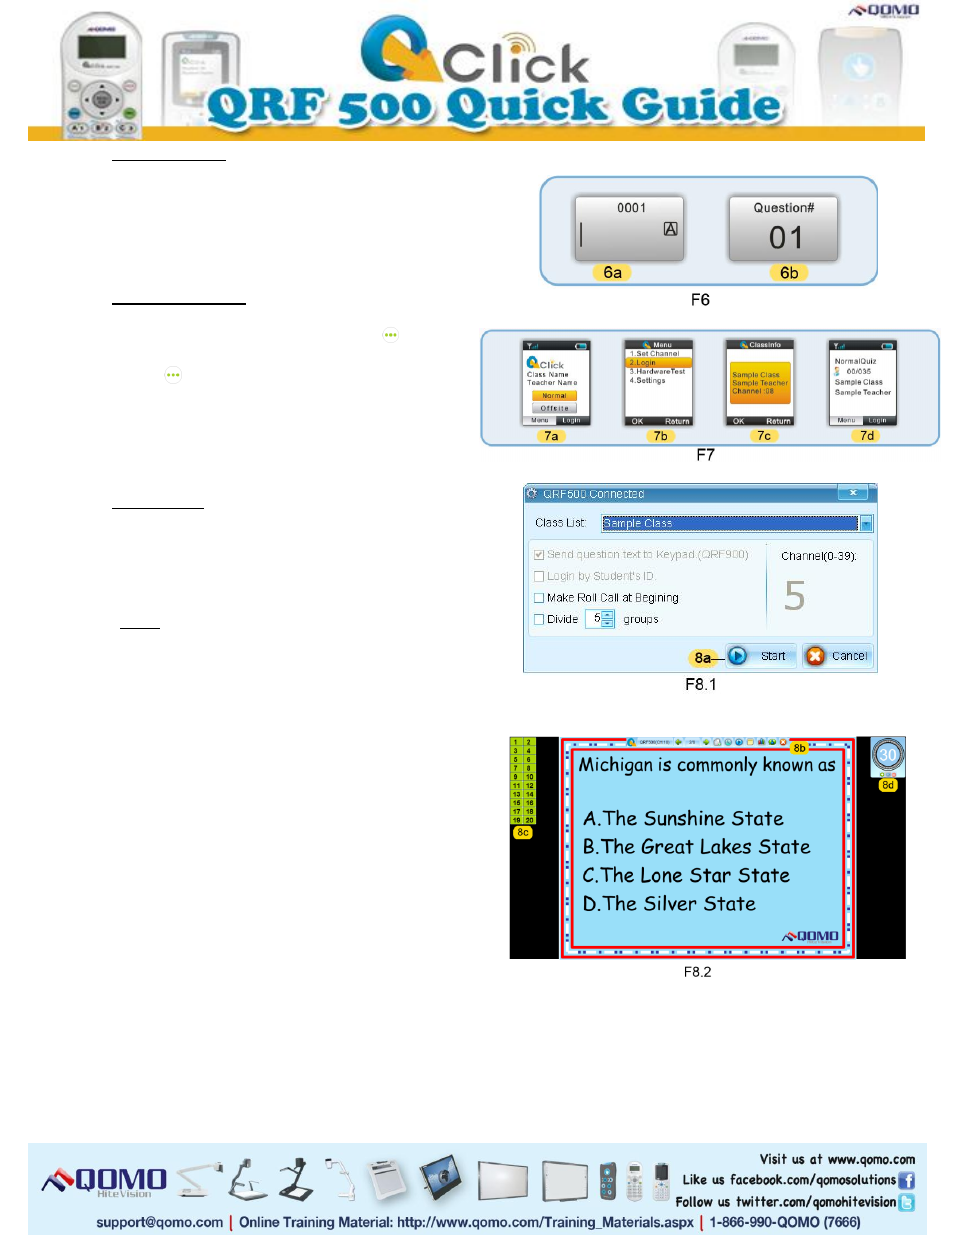
6. Student Login
The student remote will automatically login to the
class (F6-6a), and the screen will display the
current question number when a new question has
started (F6-6b).
7. Instructor Login
From the home screen (F7-7a), click the
button
to enter the menu screen. Select (F7-7b) login.
Press the
button to select OK. When your (F7-
7c) class information appears on the screen, press
the top left function key to select OK then your
exam details will appear on the remote screen (F7-
7d).
8. Run a Quiz
a. Click the Start button (F2-2d) in the Tools
section to choose a quiz mode. A quiz setting
window will pop up.
Note: The QClick toolbar will appear and
shows “QRF500 Connected”. If the toolbar
shows “No Host” re-plug the USB dongle.
b. Select a class from the drop-down list in the
quiz setting window.
c. Click the check boxes necessary for your
session.
d. Click Start (F8.1-8a) to run the quiz.
e. A toolbar (F8.2-8b) will appear on the top of
the screen from which you can operate your
exam. On the left side of the screen a (F8.2-8c)
list of student registration numbers will appear.
On the right side of the screen a (F8.2-8d) timer
will show the response time to the questions.
f. Start any question by clicking Start (F8.3-8e),
and end the timer by clicking Stop (F8.3-8e).
Go through the questions using the arrow keys.
g. Add questions during the quiz session by
clicking on the Instant Questions button (F8.3-
8f). Select a question mode from its option
menu and edit the question in the Add a
Question window.