Step 17, Step 18 – Craftsman 351.21833 User Manual
Page 9
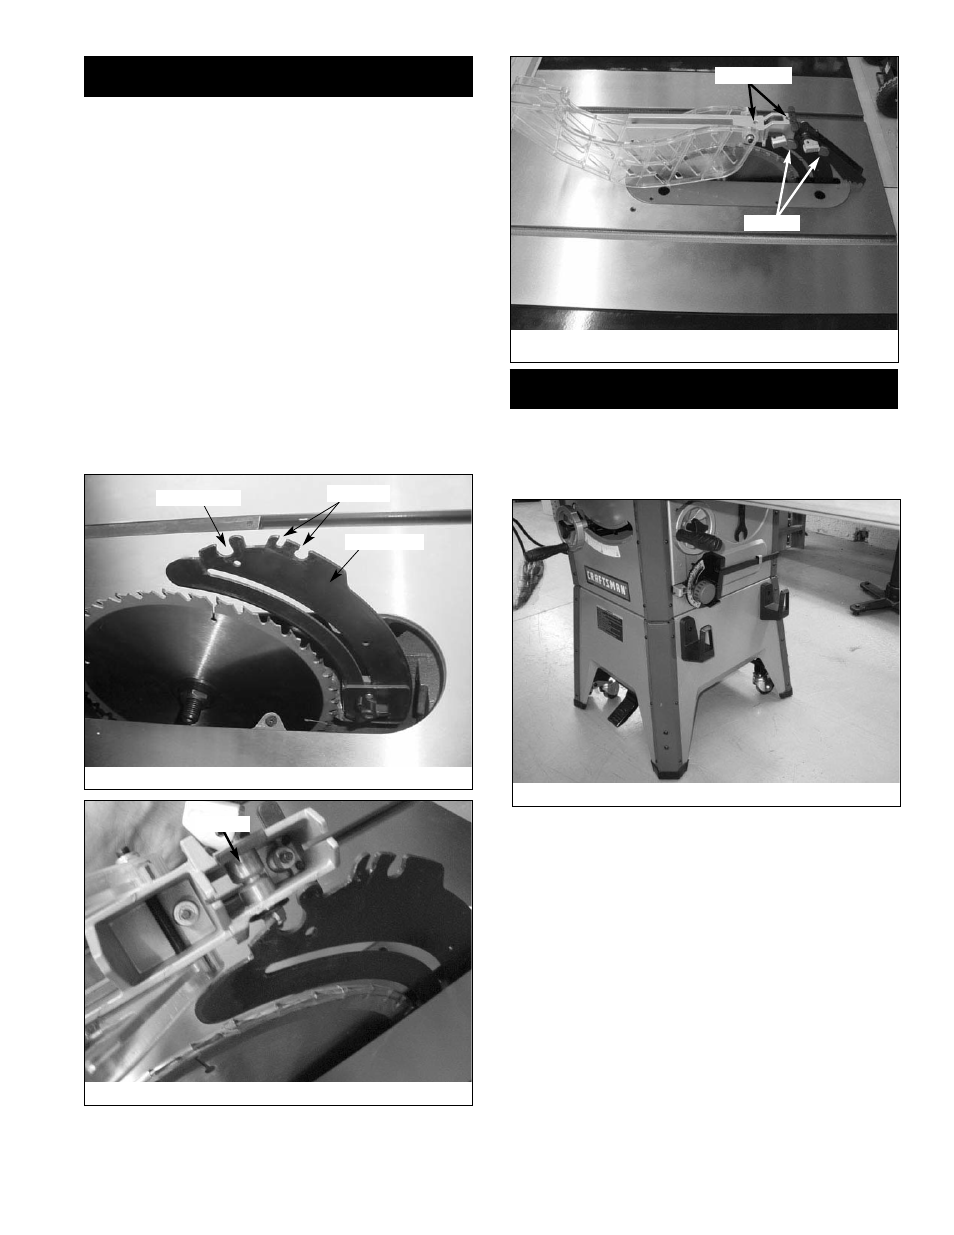
STEP 17
ATTACH BLADE GUARD AND ANTI-KICKBACK
PAWLS
• Place the slot of blade guard body over the riving knife.
Slot of bushing is placed in the notch indicated in Figures
29 and 30.
• The bushings have a beveled edge and must be located in
the center of the slot to lock properly.
• Position guard completely down on riving knife and press
latch to lock in position.
• Blade guard body should be parallel to the table. Use set
screws to adjust if needed.
• Place anti-kickback pawl set onto riving knife at notches
indicated. The spring pin is placed in the front notch and
bolt is placed in the rear notch.
• Press pawl set completely down and press latch to secure
in position.
NOTE: The teeth of anti-kickback pawls should touch table
surface. Use set screws to adjust if needed.
STEP 18
INSTALL MITER GAUGE
• The miter gauge comes preassembled. Unpack the miter
gauge and clean thoroughly. Insert into storage slots on
right side of cabinet.
9
Figure 29 - Blade Guard and Pawl Attachment
Blade Guard
Pawl Set
Riving Knife
Figure 30
Bushing
Figure 31 - Latches Lock and Unlock Blade Guard and Pawls
to Riving Knive
Set Screws
Latches
Figure 32