Hollywood Racks HR575 Prorider User Manual
Page 3
11
Fig. 6
Fig. 7
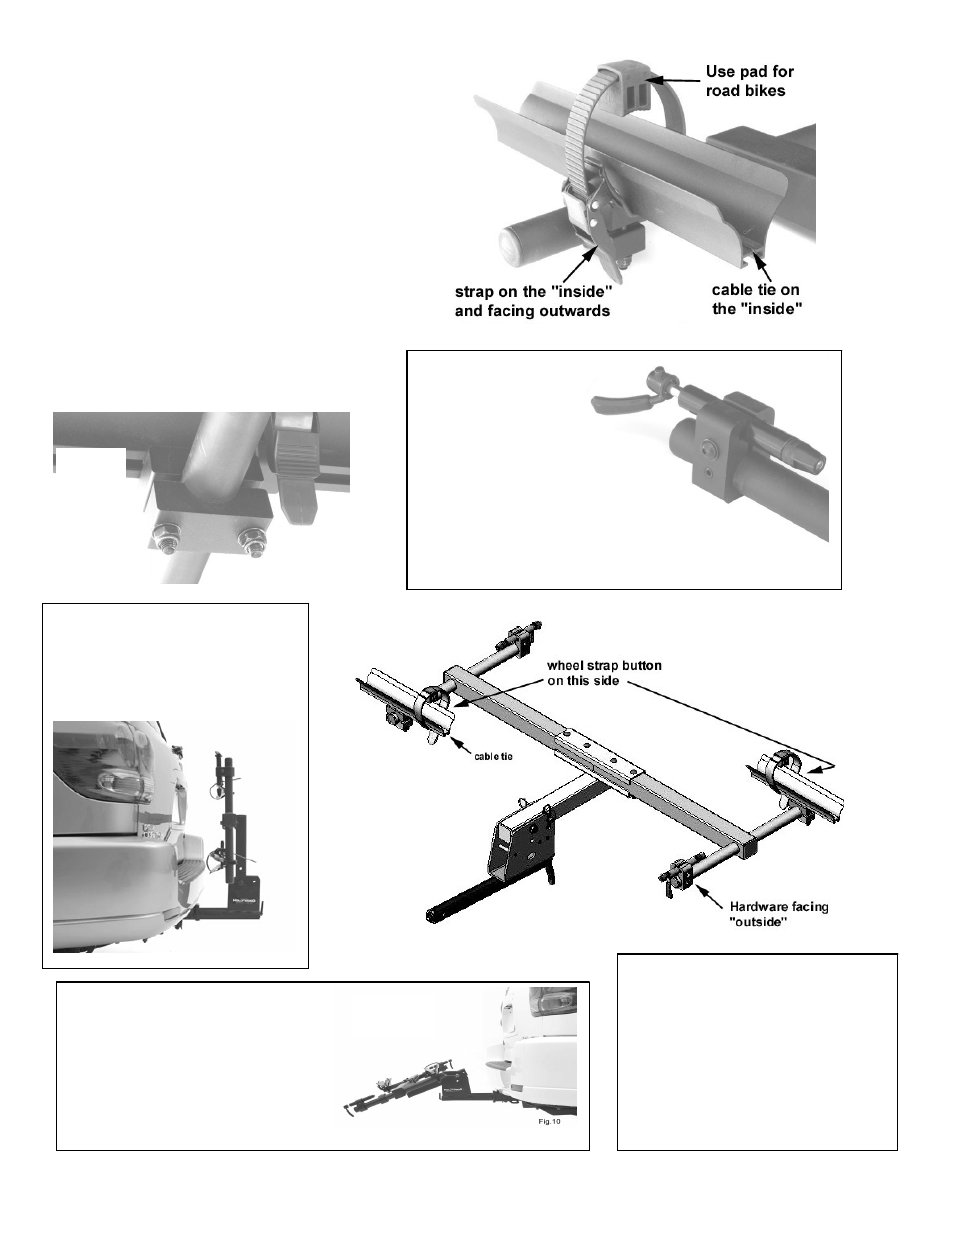
7. Wheel tray installation:
See Fig. 5, 6 and 8:
Slide wheel strap B into wheel tray D. Then
slide Carriage bolt heads from Clamp C into
wheel tray. Now slide the clamps around the
1 ¼” tube of the side beams. Note that the
wheel strap should be located between the
cable tie and the 1 ¼” tube. Position the
wheel strap so the red button is facing
outward.
For most bikes, the wheel strap should be
“inside” of the 1 ¼” tube. If you have a long
wheel base bike (greater than 45”), then
you may have to position the straps on the
outside of the tube. Be sure the strap is
always between the cable tie and tube.
Tighten carriage bolts.
8. Fork mount installation
See fig. 7 and 8:
Slide fork mount onto
the other 1 ¼” tube.
Use the 4mm hex wrench
To tighten main bolt. After
installing bikes and deciding on
final position of the fork mount,
tighten set screw with 4mm
wrench.
Fig. 5
Fig. 8
9. Fold up feature: To fold up
the main beam, remove R clip
and remove pin H6. Rotate
main beam upward and reinstall
pin and clip. See fig. 9
Fig. 9
10. Tilt
–Down Feature:
Please refer to fig. 2 and 10:
Remove 3/8” dia pin (H5) from
Insert tube bracket and gently
lower the main beam down so it
is resting on the welded stop.
Fig. 10
11. Locking features: see fig. 2
To lock bikes to rack, obtain a
locking bike cable (available
through Hollywood Racks). Wrap
Through wheels and frame and
through slot H1 on the insert tube
bracket. The Prorider comes with
a locking hitch pin to lock rack to
vehicle.