Ed f g h – Gastroback 98101 Meat Grinder / Cookie Attachment User Manual
Page 5
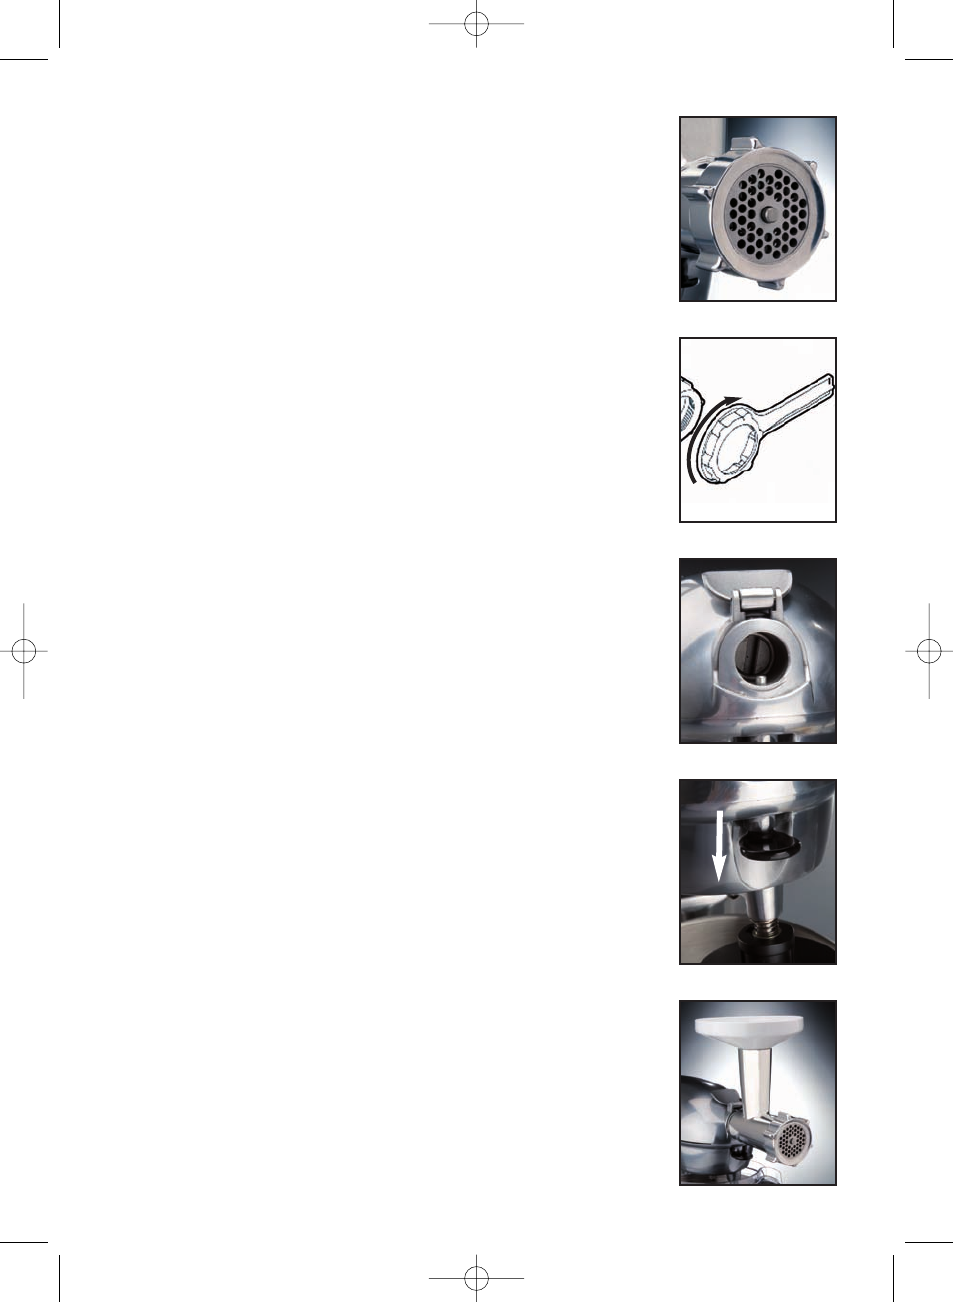
5. Take the ring nut and screw it onto the thread of the housing
turning it clockwise. You can use the spanner to securely tighten
the ring nut (picture D/E).
NOTE: Do not tighten the ring nut too much to avoid overwinding
the thread.
The Meat Grinder Attachment is now assembled and can be
attached to the Design Standmixer Advanced.
6. Prop up the attachment access (picture F).
7. Press down the attachment ejector (picture G) and slide the
Meat Grinder Attachment into the opening. Release the attachment
ejector and turn the Meat Grinder Attachment slightly so that the
shaft engages in the socket with pin of the access opening located
in the hole of the attachment.
8. Place the tray cover on top of the feed chute in a convenient
position (picture H).
You can place the storage container beneath the outlet to collect
the food.
The Meat Grinder Attachment is now ready for use.
To operate the Meat Grinder Attachment
WARNING: For the case that liquid runs over the appliance
while operating turn the appliance ´Off` immediately and pull
the plug. Clean and dry the appliance according to the
instructions ´Care and cleaning`.
TIP: If you use special mince-recipes you can mix the ingredients
(for example steamed onions or spices) with the meat before
mincing. This way the ingredients get mixed really well.
IMPORTANT: The appliance can not mince hard or stingily
ingredients (for example: bones, nuts, ginger). If you use hard
ingredients like onions or carrots, you have to steam them before
adding them to the meet. Place a dry towel beside the appliance
to dry off overrunning liquids.
1. Cut the meat into pieces of 2,5 cm square size and remove
hard parts like bones, shells or stems.
2. Assemble the Meat Grinder Attachment as described, attach
it to the Design Standmixer Advanced and place a plate or dish
(for example the provided storage container) in front of the outlet.
20
E
D
F
G
H
98101_fleischwolfaufsatz_deskuechmaschadv_manual.qxp 11.12.2007 15:12 Seite 20