Countdown timer, Alarms, Illumination – Casio 3148 User Manual
Page 6: Operation guide 3148
Operation Guide 3148
6
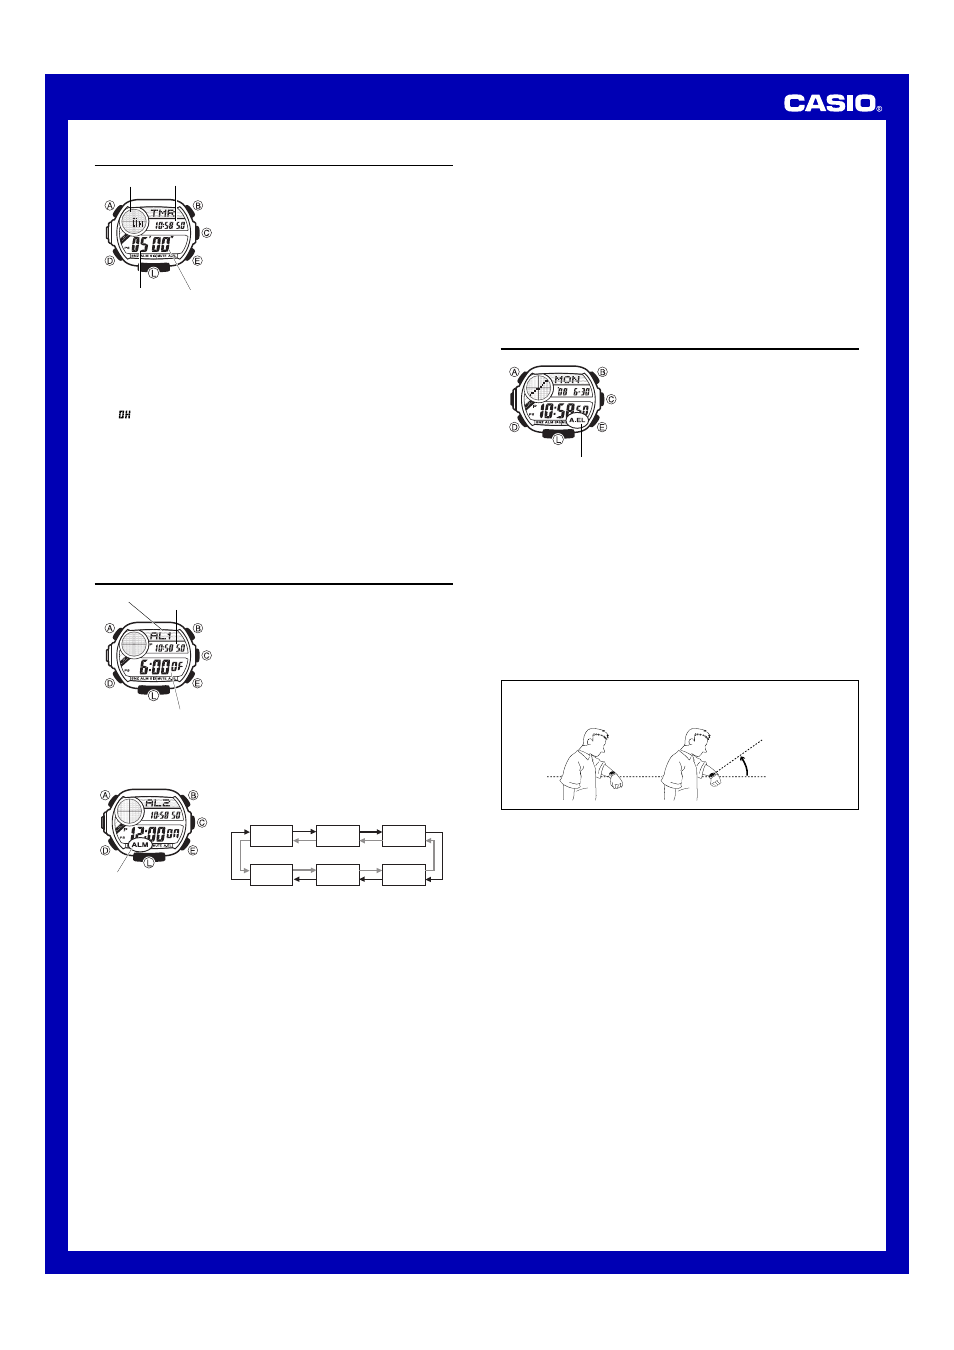
Countdown Timer
You can set the countdown timer within a range
of one minute to 24 hours. An alarm sounds
when the countdown reaches zero.
• All of the operations in this section are
performed in the Countdown Timer Mode,
which you enter by pressing D.
To set the countdown start time
1. While the countdown start time is on the
display in the Countdown Timer Mode, hold
down A until the hour setting of the
countdown start time starts to flash, which
indicates the setting screen.
• If the countdown start time is not displayed,
use the procedure under “To use the
countdown timer” to display it.
Minutes
Current time
Hours
Seconds
2. Press D to move the flashing between the hour and minute settings.
3. Use E (+) and B (–) to change the flashing item.
• To set the starting value of the countdown time to 24 hours, set
00'00"
.
4. Press A to exit the setting screen.
To use the countdown timer
Press E while in the Countdown Timer Mode to start the countdown timer.
• When the end of the countdown is reached, the alarm sounds for five
seconds or until you stop it by pressing any button. The countdown time is
reset to its starting value automatically when the alarm sounds.
• Press E while a countdown operation is in progress to pause it. Press E
again to resume the countdown.
• To stop a countdown operation completely, first pause it (by pressing E)
and then press B. This returns the countdown time to its starting value.
Alarms
The Alarm Mode gives you a choice of four one-
time alarms and one snooze alarm.
Also use the Alarm Mode to turn the Hourly Time
Signal (SIG) on and off.
• There are five alarms numbered AL1 through
AL4, and SNZ. You can configure SNZ as a
snooze alarm only. Alarms AL1 through AL4
can be used as one-time alarms only.
• When you enter the Alarm Mode, the data you
were viewing when you last exited the mode
appears first.
• All of the operations in this section are
performed in the Alarm Mode, which you enter
by pressing D.
Alarm time
(Hour : Minutes)
Alarm number
Current time
To set an alarm time
1. In the Alarm Mode, use E and B to scroll
through the alarm screens until the one whose
time you want to set is displayed.
2. Hold down A until the hour setting of the alarm time start to flash, which
indicates the setting screen.
• This automatically turns on the alarm.
3. Press D to move the flashing between the hour and minute settings.
4. While a setting is flashing, use E (+) and B (–) to change it.
• When setting the alarm time using the 12-hour format, take care to set
the time correctly as a.m. (no indicator) or p.m. (P indicator).
5. Press A to exit the setting screen.
AL1
AL2
AL3
SIG
SNZ
AL4
E
B
Alarm on indicator
Alarm Operation
The alarm tone sounds at the preset time for 10 seconds, regardless of the
mode the watch is in. In the case of the snooze alarm, the alarm operation is
performed a total of seven times, every five minutes, until you turn the alarm
off.
• Alarm and Hourly Time Signal operations are performed in accordance with
the Timekeeping Mode time.
• To stop the alarm tone after it starts to sound, press any button.
• Performing any one of the following operations during a 5-minute interval
between snooze alarms cancels the current snooze alarm operation.
Displaying the Timekeeping Mode setting screen
Displaying the SNZ setting screen
To test the alarm
In the Alarm Mode, hold down E to sound the alarm.
To turn an alarm and the Hourly Time Signal on and off
1. In the Alarm Mode, use E and B to select an alarm or the Hourly Time
Signal.
2. When the alarm or the Hourly Time Signal you want is selected, press C
to toggle it on and off.
ALM Indicates alarm is on.
SIG Indicates Hourly Time Signal is on.
• The alarm on indicator (ALM) and the Hourly Time Signal on indicator
(SIG) are shown on the display in all modes while these functions are
turned on.
• If any alarm is on, the alarm on indicator is shown on the display in all
modes.
Illumination
The display of the watch is illuminated using an
EL (electro-luminescent) panel for easy reading
in the dark. The watch’s auto light switch turns on
illumination automatically when you angle the
watch towards your face.
• The auto light switch must be turned on
(indicated by the auto light switch on indicator)
for it to operate.
• See “Illumination Precautions” for other
important information about using illumination.
Auto light switch
on indicator
To turn on illumination manually
Press L in any mode to illuminate the display for about one second.
• The above operation turns on illumination regardless of the current auto
light switch setting.
• Illumination is disabled while configuring sensor measurement mode settings.
About the Auto Light Switch
Turning on the auto light switch causes illumination to turn on, whenever you
position your wrist as described below in any mode.
Note that this watch features a “Full Auto EL Light”, so the auto light switch
operates only when available light is below a certain level. It does not
illuminate the display under bright light.
• The auto light switch is always disabled, regardless of its on/off setting,
when any one of the following conditions exists.
While an alarm is sounding
During sensor measurement
Moving the watch to a position that is parallel to the ground and then tilting
it towards you more than 40 degrees causes illumination to turn on.
• Wear the watch on the outside of your wrist.
Warning!
• Always make sure you are in a safe place whenever you are reading
the display of the watch using the auto light switch. Be especially
careful when running or engaged in any other activity that can result
in accident or injury. Also take care that sudden illumination by the
auto light switch does not startle or distract others around you.
Parallel to
ground
More than
40
°
• When you are wearing the watch, make sure that its auto light switch
is turned off before riding on a bicycle or operating a motorcycle or
any other motor vehicle. Sudden and unintended operation of the auto
light switch can create a distraction, which can result in a traffic
accident and serious personal injury.
To turn the auto light switch on and off
In the Timekeeping Mode, hold down L for about three seconds to toggle the
auto light switch on (A.EL displayed) and off (A.EL not displayed).
• The auto light switch on indicator (A.EL) is on the display in all modes while
the auto light switch is turned on.
• The auto light switch turns off automatically whenever battery power drops
to Level 3.
• Illumination may not turn on right away if you raise the watch to your face
while a barometric pressure or altitude measurement operation is in
progress.