Bc a d – Gastroback 42325 Latte Magic User Manual
Page 11
33
Do not operate the appliance with the filling level below the MIN filling mark or exceeding
the MAX filling mark. Ensure not to spill any liquids on the power base. The jug must always
be clean and dry, when placed on the power base to avoid risk of electric shock or damage.
1.
Place the power base on a flat, stable, moisture-resistant and heat-resistant surface near a
suitable wall power outlet (see: ›Important Safeguards‹) with the START/STOP button facing to
you. Leave at least 10 cm of free space to walls, curtains, boards and other objects on each
side of the appliance. Leave at least 50 cm of free space above the appliance to get unhinde-
red access. Ensure that the appliance is unplugged.
note: Clean the jug with cold water before frothing milk.
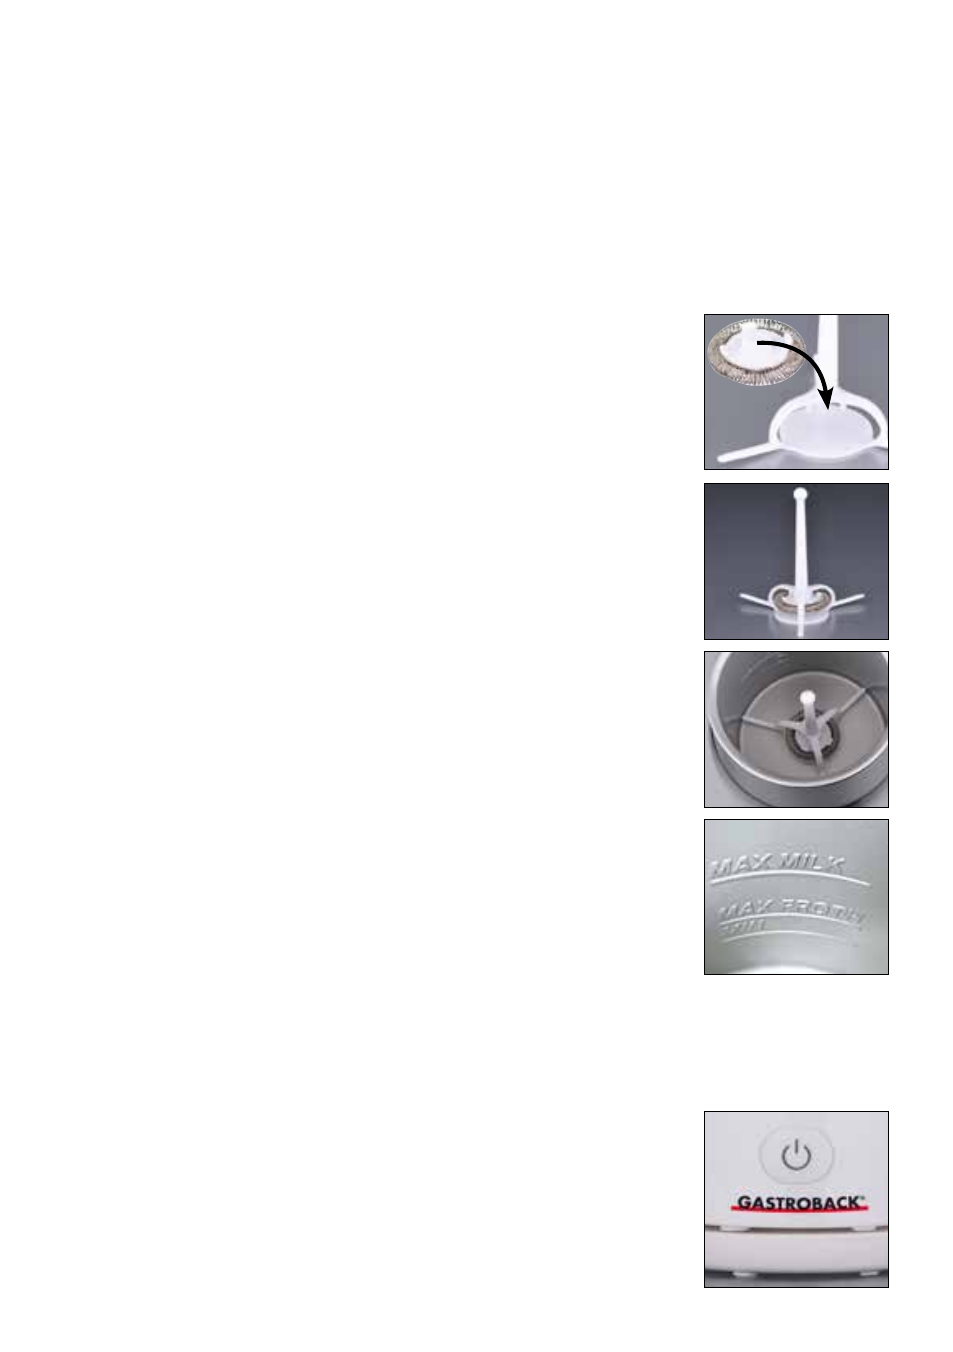
2.
Take the milk frothing disc and place it with the bulge pointing up-
wards between the three pins on the frothig disc mount - the spiral is
brought by a magnet to the correct position. (pic. A and B).
3.
Grab the dic mount with the inserted frothing disc and place it up-
right, the long pin facing up (see pic C) at the bottom of the foam jug.
4.
Pour the desired amount of chilled milk into the jug. You can use
skim milk or whole milk. Pay attention to the MAX mark the inside of
the jug when pouring the milk. The MAX mark for heating milk is 250
ml and the MAX mark for frothing milk in 150 ml. The MIN mark is
100 ml. For frothing milk you need less milk because the finished foam
has a larger volume than heated milk and would otherwise overflow.
Keep the container it as upright as possible. (see pic D).
note: Take the jug of the power base before filling.
IMpOrtant:
There are two max level indicators inside the jug. The
lower level max level indicator is for frothing milk and the upper max
level indicator for heating milk (picture C). You need less milk for
frothing because the volume of milk froth is bigger then the volume
of heated milk. Using too much milk when frothing would cause over-
running.
IMpOrtant: Never overfill the jug. Spilling liquids can cause da-
mage to the electronic components.
nOte: The volume, texture, and taste of froth vary depending on the
fat content and amount of milk and flavouring used. The milk frother
produces the greatest volume of rich, thick, froth using cold, fat free
milk. 0,3%,1,5%, 3,5% and whole milk froth well, but due to a higher
fat content they produce a froth with a slightly different texture and less
volume but sweeter. To prepare toppings for coffee or dessert, using the maximum amount
of milk will produce approximately 3-4 servings generous servings.
nOte:
To make flavoured froth, frothy drinks, dessert toppings or desserts, you may add
syrups, powders, sugar, sugar substitutes or liqueurs to the milk. See milk froth recipes in the
back of the manual instructions.
5.
Place the lid on the jug and ensure the it is closed properly.
6.
Place the jug onto the power base. The electric contacts of the multi-
directional power base will slide into a corresponding opening in the
bottom of the jug. The power base will work out in any orientation. The
start button is on the jug (picture E).
7.
Place the plug into the power outlet
B
C
A
D
100 ml
150 ml
250 ml
E