EFCO S5900 Outside Glazed User Manual
Page 14
EFCO CORPORATION 6/2012 PART NO. Y350
Page 14 of 16
Series 5900 Outside Glazed Curtain Wall Installation Instructions
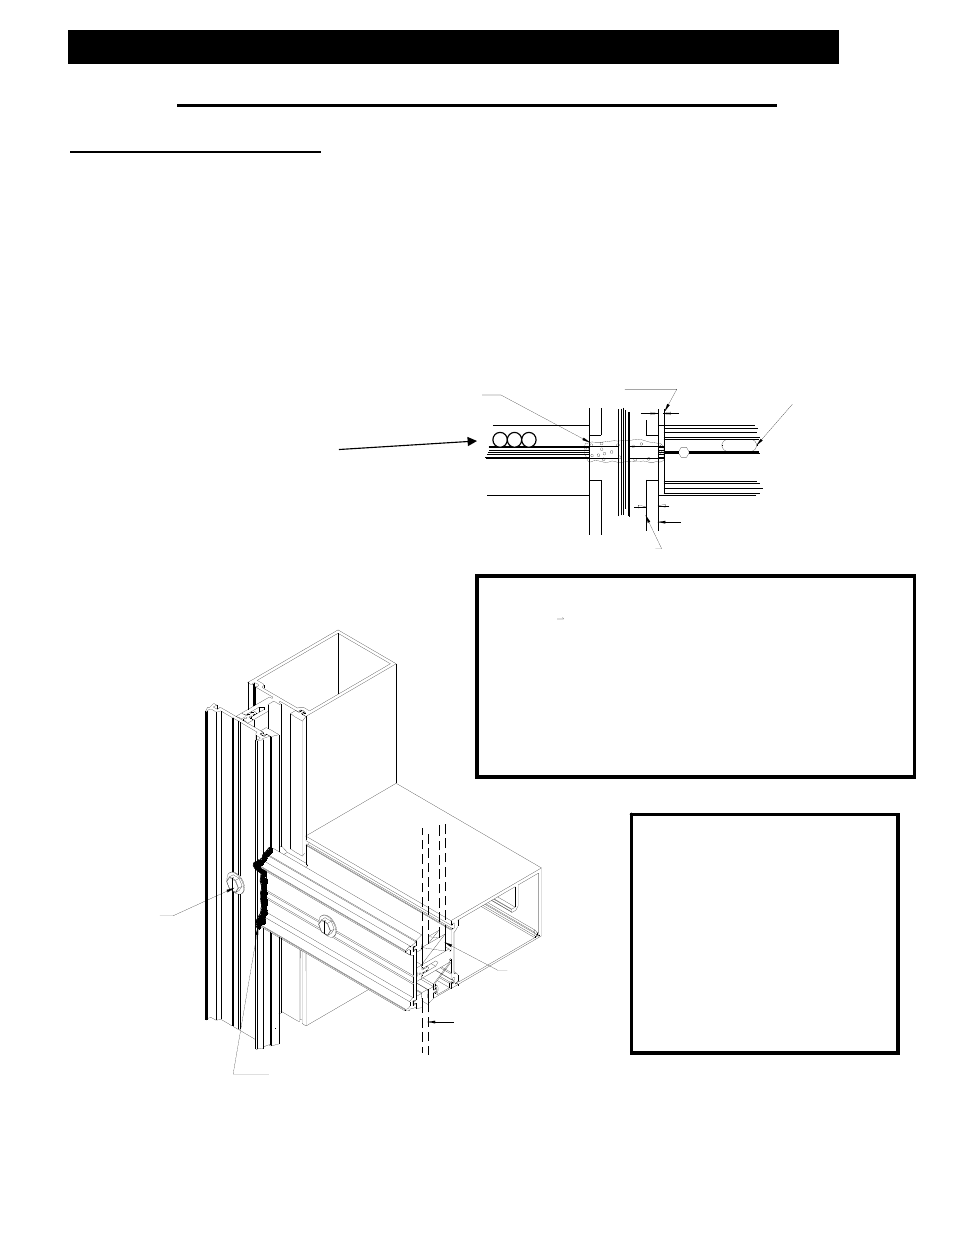
1/2"
MULL PLUG
Section IX: Pressure Plate Attachment
Pressure Plate Attachment
A.)
Attach pressure plates with ¼” X 1” stainless steel hex washer head pressure plate
screws. Typical spacing is 6” on center.
B.)
Torque screws to 80 inch pounds. In cold weather, first torque all screws to 40
inch pounds.
C.)
When possible, work from the center outward on horizontals and from the sill
upward on verticals.
D.)
Torque all screws to the full 80 inch pounds after all four sides of the opening
have been clamped.
Note: Reference page #9 for recommended
pressure plates at the splice. Install the
first screw approx. 3” from the end.
Typical screw spacing is 6” O.C. Glazier
should always place a screw in the vertical
pressure plate directly opposite each
horizontal. This will provide maximum
control of pressure on the mullion plugs
that provides critical sealing function.
Glass line
Seal the horizontal pressure plate to the vertical
pressure plate so they are air and watertight.
¼” X 1” HWHSMS
1” Setting block
Line of mullion
Edge of glass
3/16” X 1” Weep slot
centered 4” off each end
of pressure plate.
Apply sealant to the face
of the mullion plug prior
to installation of the
vertical pressure plate.
Extend gaskets
¼” both ends of
pressure plate.
OPTIONAL WEEP HOLES
5/16” weep holes
Drill 3 holes side by side
In pressure plate centered 4” off
each end. Locate C/L of holes
5/32” above top of tongue.
Customer / Installer Note:
EFCO setting blocks are
typically 4” in length with
different depths. If the
glazing infill is “NOT BY
EFCO” and glazing sizes are
larger than 40 square feet,
then the glazing details
must be reviewed by the
glazing manufacturer for
proper setting block size.