Copernicus RC106 User Manual
Page 7
RC106 - Version A - 29 July 2014 - Copernicus Educational Products Inc.
5
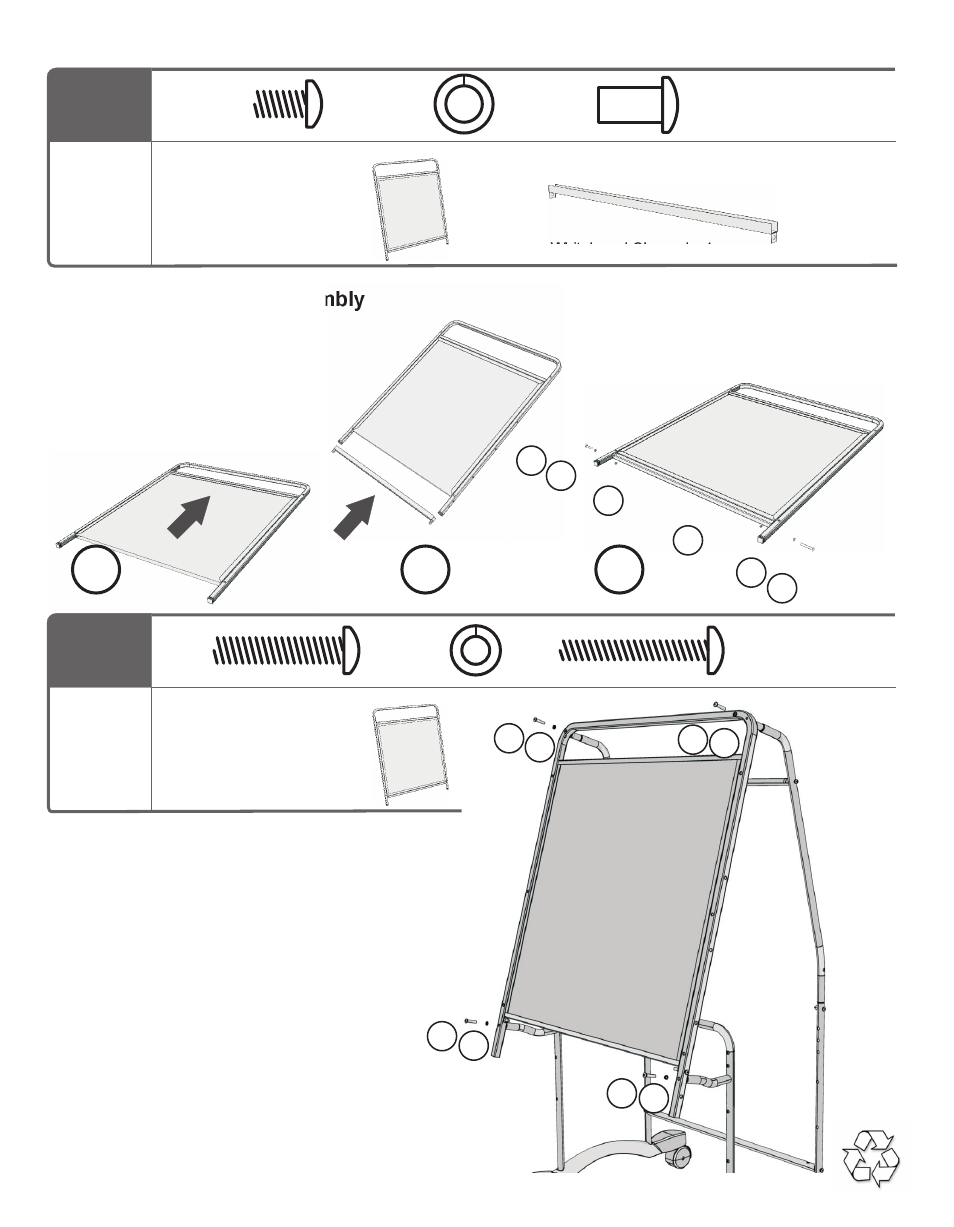
Front Frame Assembly x 1
You will need:
(Not to Scale)
Actual Size:
Whiteboard Channel x 1
Build Front Frame Assembly
G
F
C
C
F
G
3
2
1
1. Slide whiteboard as far up as it will go.
2. Slide whiteboard channel up to bottom
of whiteboard.
3. Fasten the whiteboard channel in
place.
Tighten bolts
x 2
x 2
C
F
x 2
G
6
Front Frame Assembly x 1
You will need:
(Not to Scale)
x 2
x 4
Actual Size:
A
E
Attach Whiteboard
x 2
D
Pee
l off
prot
ectiv
e film
D
E
D
E
A
E
A
E
1. Put brakes in the LOCKED / DOWN position
to help hold unit steady.
2. It is easiest to fasten the top first and then
the bottom.
Tighten bolts
See also other documents in the category Copernicus Products for children:
- AC401 (1 page)
- AUD1 (9 pages)
- AUD5 (13 pages)
- BC300 (1 page)
- BTHC1 (9 pages)
- BTHC2 (11 pages)
- CD400 (1 page)
- DCS1 (12 pages)
- DCS2A (14 pages)
- E3IN1 (19 pages)
- ELS1 (3 pages)
- GR220 (2 pages)
- IPT102 (14 pages)
- IR400 (51 pages)
- IS2 (16 pages)
- IS602 (40 pages)
- LLS300 (19 pages)
- LW430 (5 pages)
- PDR11 (12 pages)
- PDR20 (1 page)
- RC005 (7 pages)
- RC108 (4 pages)
- RC105 (11 pages)
- RC107 (11 pages)
- SOSE1 (15 pages)
- SRC1 (10 pages)
- STEM100 (18 pages)
- SWT (8 pages)
- TAG2 (19 pages)
- TD5000 (12 pages)
- TEC500 (13 pages)
- TEC500C (12 pages)
- TEC510 (17 pages)
- TEC520 (18 pages)
- TEC57 (8 pages)
- TEC700 (12 pages)
- TEC707 (14 pages)
- VBC5600 (2 pages)
- VE550 (2 pages)
- XS005 (4 pages)