Code 3 920 Flashers User Manual
Page 4
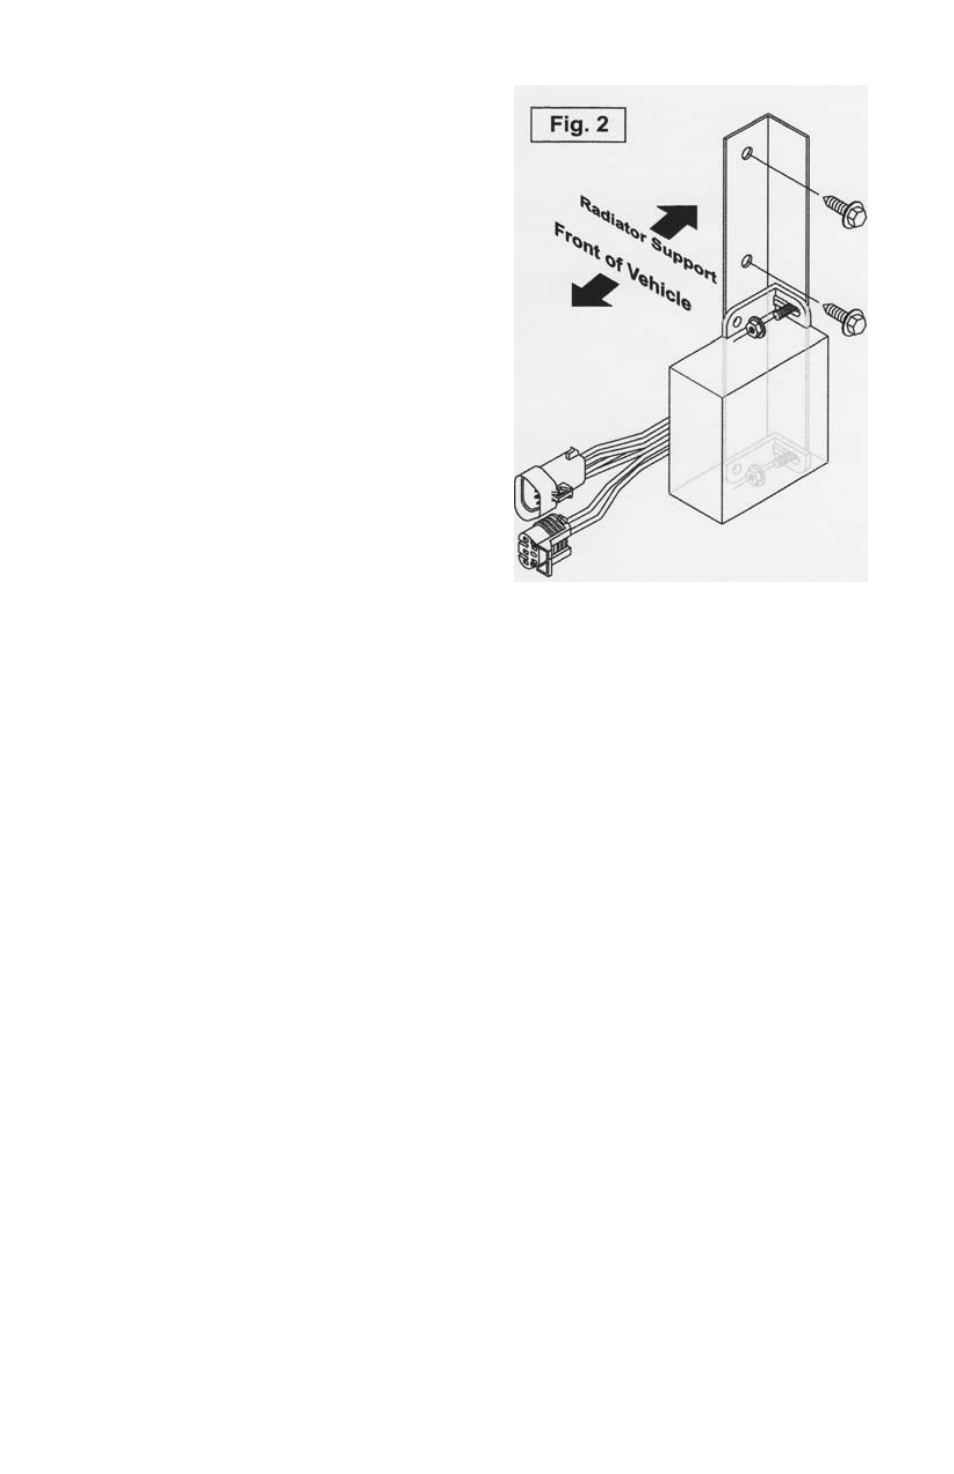
4
3. Using the bolts removed in the
previous step, secure the head-
light flasher bracket to the pillar.
Make sure that the flasher is
oriented as shown in fig. 2.
4. The necessary electrical connec-
tions will now be made. Follow the
appropriate procedure for your
vehicle.
Wiring:
Vehicles equipped with Chevrolet Option SEO 6J3
1.
Disconnect the headlamp harness’ water-proof connection adjacent to
the installed flasher.
2.
Plug the water-proof flasher plugs into the appropriate water-proof
harness connection referenced in the previous step. Make sure that these
plugs fully engage the harness receptacles.
3.
Locate the PINK, 16-gauge control wire under the instrument panel (refer
to your ”Impala Police Package Owner’s Manual Supplement” for specific
information regarding the location of this wire).
4.
Connect this PINK wire to a customer supplied switch.
Vehicles without Chevrolet Option SEO 6J3
1.
Disconnect the headlamp harness’ water-proof connection adjacent to
the installed flasher.
2.
The flasher’s pin-housing connector includes an ORANGE wire. Cut
this wire at the connector.
3.
Plug the water-proof flasher connector into the appropriate water-proof
harness connection referenced in the previous step. Make sure that
these connectors fully engage the harness connectors.
4.
Using appropriately sized wire, extend this ORANGE wire to a
customer-supplied switch.