E-18, Osd menu description – AVer CP150 user manual User Manual
Page 22
E-18
OSD Menu
Description
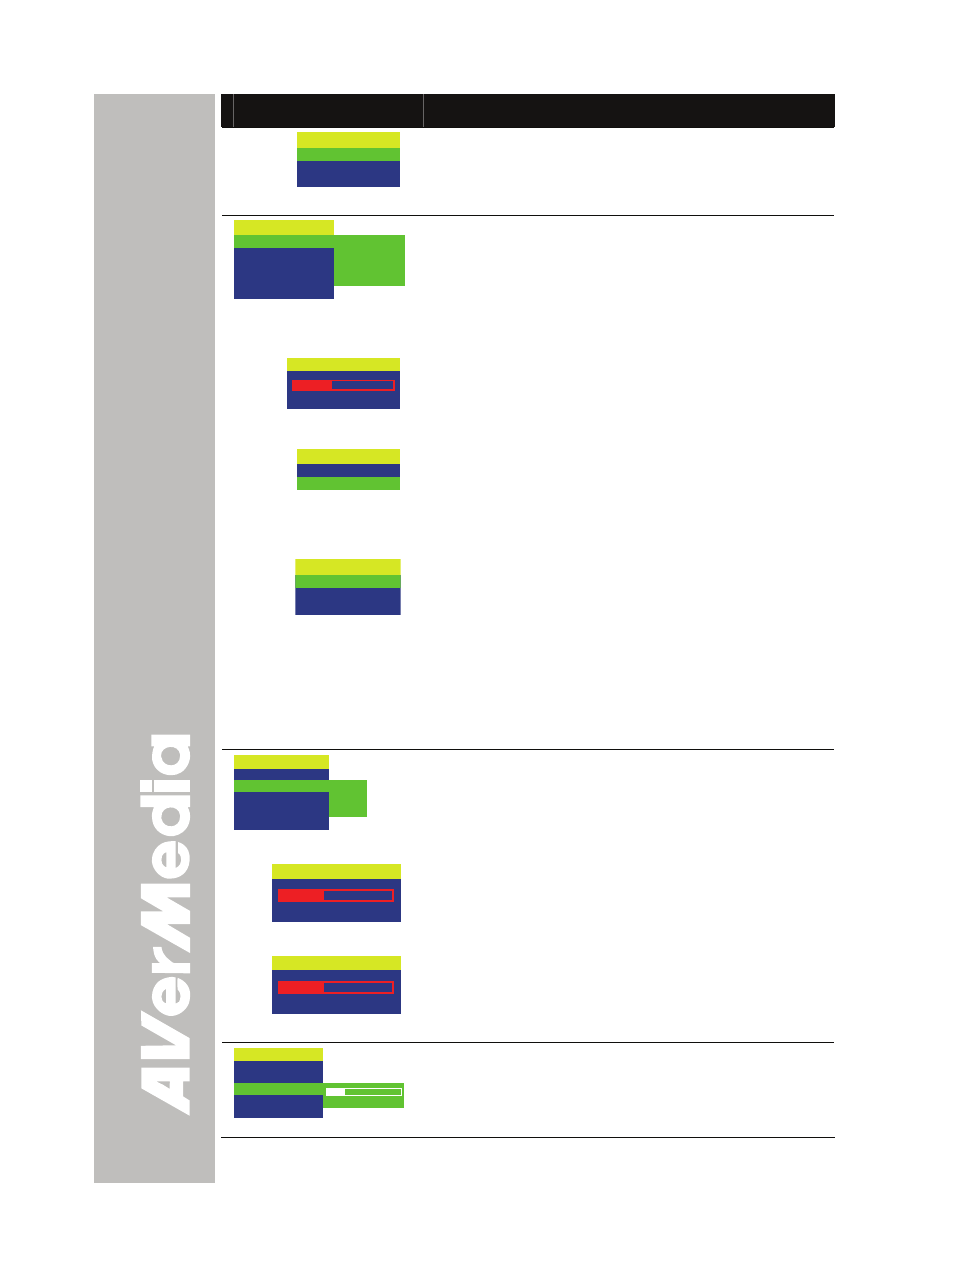
MODE
TEXT
GRAPHICS
HIGH FRAME
• High Frame - increases the frame rate capture and
can visually tracks the motion and react quickly.
Sufficient lighting is required when using this
mode.
IMAGE
EXPOSURE
WHITE BALANCE
BRIGHTNESS
CONTRAST
RESOLUTION
AUTO
MANUAL
FLICKER
NIGHT VIEW
SETTINGS > IMAGE > EXPOSURE
Press ► and use ▲or▼ buttons to select between
Auto, Manual, Flicker and Night View. Then press
►
/
ENTER to make a selection.
Select AUTO to automatically adjust the camera
exposure to determine how much light is required.
MANUAL
0
54
21
SETTINGS > IMAGE > EXPOSURE > MANUAL
Press ►/ENTER and use ◄or► buttons to manually
adjust the exposure level then press ENTER to save
the setting and exit.
FLICKER
50 HZ
60 HZ
SETTINGS > IMAGE > EXPOSURE > FLICKER
Use ▲or▼ buttons to select between 50Hz or 60Hz.
Some display devices cannot handle high refresh
rates. The image will flicker a couple of times as the
output is switched to another refresh rate.
NIGHT VIEW
ON
OFF
AUTO
SETTINGS > IMAGE > EXPOSURE > NIGHT VIEW
Use ▲or▼ buttons to turn Night View ON, OFF or
AUTO.
If you are presenting in a low-light condition, Night
View enables the image of the object to appear as
though under normal lighting conditions. CP150 can
automatically adjust the exposure to compensate for
the adverse condition, but the captured image will
appear to be in slow motion.
IMAGE
EXPOSURE
WHITE BALANCE
BRIGHTNESS
CONTRAST
RESOLUTION
AUTO
RED
BLUE
SETTINGS > IMAGE > EXPOSURE > WHITE BALANCE
Press ► and use ▲or▼ buttons to select between
Auto or manually adjust the Red and Blue color to suit
the lighting condition or color temperature. Then
press ►/ENTER to make a selection.
RED
255
0
65
SETTINGS > IMAGE > EXPOSURE > WHITE BALANCE >
RED
Use ►or◄ buttons to manually adjust the red color
level then press ENTER to save the setting and exit.
BLUE
255
0
65
SETTINGS > IMAGE > EXPOSURE > WHITE BALANCE >
BLUE
Use ►or◄ buttons to manually adjust the blue color
level then press ENTER to save the setting and exit.
IMAGE
EXPOSURE
WHITE BALANCE
BRIGHTNESS
CONTRAST
RESOLUTION
63
16
0
SETTINGS > IMAGE >
BRIGHTNESS
Use ►or◄ buttons to increase or decrease the
brightness level and improve the visibility of the
image. The brightness level can be set up to 63.