Remote control, English – AVer M50(355AF) user manual User Manual
Page 10
ENGLISH
5
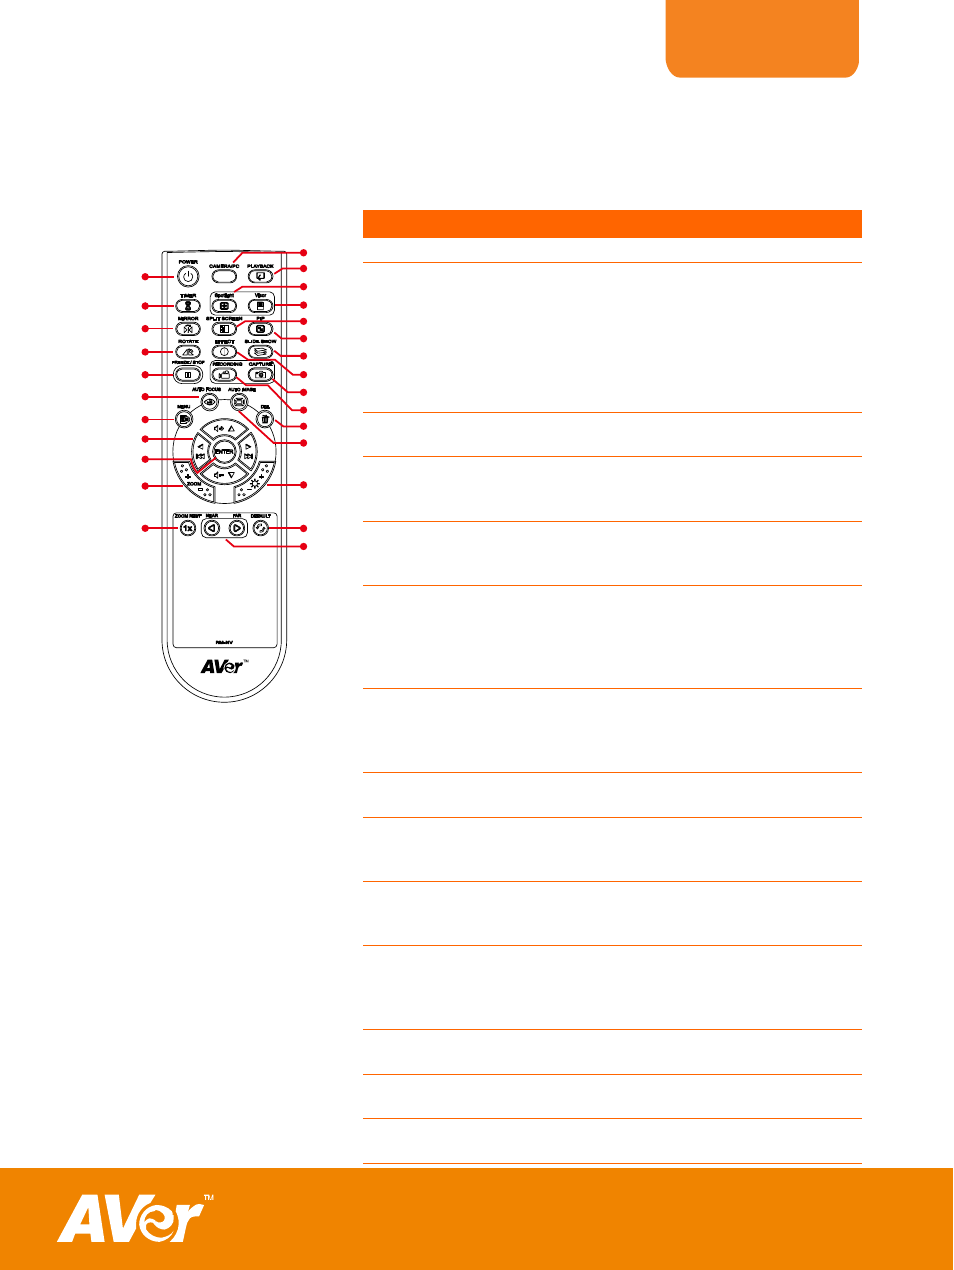
Remote Control
The remote control requires two (2) “AAA” size batteries (supplied), make sure batteries
are installed properly before use. You can access all the features of AVerVision M50 with
the remote.
Name
Function
(11)
(6)
(17)
(22)
(21)
(19)
(20)
(23)
(26)
(1)
(9)
(13)
(15)
(5)
(24)
(25)
(7)
(2)
(4)
(3)
(8)
(10)
(16)
(14)
(12)
(18)
(fig. 1.6)
(1) POWER
Turn the unit on/standby.
(2) CAMERA / PC
Switch between Camera and
computer mode.
- Camera mode displays the video
signal from the built-in camera.
- PC mode displays the video signal
from the RGB INPUT port of
AVerVision
M50.
(3) PLAYBACK
View the captured picture/video from
the memory in 16-thumbnail images.
(4) SPOTLIGHT
Overlay a box frame on the
presentation screen, you can move it
around and adjust the box size
(5) VISOR
Cover part of the presentation screen
and allow presenter to reveal the
material as desire.
(6) SPLIT SCREEN
Divide the screen into two. One side
displays the live image from the built-
in camera and the other side displays
8-thumbnail size picture/video from
the memory.
(7) PIP
Show a thumbnail size captured
picture/video from the memory at the
corner of the screen in Camera
mode.
(8) SLIDE SHOW
Start/Stop automatically showing the
captured picture/video one-by-one.
(9) EFFECT
Convert and display the image in
BW, Negative or Color in Camera
and Playback mode only.
(10) CAPTURE
Capture still image in Camera mode.
In continuous capture mode, press
this button again to stop.
(11) RECORDING
Start/Stop audio & video recording.
Video recording can only be saved
either in a SD memory card or a USB
flash drive.
(12) DEL
Delete the selected picture/video in
Playback mode.
(13) AUTO IMAGE
Automatically adjust and set the
white balance and exposure setting.
(14) BRIGHTNESS
+/-
Adjust the brightness.