Alumax DesignLine Hinge User Manual
Page 3
Page 3 of 5
EPH-N00-06092
12-9-03
2
3
Unscrew the two hinge leaf screws (L) and remove
hinge leaf (B). Clean the glass and gasket surfaces with
alcohol. (For the gasket to hold properly, the glass and
gasket surfaces must be cleaned to remove the sodium
dioxide lubricants used in tempering furnaces.)
Note that the hinge mounting is a compression fit.
The glass surface must be free of debris or oil before
application and hinge must be secured tightly enough to
prevent slippage. If glass with water repellent coating is
used the hinge mounting area of the glass must be masked
off prior to installation.
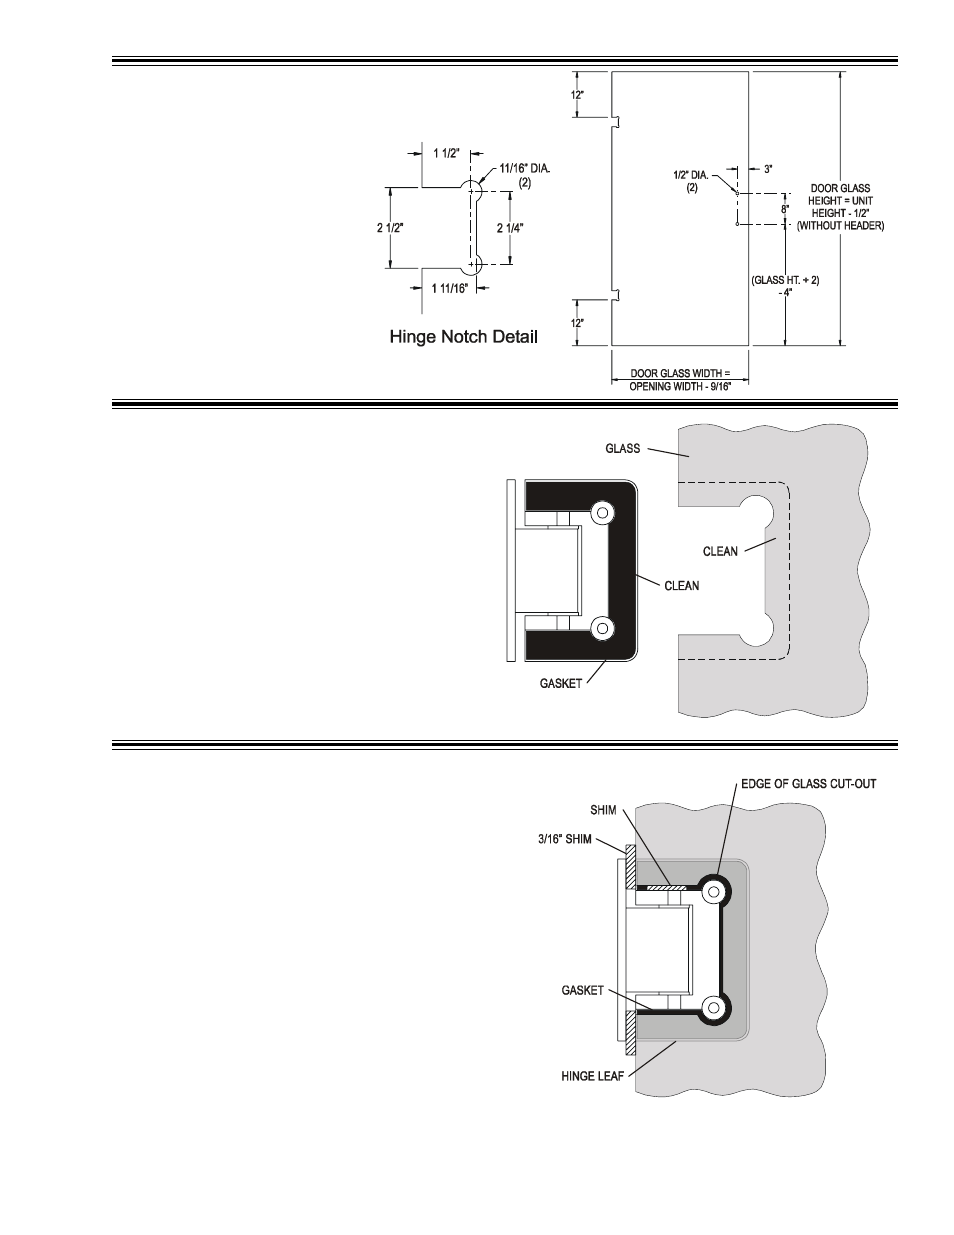
1
Note glass cut out dimensions. Double check these
dimensions before proceeding.
Center the stationary leaf (A) in the cutout so that
hinge leaf mounting screws (L) will be inside of unit.
TIP: If the hinge is loose in the cutout, insert a shim
between the stationary leaf (A) and the top edge of the
glass cutout to prevent the glass from shifting or dropping
over time.
Insert two 3/16" shims between the back plate (C)
and the edge of the glass to assure the hinge is square to
the glass. (Remove after you have reattached the hinge
leaf.)
Screw the hinge leaf (B) back onto the hinge with the
two hinge leaf screws (L). Use an allen wrench to tighten
them down. NEVER USE A POWER DRILL. Brass is
relatively soft and you may strip the screws or over
torque which will cause the hinge to flex and lose it's
holding power.
Tighten the screws evenly, back and forth between
screws, for a tighter fit to glass.