Alumax 391 User Manual
Page 9
EPH-N00-06009
5-20-97
Page 8 of 11
13
14
15
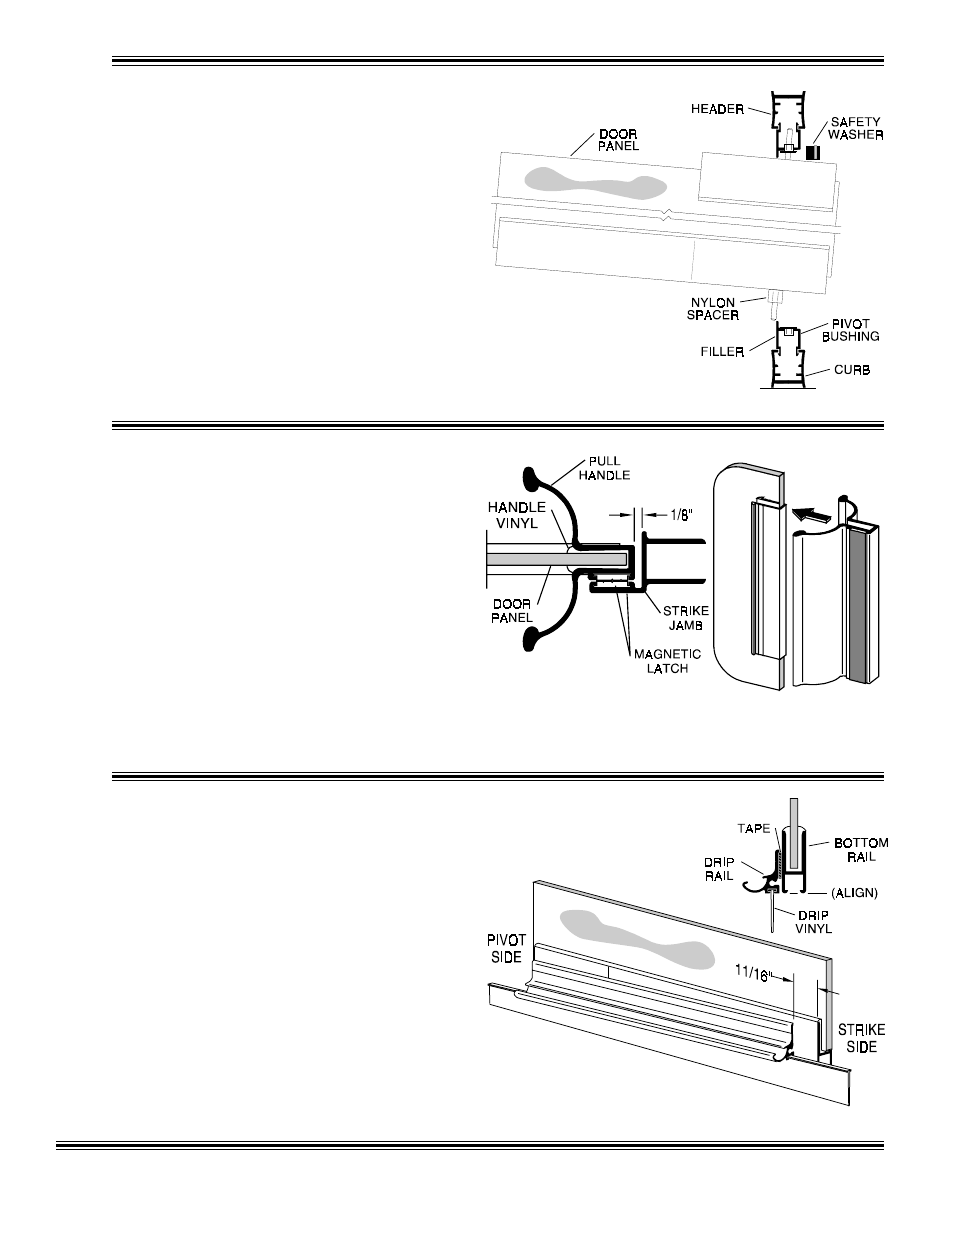
Insert the two nylon pivot bushings [Y] into
the pivot holes in the head and curb fillers [N].
Lift the door panel [P] and insert the top pivot pin
into the pivot bushing in the header filler. Hold
the door vertical and insert the bottom pivot pin
into the pivot bushing in the curb filler. It may be
necessary to remove the header retaining screws
and raise the header slightly to install the door.
When the door has been set into place, snap the
security washer [AA] over the top pivot pin to hold
the upper pivot bushing in place and prevent
accidental dislodging of the door.
Slide the door handle [BB] with magnet onto
the strike edge of the door panel [P]. Close the door and
slide the handle up or down until the two magnetic
strips are aligned. Use a pencil or masking tape to
mark the top and bottom edges of the door handle on
the door.
Slip the door handle vinyl [CC] over the door between
the marks and carefully drive the door handle onto the
door panel. Spraying glass cleaner or water onto the
vinyl and handle will make assembly easier.
Close the door and check the clearance with the strike
jamb. If necessary, loosen the set screws [V] on the top
& bottom pivot blocks [W] and adjust the door panel to
align the strike magnets. When the door panel is
properly aligned, tighten the set screws securely.
Cut the drip rail [S] to the length of the
bottom rail minus 11/16". Clean the interior face
of the bottom door rail [R] and the flat side of the
drip rail thoroughly to ensure proper adhesion of
the double stick tape [T]. Unroll the tape and
carefully attach it to the back of the drip rail (do
not peel the tape backing yet).
Insert the tapered drip vinyl [U] into the drip rail.
Position the drip rail flush with the bottom and
pivot side of the bottom door rail, then raise the
strike side until the bottom edge of the drip vinyl
is parallel to the bottom of the door. Mark the
location of each end of the drip rail.