Operation – Craftsman 315.269600 User Manual
Page 17
Attention! The text in this document has been recognized automatically. To view the original document, you can use the "Original mode".
OPERATION
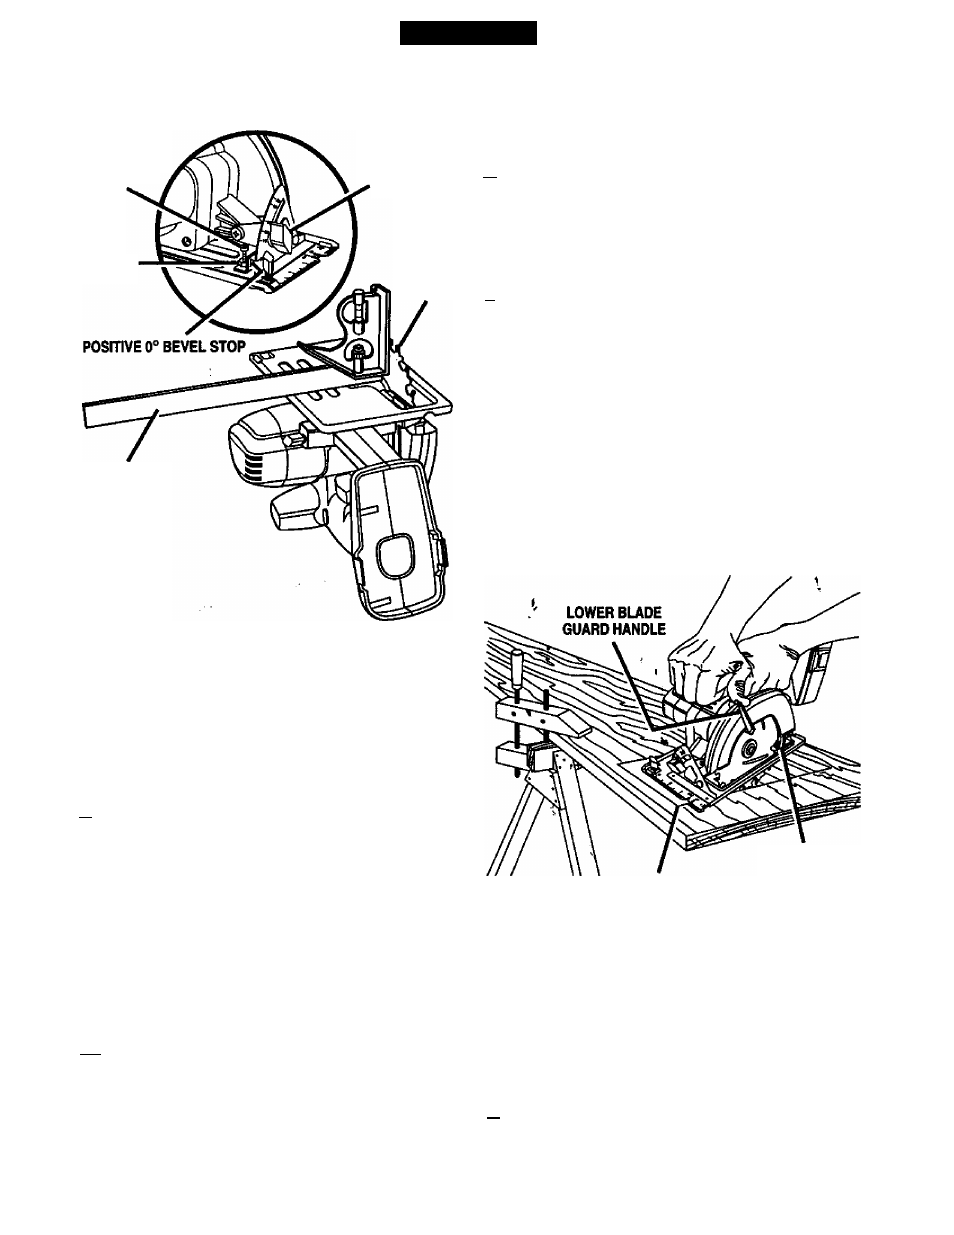
POSITIVE 0° BEVEL STOP
See Figure 21.
ADJUSTMENT
SCREW
BEVEL
ADJUSTMENT
KNOB
HEX NUT
BLADE
COMBINATION
SQUARE
Fig. 21
Your saw has a positive 0“ bevel stop, that has been
factory adjusted to assure 0** angle of your saw blade
when making 90® cuts. However, misalignment can
occur during shipping.
TO CHECK
■ Remove battery pack from saw.
A. WARNING: Failure to remove battery pack from
saw could result in accidental starting causing
possible serious personal injury.
■ Place your saw in an upside down position on
workbench. See Figure 21.
■ Using a combination square, check squareness of
saw blade to the base of your saw.
TO ADJUST-
■ Remove battery pack from saw.
XL. WARNING: Failure to remove battery pack from
saw could result in accidental starting causing
possible serious personal injury.
■ Loosen bevel adjustment knob.
■ Loosen hex nut securing adjustment screw.
■ Turn screw and adjust base until square with saw
blade.
■ Tighten hex nut and bevel adjustment knob securely.
.A WARNING: Attempting to make cuts without
bevel adjustment knob securely tightened can
result in serious injury.
TO POCKET CUT
See Figure 22.
A WARNING: Always adjust bevel setting to zero
before making a pocket cut. Attempting a pocket
cut at any other setting can result in loss of control
of your saw possibly causing serious injury.
Adjust the bevel setting to zero, set blade to correct
blade depth setting, and swing the lower blade guard
up using the lower blade guard handle.
Always raise the lower blade guard with the
handle to avoid serious Injury.
While holding lower blade guard by the handle, firmly
rest the front of the base flat against the workpiece
with the rear of the handle raised so the blade does
not touch the workpiece. See Figure 22.
POCKET CUT
LOWER
BUDE GUARD
Fig. 22
Depress the lock-off button and squeeze the switch
trigger to start your saw. Always let the blade reach
full speed then slowly lower blade into the
workpiece until base Is flat against workpiece.
After you complete your cut release the trigger and allow
№e blade to come to a complete stop. After the blade
has stopped, remove it from the workpiece. Comers
may then be cleared out with a hand saw or sabre saw.
A
WARNING: Never tie the lower blade guard in a
raised position. Leaving the blade exposed could
lead to serious injury.
17