Fig, 1, Assembly & operation a, A warning – Craftsman 183.172530 User Manual
Page 9: Fig. 2
Attention! The text in this document has been recognized automatically. To view the original document, you can use the "Original mode".
ASSEMBLY & OPERATION
A
WARNING
Remove the plug from the power source before
assembly, changing accessories or cutters and
making adjustments. This safety action will help
prevent accidental starting of the tool which could
result in serious injury.
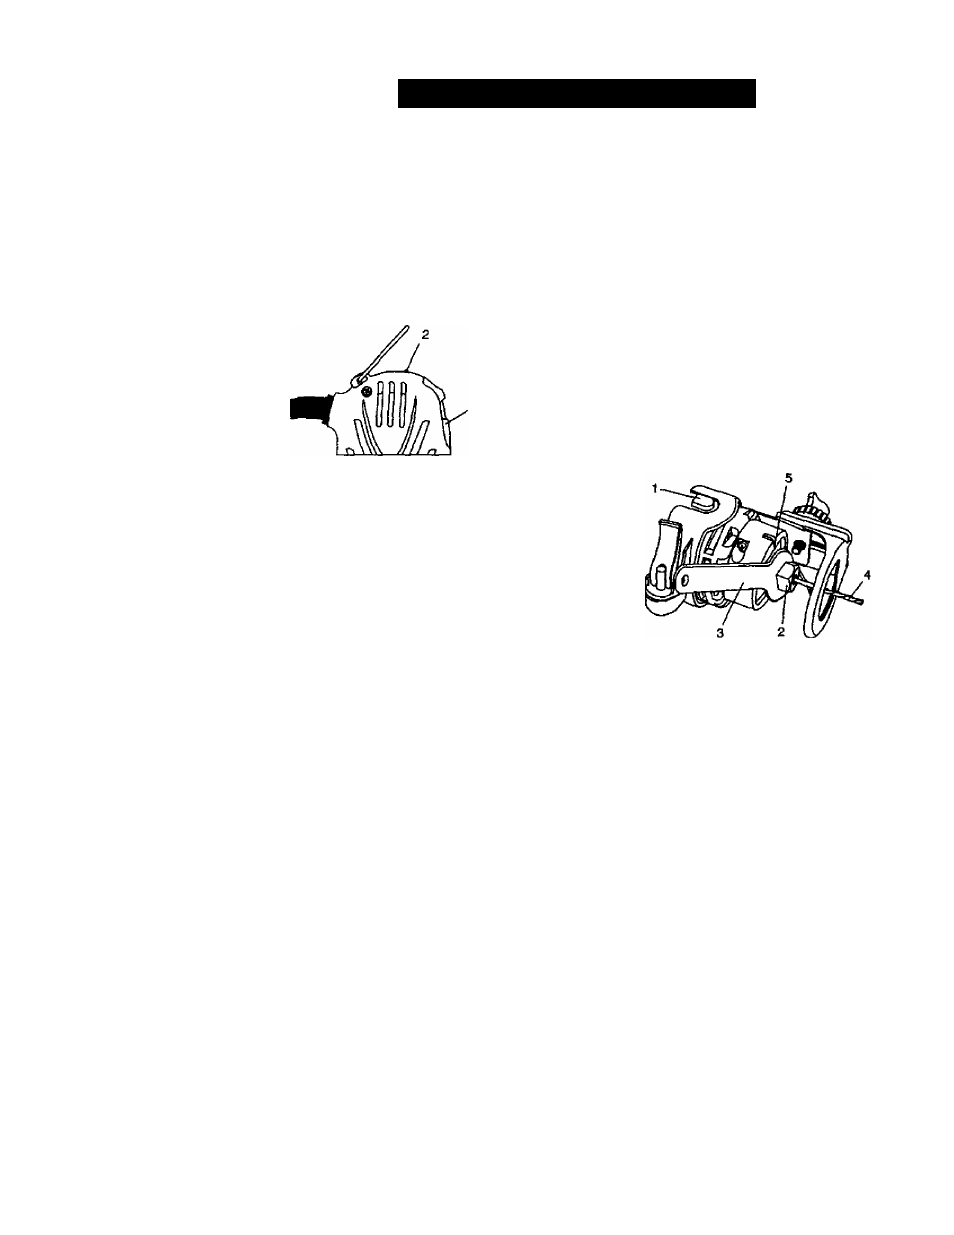
ON / OFF & SPEED CONTROL SWITCHES
This cutting tool is equipped with
a sliding ON / OFF
switch (1) located on the side of the tool and a speed
control switch (2) located on top of the tool (see Fig. 1 ),
INSTALLING CUTTING BITS - Cont’d
4.
Insert new cutting bit (4) into the collet.
5.
A WARNING
Insert the bit all the way into the collet and then
pull it back between and
'it".
This creates an
air space between the motor shaft and the bit to
help prevent overheating the bit.
Before tightening the collet on the bit, make sure
the flutes (spiral portion) of the bit are completely
wsible outside the collet. Clamping the collet on
the bit flutes will result in broken bits and possible
injury.
When bit is properly placed in the collet depress the
shaft locking button and turn the collet nut clockwise
by hand as far as possible.
6. Securely tighten collet nut using the wrench.
Fig, 1
1.
To turn the tool ON, slide the switch (1) up.
2.
To turn the tool OFF, slide the switch down,
3.
To set speed to high speed, slide speed control switch
(2) away from the ON / OFF switch.
■
4.
To set the speed control switch to low speed, slide the
speed control switch (2) toward the ON / OFF switch.
INSTALLING CUTTING BITS
A WARNING
Cutting bit and router bit cutting surfaces are
extremely sharp. Handle with caution.
To insert a cutting bit, use the collet wrench which is in the
wrench holder attached to the power cord,
1.
Depress the shaft locking button (1) and rotate the
collet lock nut (2) clockwise with the other hand until
the locking button drops into place, preventing the
shaft from turning (see Rg, 2).
2.
While continuing to hold the shaft locking button IN,
use the collet wrench (3) to turn the collet nut counter
clockwise. Loosen the collet nut two or three turns.
3.
Remove bit if one is already Installed in the tool.
Fig. 2
WORK LIGHTS
The motor unit has two built-in work lights (5) (see Fig, 2).
These work lights automatically light up when the motor
switch is turned ON. Patterns or drawings in the
immediate vicinity of the bit will be illuminated for better
visibility and improved cutting accuracy.
SELECT APPROPRIATE MOTOR SPEED
Selecting the appropriate motor speed will ensure
smoother, more efficient cutting action. Choose LOW
speed for grinding, cutting plastics, polishing and when
using wire or bristle bnjshes. Choose HIGH speed when
cutting wood, using cut-off wheels and to reduce “chatter"
that may develop when cutting some materials at LOW
speed.