Install the belt and attach the belt cap retainer, A warning, Assembly step 4 – Craftsman 139.53918d User Manual
Page 10
Attention! The text in this document has been recognized automatically. To view the original document, you can use the "Original mode".
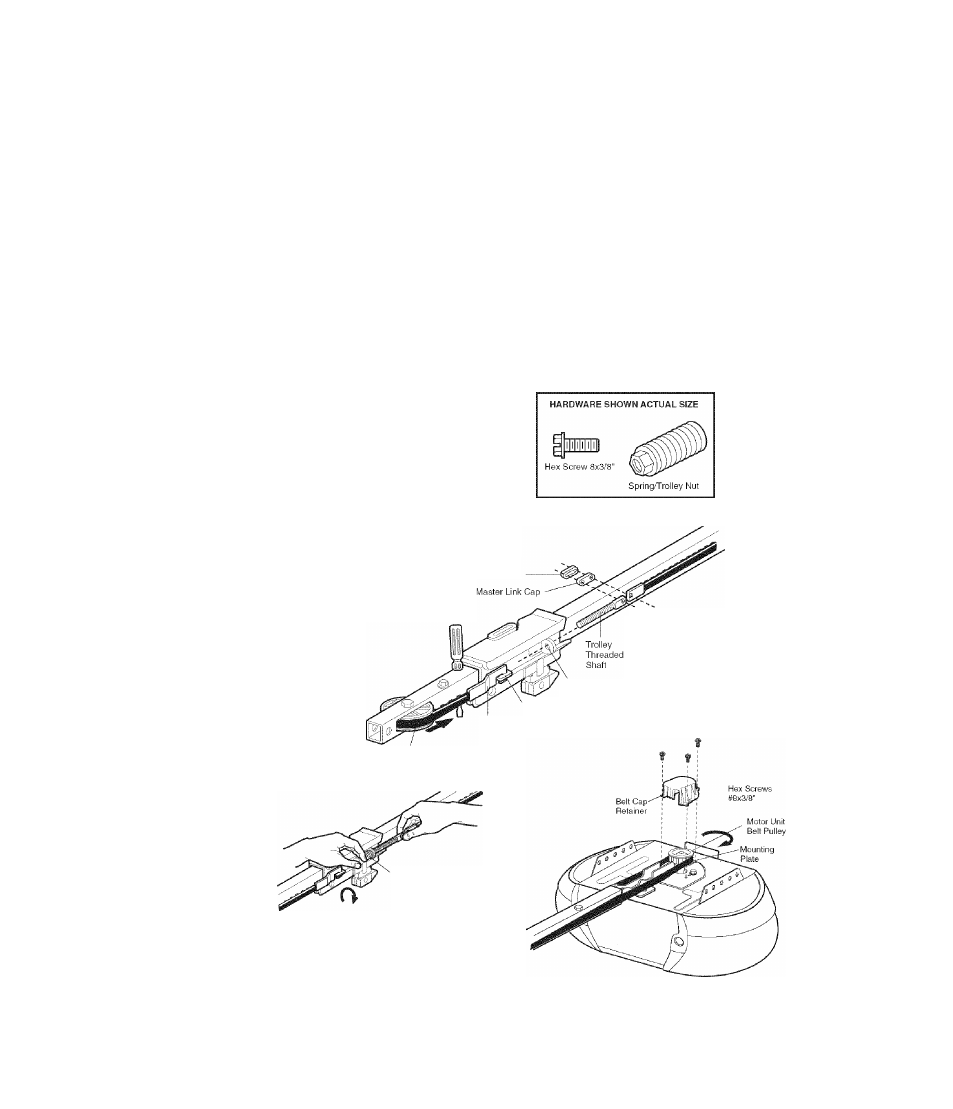
Install the Belt and Attach the Belt
Cap Retainer
1. Pull the belt around the idler pulley and toward the
trolley. The ribbed side must contact the puiley.
2. Hook the trolley connector into the retaining siot on
the troiley as shown.
3. With the troiley against the screwdriver, dispense the
remainder of the beit along the rail length toward the
motor unit and around the sprocket. The sprocket
teeth must engage the belt.
4. Check to make sure the belt is not twisted, then
connect it to the flat end of the trolley threaded shaft
with the master link, as illustrated;
• Push pins of master link bar through holes in end of
belt and trolley threaded shaft.
• Push master link cap over pins and past
pin notches.
• Slide clip-on spring over cap and onto pin notches
until both pins are securely locked
in place.
5. Insert the trolley threaded shaft through the hole in
the trolley. Be sure the beit is not twisted, and the
ribbed side faces the rail.
6. Hold the belt at the trolley shaft as you thread the
spring nut by hand onto the shaft until finger tight
against the trolley. Do not use any tools.
7. Remove the screwdriver.
8. Position the belt cap retainer over the motor unit
sprocket as shown and fasten to the mounting plate
with 8x3/8" hex screws provided.
ASSEMBLY STEP 4
A WARNING
To avoid possible SERIOUS INJURY to fingers from moving
garage door opener:
• ALWAYS keep hand clear of belt pulley while operating
opener.
• Securely attach belt pulley cover BEFORE operating.
Master Link
Clip-On Spring
Pin
Notch
Master
Link Bar
Round
Hole
Trolley
Connector
Retaining
Slot
Idler Pulley
Spring Nut
10