Assembly, Special notice, Save these instructions – Craftsman 944.514610 User Manual
Page 7
Attention! The text in this document has been recognized automatically. To view the original document, you can use the "Original mode".
flames from water heaters, electric
motors or switches, furnaces, etc.
• Store attachment so blade cannot ac
cidentally cause injury.
• Store attachment indoors, out of reach
of children.
If situations occur which are not cov
ered in this manual, use care and
good judgment. If you need assis
tance, contact your Sears Service
Centre.
SPECIAL NOTICE:
Exposure to vibra
tions through prolonged use of gasoline
powered hand tools could cause blood
vessel or nerve damage in the fingers,
hands, and joints of people prone to cir
culation disorders or abnormal swell
ings. Prolonged use in cold weather has
been linked to blood vessel damage in
otherwise healthy people. If symptoms
occur such as numbness, pain, loss of
strength, change in skin color or texture,
or loss of feeling in the fingers, hands,
or joints, discontinue the use of this tool
and seek medical attention. An anti
vibration system does not guarantee the
avoidance of these problems. Users
who operate power tools on a continual
and regular basis must monitor closely
their physical condition and the condi
tion of this unit.
SAVE THESE INSTRUCTIONS
ASSEMBLY
CARTON CONTENTS
Check carton contents against the fol
lowing list.
Model C944.514610
• Pruner attachment
• Shoulder strap
• Upper shoulder strap clamp
• Lower shoulder strap clamp (with
spacer tabs)
• Shoulder strap clamp screws (2)
• Attachment hanger
• Bar sheath
• Chain adjustment tool (bar tool)
• Hex wrench
• Bar and chain oil
Examine parts for damage. Do not
use damaged parts.
NOTE: If you need assistance, or find
parts missing or damaged, contact
your Sears Service Centre.
ASSEMBLY
^WARNING; If received as
sembled, repeat all steps to ensure
your unit is properly assembled and all
fasteners are secure,
TOOLS REQUIRED
• Hex wrench (provided)
INSTALLING PRUNER ATTACH
MENT
CAUTION: When removing or instal
ling attachments, place the unit on a
flat surface for stability.
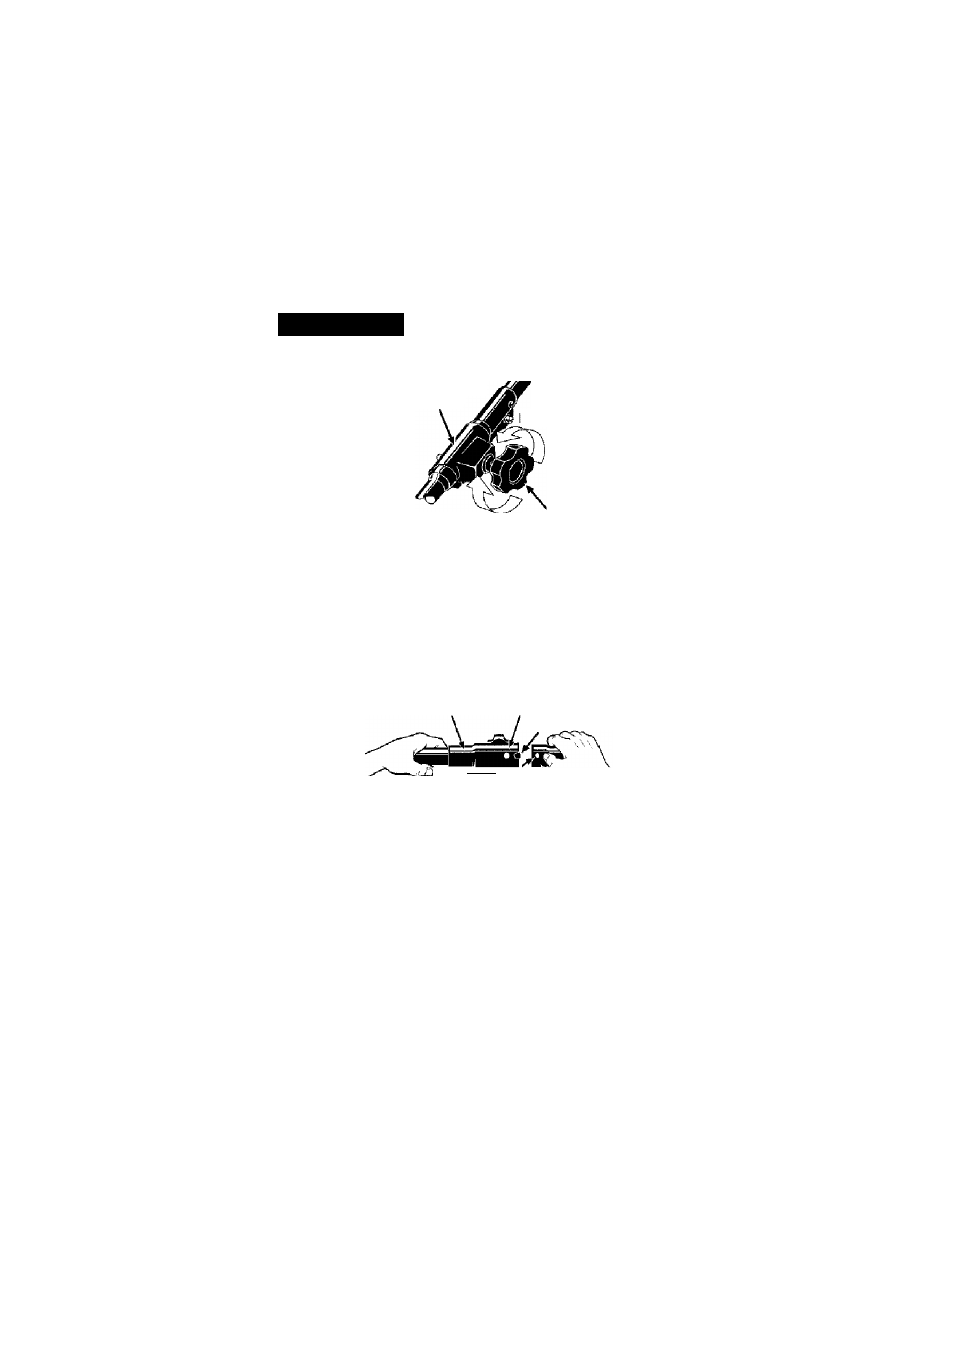
1. Loosen the coupler by turning the
knob counterclockwise.
Coupler
TIGHTEN
LOOSEN
Knob
Remove the shaft cap from the
pruner attachment (if present).
Position locking/release button of
attachment into guide recess of
coupler.
Push the attachment into the cou
pler until the locking/release button
snaps into the primary hole.
Before using the unit, tighten the
knob securely by turning clock
wise.
Coupler Primary Hole
Guide Recess
> * 'Vgy..... 1!1S?»|
R°eleas'i Lower'
Shaft ¿jlon Attachment
^WARNING: Make sure the lock
ing/release button is locked in the pri
mary hole and the knob is securely
tightened before operating the unit.