Warning, Check chain sharpness, Bar maintenance – Craftsman 944.514610 User Manual
Page 12: Lubrication
Attention! The text in this document has been recognized automatically. To view the original document, you can use the "Original mode".
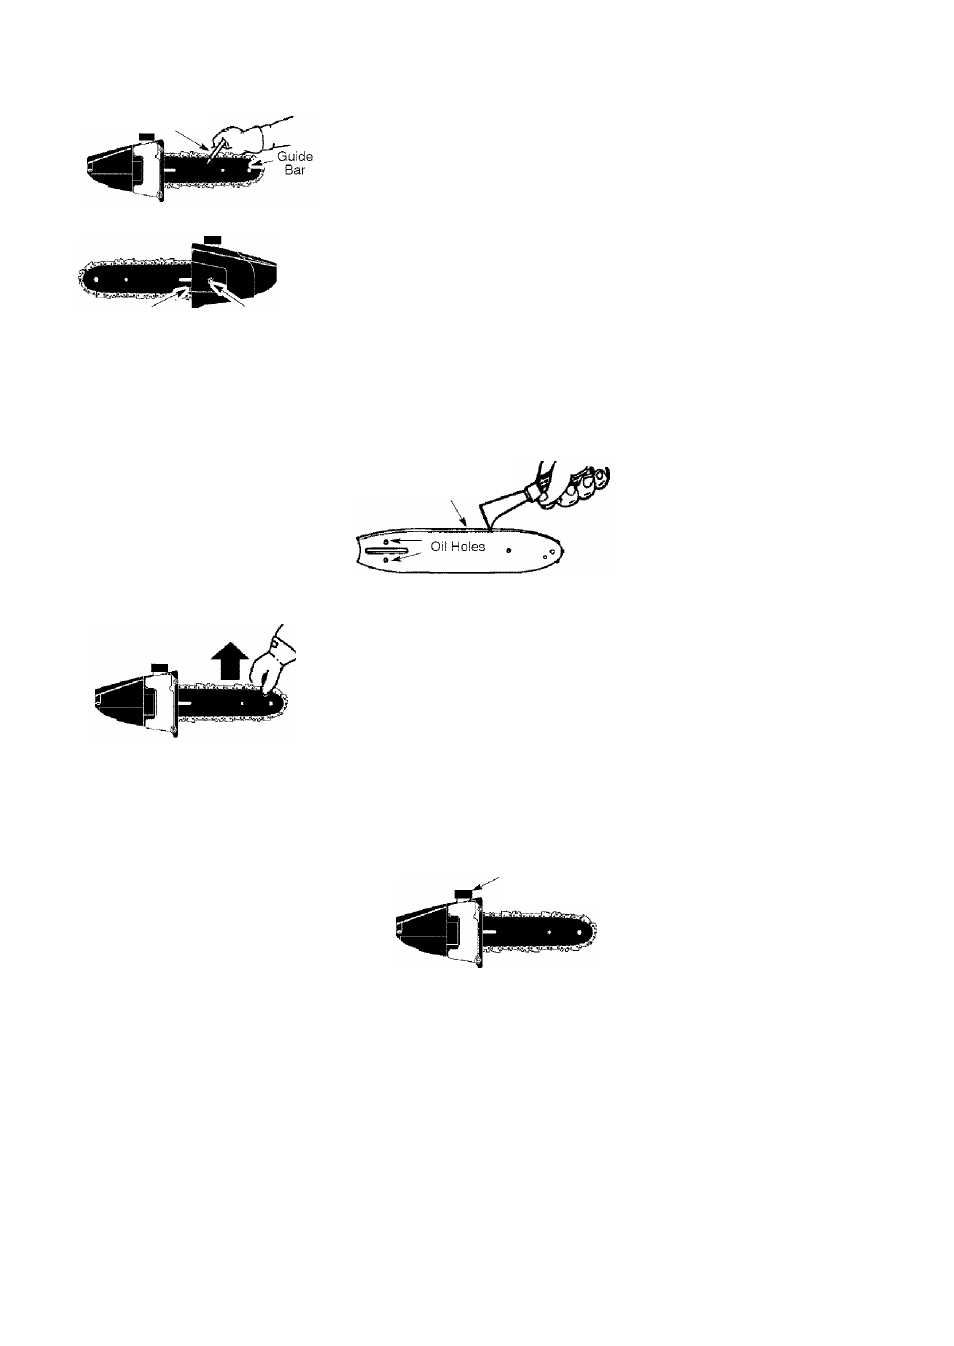
I. Use the screwdriver end of the
chain adjustment tool (bar tool) to
move chain around guide bar to
ensure kinks do not exist. The
chain should rotate freely.
Chain Adjustment Tool
2. Loosen bar clamp nut until it is
finger tight against the bar clamp.
Adjusting
Screw * Bar clamp
nut
3. Turn adjusting screw clockwise
until chain solidly contacts bottom
of guide bar rail. Then, turn adjust
ing screw an additional 1/4 turn.
Adjusting Screw - 1 /4 Turn
'^dD^©
4. Using bar tool, roll chain around
guide bar to ensure all links are in
bar groove.
5. Lift up tip of guide bar to check for
sag. Release tip of guide bar, then
turn adjusting screw 1 /4 turn clock
wise. Repeat until sag does not
exist.
6. While lifting tip of guide bar, tighten
bar clamp nut securely with the bar
tool.
8
Use the screwdriver end of the bar
tool to move chain around guide
bar.
if chain does not rotate, it is too
tight. Slightly loosen bar clamp nut
and loosen chain by turning the ad
justing screw 1/4 turn counterclock
wise. Retighten bar clamp nut.
9. If chain is too loose, it will sag below
the guide bar and needs to be tight
ened following above procedure.
^WARNING;
DO NOT
operate the
pruner if the chain is loose. If the prun-
er is operated with a loose chain, the
chain could jump off the guide bar and
result in serious injury.
CHECK CHAIN SHARPNESS
A sharp chain makes wood chips. A
dull chain makes a sawdust powder
and cuts slowly. See
CHAIN SHARP
ENING
in the
SERVICE AND ADJUST
MENTS
section.
BAR MAINTENANCE
If your pruner cuts to one side, has to
be forced through the cut, or been run
with an improper amount of bar lubri
cation it may be necessary to service
your bar. A worn bar will damage your
chain and make cutting difficult.
After each use, ensure
ON/OFF
switch is
in the
OFF
position, then dean all saw
dust from the guide bar and sprocket
hole.
To maintain guide bar:
• Move
ON/OFF
switch to the
OFF
posi
tion and disconnect spark plug {or dis
connect powerhead from power
source).
• Loosen and remove bar clamp nut
and chain brake. Remove bar and
chain from pruner.
• Clean the oil holes and bar groove
after each 5 hours of operation.
Remove Sawdust From
Guide Bar Groove
Burring of guide bar rails is a normal
process of rail wear. Remove these
burrs with a flat file.
When rail top is uneven, use a flat
file to restore square edges and
sides.
- File Rail Edges-
and Sides
Square
'Iff
Worn Groove
Correct Groove
Replace guide bar when the groove is
worn, the guide bar is bent or cracked,
or when excess heating or burring of
the rails occurs. If replacement is nec
essary, use only the guide bar speci
fied for your pruner in the repair parts
list.
LUBRICATION
■ Bar Oil
Fill Cap
See GUIDE BAR AND CHAIN OIL un
der the OPERATION section.
12