Service and adjustments, Service & adjustments, War n – Craftsman 944.514610 User Manual
Page 13: Chain sharpening, Chain replacement, Chain adjustment
Attention! The text in this document has been recognized automatically. To view the original document, you can use the "Original mode".
SERVICE AND ADJUSTMENTS
A
WAR N
I
N G
: Always stop unit
and disconnoct spark plug wire (or
disconnect powerhead from power
source) before performing mainte
nance, service, or adjustments except
for carburetor adjustments.
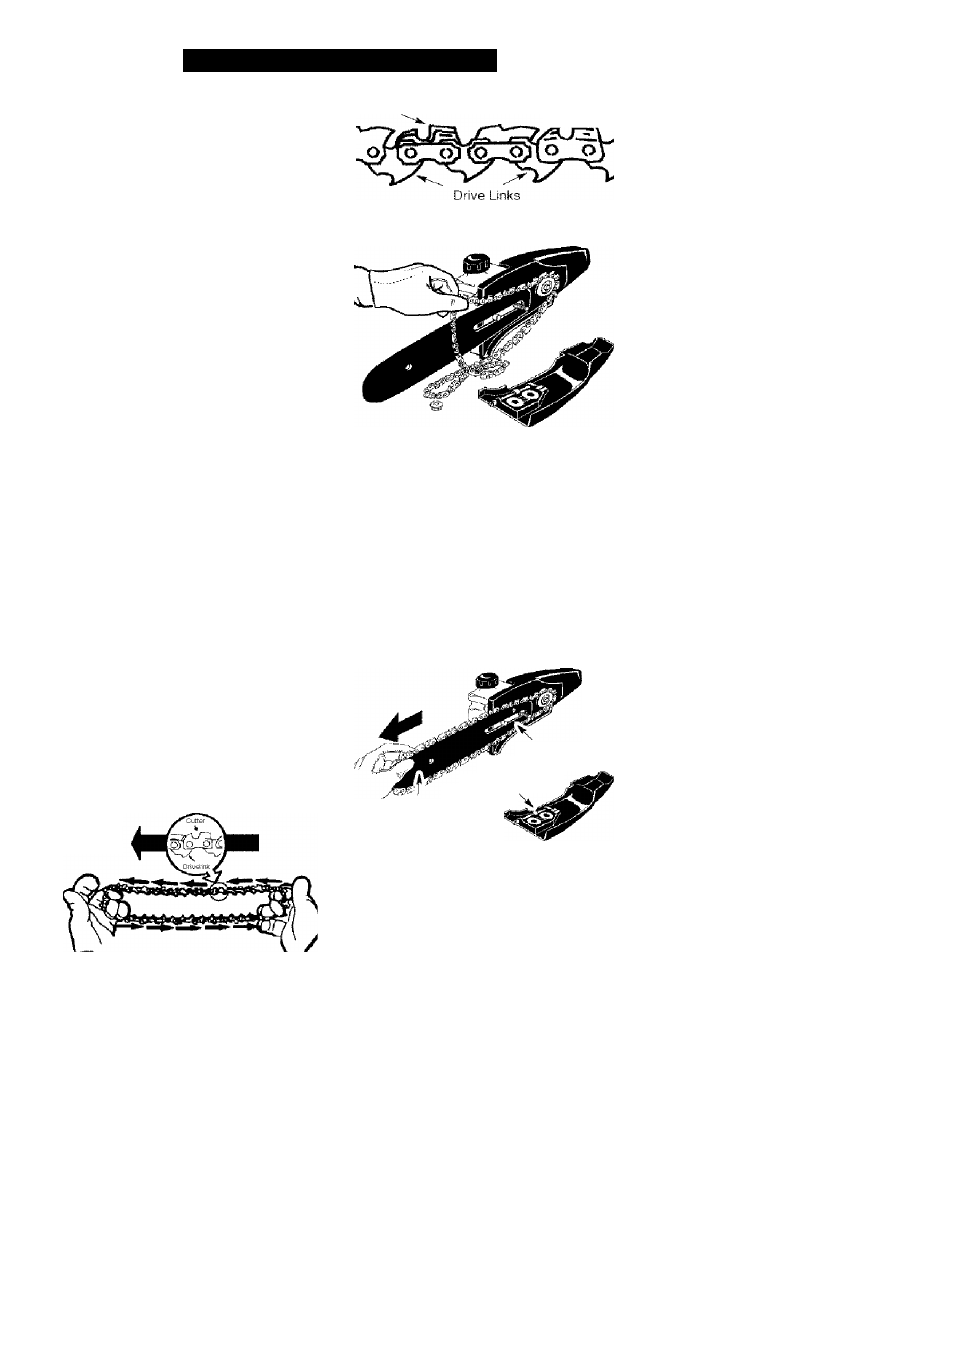
CHAIN SHARPENING
Chain sharpening is a complicated task
that requires special tools. We recom
mended you refer chain sharpening to a
professional chain sharpener.
CHAIN REPLACEMENT
^WARNING: Wear protective
gloves when handling chain. The
chain is sharp and can cut you even
when it is not moving.
It is normal for a new chain to stretch
during the first 15 minutes of operation.
You should recheck your chain tension
frequently and adjust the chain tension
as required. See CHAIN TENSION sec
tion.
Replace the old chain when it becomes
worn or damaged. Use only the Low-
Kickback replacement chain specified in
the repair parts list.
TO REPLACE CHAIN:
1.
Move ON/OFF switch to the OFF
position and disconnect spark plug
(or disconnect powerhead from
power source),
2. Remove bar clamp nut.
3. Remove bar clamp.
4. Turn adjusting screw by hand
counterclockwise until adjusting
pin just touches the stop.
5.
Slide guide bar behind sprocket
until guide bar stops against
sprocket.
6. Remove the old chain.
7. Carefully remove new chain from
package. Hold chain with the drive
links as shown.
Tip of
Bar
Cutters
Depth Gauge
8. Place chain over sprocket, fitting
the drive links in the sprocket.
9. Fit bottom of drive links between the
teeth in the sprocket in the nose of
the guide bar.
10. Fit chain drive links into bar
groove.
11. Pull guide bar forward until chain is
snug in guide bar groove. Ensure
all drive links are in the bar groove.
12. Now, install bar clamp making sure
the adjusting pin is positioned in
the lower hole in the guide bar.
Lower Hole
JCUTTERS MUST FACE iN^
DiRECTION OF ROTATION
^ Adjusting Pin
Guide Bar
13.
Install bar clamp nut and finger
tighten only. Do not tighten any fur
ther at this point. Proceed to the
CHAIN ADJUSTMENT section.
CHAIN ADJUSTMENT
See CHECK CHAIN TENSION in MAIN
TENANCE section.
13