Assembly – Craftsman 509347 User Manual
Page 16
16
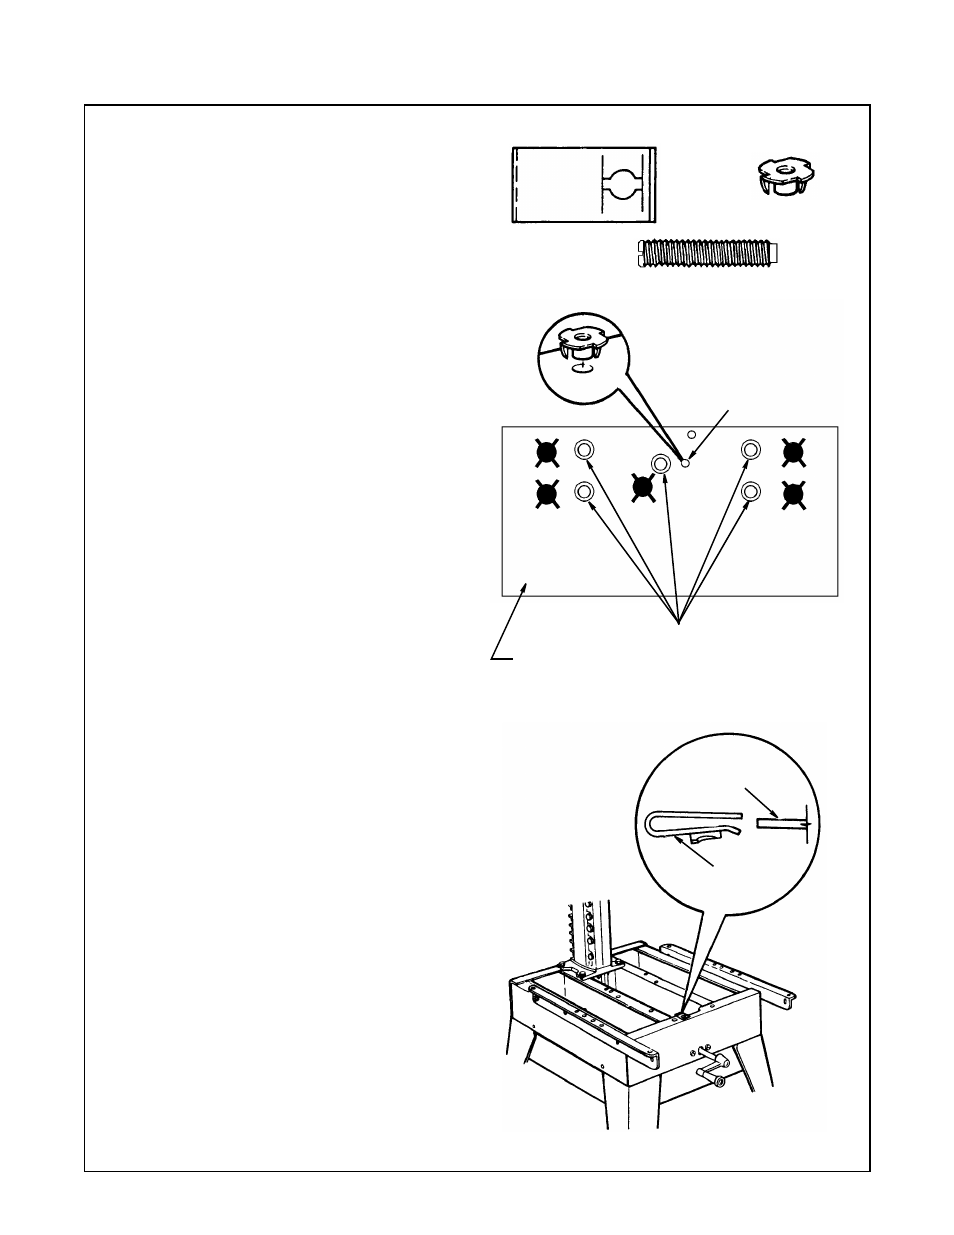
Installing Front Table
1. Set out:
- front table
- tee nut
- 1/4 " U-clip
- 1/4" diam. x 7/8" long cup point set
screw
- four 1/4" diam. x 1" long pan head
screws
- 1/4" dia. x 1-3/4" long pan head screw
- five 17/64" I.D. x 5/8" O.D. flat washers
- four 1/4" lockwashers
- four 1/4" diam. hex nuts
2. Identify top and bottom of table: top has
counterbored holes. Place table bottom
side up on solid surface. Hammer tee nut
into leveling hole. (This hold is not counter-
bored from the top).
3. Snap u-clip onto front edge of base so
hole lines up with hold just to the left of cen-
ter notch.
4. Place table, top side up, on saw so cen-
ter counterbored hole lines up with hole in u-
clip. NOTE:
Table will extend over front edge
of saw frame.
Channel
U-Clip
Tee Nut
(Install from bottom)
Table Mounting Holes
Top of Table
(Counterbored Holes Up
~
Assembly
- TS3650 (8 pages)
- 113.24181 (40 pages)
- 572.24700 (6 pages)
- 137.21194 (44 pages)
- 118.22000 (15 pages)
- 137.21807 (56 pages)
- 113.244513 (20 pages)
- 315.24234 (42 pages)
- 351.21833 (12 pages)
- 113.298761 (56 pages)
- 137.248830 (31 pages)
- 113.2472T0 (40 pages)
- 286.17589 (48 pages)
- 137.218030 (30 pages)
- 137.21602 (36 pages)
- 509399 (52 pages)
- 137.21236 (29 pages)
- 137.21239 (50 pages)
- CONTRACTOR 351.21833 (36 pages)
- 286.25574 (48 pages)
- 286.26829 (46 pages)
- 315.220381 (82 pages)
- 113.248510 (52 pages)
- 315.235380 (38 pages)
- 315.228110 (54 pages)
- 315.212220 (39 pages)
- 137.212290 (28 pages)
- 917.27103 (60 pages)
- 315.216360 (26 pages)
- 172.267700 (18 pages)
- 315.108330 (20 pages)
- 315.108990 (20 pages)
- 315.212080 (36 pages)
- 315.212100 (38 pages)
- 315.212100 (4 pages)
- 315.212110 (38 pages)
- 315.212120 (36 pages)
- 315.212130 (36 pages)
- 315.214490 (32 pages)
- 315.214500 (34 pages)
- 315.214770 (32 pages)
- 315.228310 (64 pages)
- 315.228390 (66 pages)
- 315.228410 (8 pages)