Tuner .h-» cd —. tape, To change the preset timer settings, To check the preset timer settings – Sony LBT-D670AV User Manual
Page 27: To change the timer, To cancel the timer, Timer-recording radio programs, To cancel the timer settings, To check the timer settings, To change the timer settings
Attention! The text in this document has been recognized automatically. To view the original document, you can use the "Original mode".
5
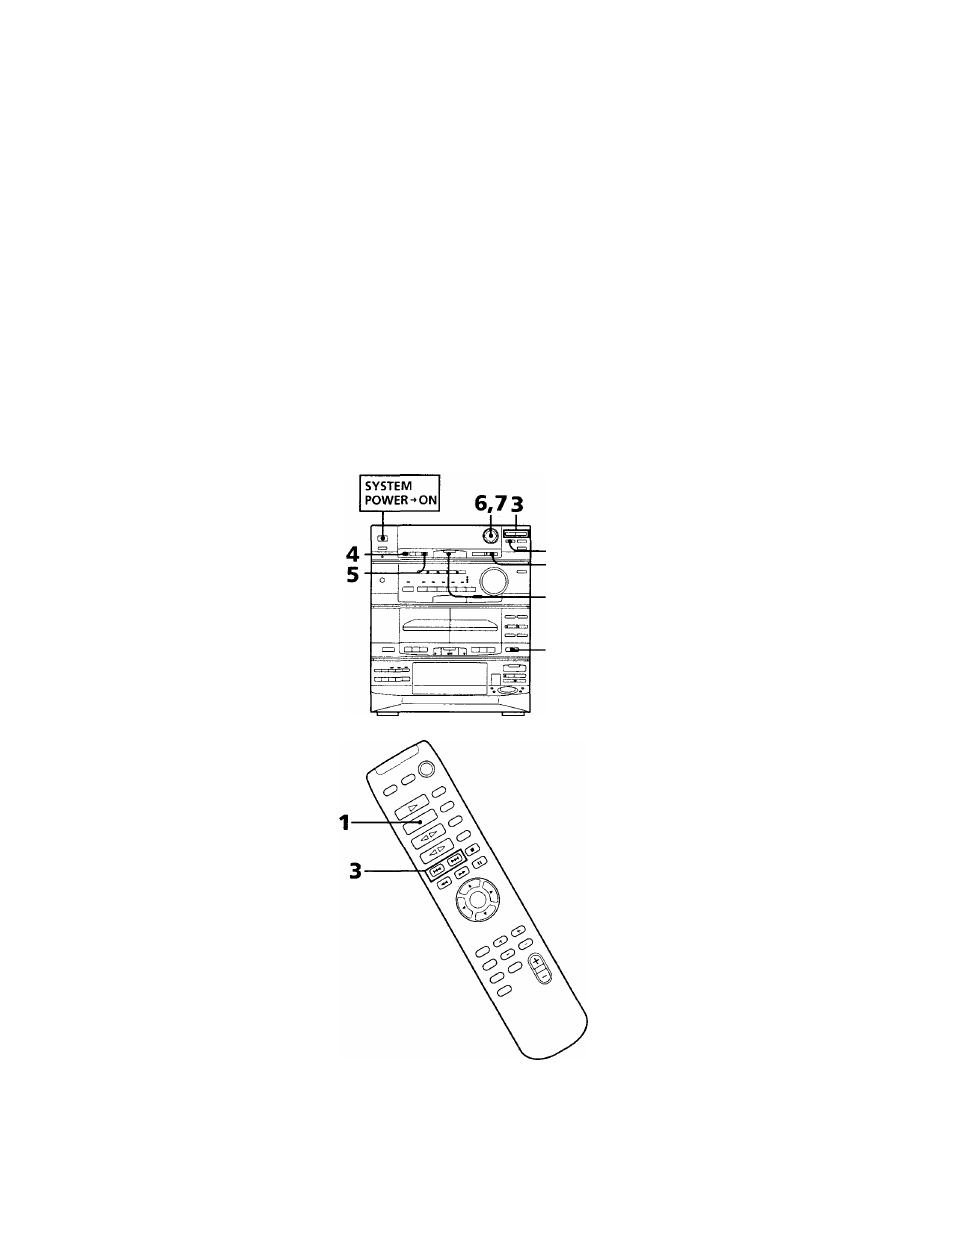
Press ◄ or ► (CURSOR CONTROL) to
set the hour you want the system to turn
on, then press ENTER/NEXT.
Set the minutes in the same way. "OFF"
appears and the hour digits flash in the
display.
flashing
6
Press ◄ or ► (CURSOR CONTROL) to
set the hour you want the system to turn
off, then press ENTER/NEXT.
Set the minutes in the same way.
7
Press ◄ or ► (CURSOR CONTROL) to
select a sound source.
The display changes as follows:
TUNER .H-» CD —. TAPE
t_____________ i
„ W A A 4 .
« T
u n e r
»
I
flashing
8
Press ENTER/NEXT.
The preset items appear in order in the
display.
9
Press SYSTEM POWER to turn off the
system.
The power will turn on at the preset
time and the music will play at the
volume level you have adjusted.
At the turn-off time, the power will go
off again.
To change the preset timer settings
Start over from step 1.
To check the preset timer settings
1
Press DAILY 1 or DAILY 2 whichever
you have set.
"TIMER OFF" appears in the display.
2
Press DAILY 1 or DAILY 2 again.
The preset items appear in order in the
display, then "DAILY 1 ON" or "DAILY
2 ON" appears in the display.
To change the timer
Press the desired timer button.
To cancel the timer
Press DAILY 1 or DAILY 2 whichever
you have set.
"TIMER OFF" appears in the display.
Notes
• You cannot set DAILY 1 and DAILY 2 to
the same time.
• You cannot set the timer if the timer on
and off times are the same.
• When you set the sleep timer, the daily
timer does not turn on until the system
turns off by the sleep timer.
• You cannot activate daily timer and
recording timer at the same time.
Timer-Recording
Radio Programs
You can set the timer to record the radio
programs. This timer works only once for
each setting. The volume level is
automatically set to the minimum.
Make sure the clock has been set correctly
and preset the station beforehand. See
"Presetting Radio Stations."
2
6.7
1
8
2
Press TUNING MODE repeatedly until
"PRESET" appears in the display.
3
Press TUNING +/- (or /►►! on the
remote) to tune in a preset station.
4
Press TIMER SET.
"SELECT" and "TIMER" appear
alternately in the display.
5
Press REG on the tuner.
"ON" appears and the hour digits and
"AM" flash in the display.
1
Press TUNER/BAND repeatedly until
the band you want appears in the
display.
flashing
6
Set the hour you want to start recording
by pressing or ► (CURSOR
CONTROL), then press ENTER/NEXT.
Set the minutes in the same way.
"OFF" appears and the hour digits flash
again.
7
Set the hour you want to stop recording
by pressing or ► ( CURSOR
CONTROL), then press ENTER/NEXT.
Set the minutes in the same way.
The preset items appear in order in the
display.
8
Press = EJECT and insert a tape in deck
B with the side you want to record
facing forward.
Recording always starts from the front
side. If necessary, select the direction
mode. You can use TYPE I (normal) or
TYPE II (Cr02) tapes.
9
Press SYSTEM POWER to turn off the
system.
The power will turn on at the preset
time and the recording will start with
the minimum volume level
automatically.
At the turn-off time, the power will go
off again.
To cancel the timer settings
Press REC on the tuner so that "TIMER
REC" disapprears from the display. Press
REC again to activate the timer.
To check the timer settings
Press REC twice in succession.
To change the timer settings
Repeat step 1 to 9.
Notes
•
The band and station will be recalled as
you set them, but the recording does not
start if the system power is on.
• You cannot activate recording timer and
daily timer at the same time.
Chapter 7: Additional Features
27