Using on-screen menus, Menu operating buttons, Menu^uide – Sony PVM-2950Q User Manual
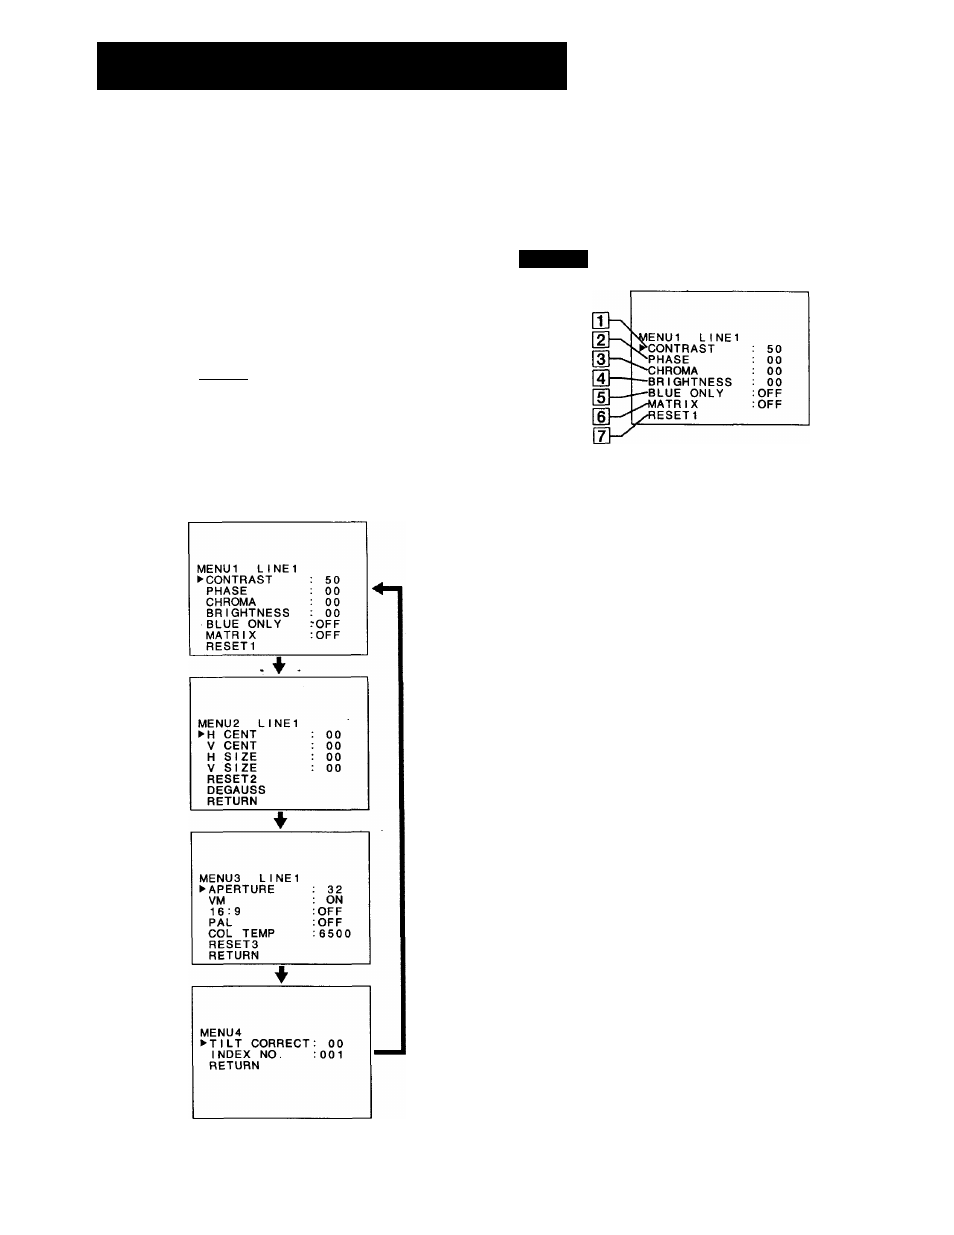
Page 8: Menu 1, T] contrast, 3] chroma, H brightness, D blue only, 6] matrix, S reset1
Attention! The text in this document has been recognized automatically. To view the original document, you can use the "Original mode".
Using on-screen menus
Ojpiirâtihg thrôülh^élil^^^
M '»■r 4- »V#
There are four buttons (keys) on the monitor and the remote
commander for menu operations.
To display a menu, first press MENU. Press + or - to move
the cursor (►) and press ENTER to select an item.
To return to the normal screen, press the selected line input
button (key).
Menu operating buttons
Remote commander
SELECT
(
menu
^
Monitor
□
SELECT
□
Each time you press MENU, the screen changes as shown
below. For details see the following guide.
' Menu^uide^ .
•
You can adjust the picture for each line input. Select the line
input by pressing the line input button (key) before making
adjustments.
The items on Menu 4 are common for all line inputs.
Menu 1
[T] CONTRAST
Press + to increase the contrast and press - to decrease it.
\2}
PHASE
Press + to make the skin tones greenish and press - to
make them purplish. (NTSC signal only)
(Set MATRIX to OFF when adjusting this item.)
[3]
CHROMA
Press + to increase the color intensity and press - to
decrease it.
(Set MATRIX to OFF when adjusting this item.)
[H BRIGHTNESS
Press + to make the picture brighter and press - to make
it darker.
[D BLUE ONLY
Select ON to turn off the red and green signals. Only a
blue signal is displayed on the screen. This facilitates
"chroma" and "phase"(NTSC signal only) control
adjustments.
[6] MATRIX
Select ON to activate the matrix circuit that may correct
skin tones. (NTSC signal only)
S RESET1
Select to restore the factory settings in MENU 1.
8