Qmark Specialty Ceiling Fans User Manual
Page 3
10. Restore power.
11. After completing installation, test run fan in normal
operating manner. Inspect for any possible shake or
wobble which may be caused by binding as a result
of “tight cable”. If this should happen, shut off power
supply and re-check instructions to correct problem.
NOTE: When any solid state motor speed control is
used, a humming noise will be present in the fan on low
speed. This hum in no way affects the operation of the
fan and is acceptable in most industrial installations.
Maintenance
WARNING: TO REDUCE THE RISK OF INJURY
DISCONNECT
THE
POWER
SUPPLY
BEFORE
SERVICING. UNPLUG FAN WHEN CLEANING OR
SERVICING.
CLEANING
In industrial applications where a moderate amount of
dirt has accumulated, wipe fan off with a damp cloth. In
agricultural applications, a pressure washer may be
used to clean away heavier dirt accumulation. Never use
flammable solvents.
LUBRICATION
Ball bearings are permanently lubricated and require no
further lubrication.
CAUTION: Before servicing or cleaning unit, switch
power off at service panel and lock service
disconnecting means to prevent power from being
switched
on
accidentally.
When
the
service
disconnecting means cannot be locked, securely
fasten a prominent warning device, such as a tag, to
the service panel.
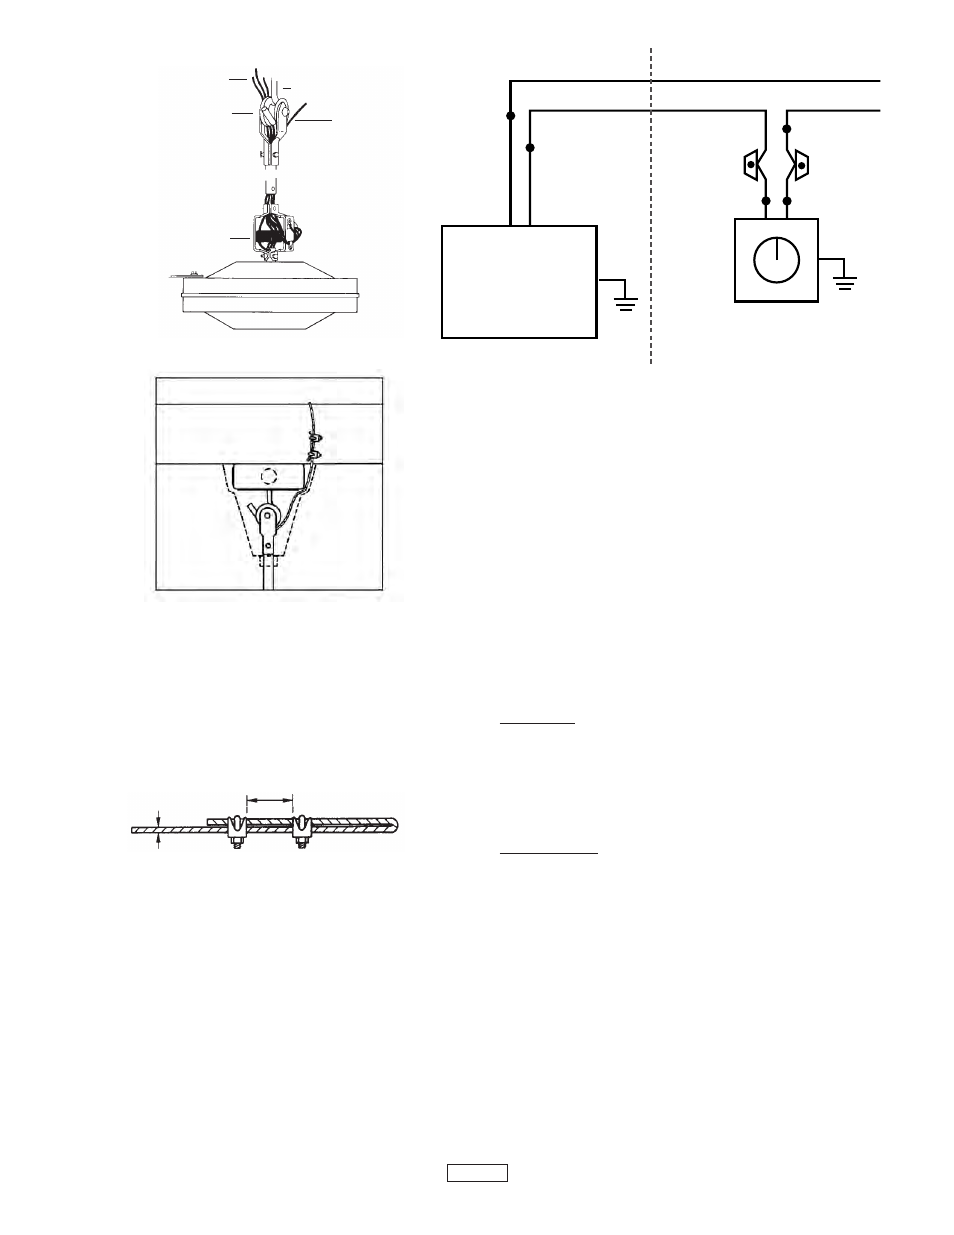
6. When hanging fan on factory supplied “J” hook,
make sure cable at top of rod is positioned behind “J”
hook as illustrated in Figure 4.
IMPORTANT NOTICE: It is important to note the proper
installation position of the cable clamps as illustrated in
Figure 5. To obtain maximum holding power, install u-bolt
section of clip on dead or short end of cable and saddle
on long end of cable. Improper installation reduces the
efficiency of the connection by as much as 40 percent.
7. This fan is pre-wired with a cord with an equipment
grounding conductor which must be used with a
grounded receptacle. The flexible cord is attached
permanently to the fan.
CAUTION: Do not use an extension cord with this
fan. Use #12 wire from power source to receptacle.
Making sure the power is off, hang the fan and plug
into power outlet.
NOTE: Hook should engage rubber roller only (G) and
not the cord (H).
8. Slide the upper canopy (B) up the rod within 1/4” of
the ceiling or beam and securely tighten the
set screw (F).
9. If a remote speed control is to be used refer to the
installation included with that control for proper
installation and wiring.
HOOK
ELECTRICAL WIRE
RUBBER
ROLLER
SAFETY CABLE
SAFETY CABLE
Figure 3
Figure 5
Figure 6
MOTOR
OPTIONAL
SOLID STATE
REGULATOR
BLACK
WHITE
BLACK
BLACK
WHITE/BLACK
GRD.
GRD.
DRY LOCATION
3
Figure 4