Operation, Lighting instructions – ProTemp PT-150V-GFA User Manual
Page 8
NEVER LEAVE HEATER UNATTENDED WHILE BURNING,
CONNECTED TO A POWER SOURCE, OR WHILE
CONNECTED TO A FUEL SOURCE
© 2014, Pinnacle Products International, Inc.
Propane Forced Air Heater User’s Manual
®
Operation
Lighting Instructions:
Starting the Heater (Ignition)
1. Connect the heater to a three prong (grounded)
power source. You must use a three prong
(grounded) extension cord that is at least 6 feet
long is a minimum of 14 AWG rating.
2. Connect heater to a proper LP cylinder.
3. Turn gas valve CLOCKWISE to off position.
4. Wait five (5) minutes for any glass to clear.
Smell for gas, if you do not smell gas, go to
step 5.
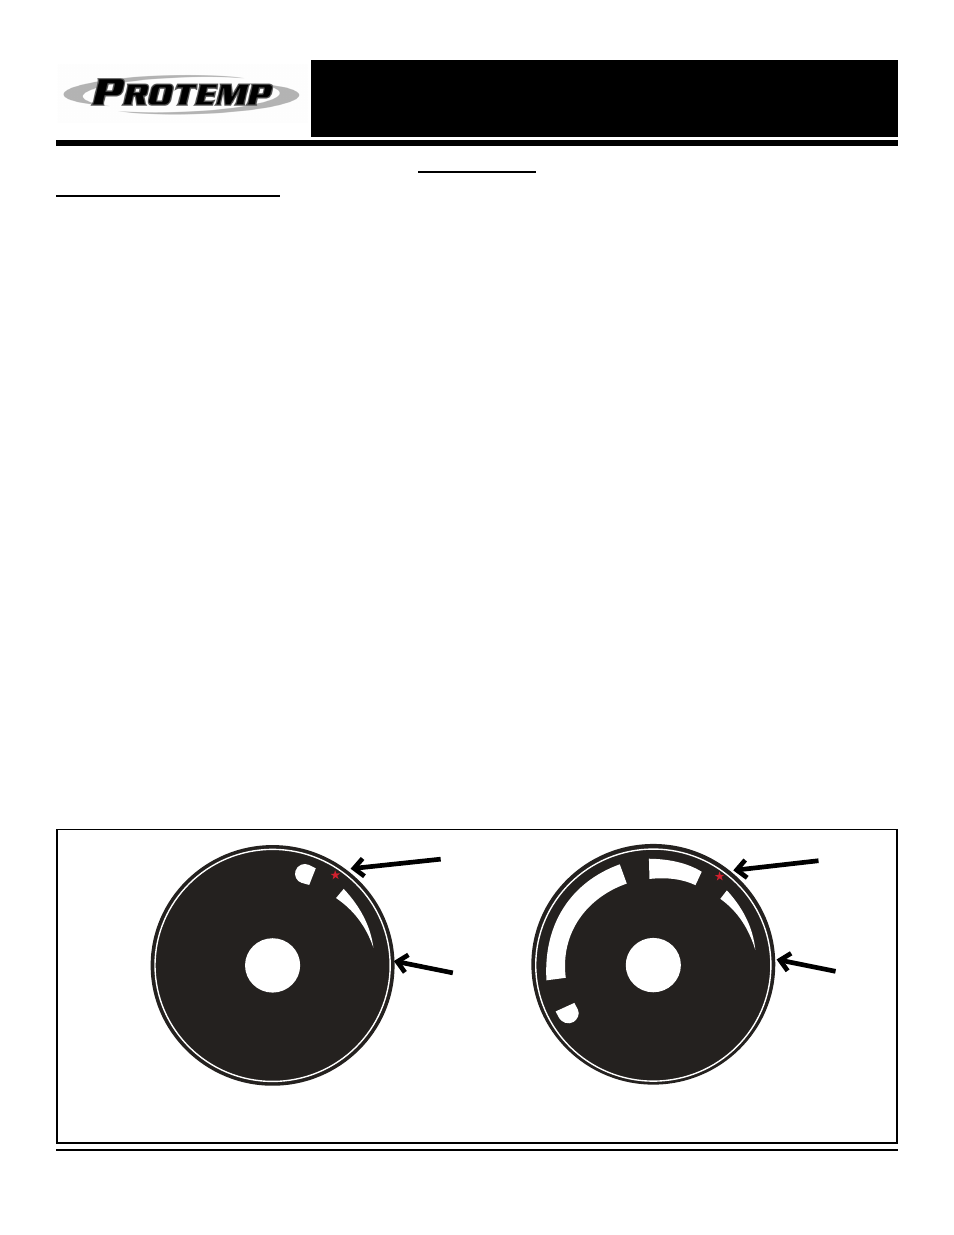
5. Push in and turn gas control knob
COUNTERCLOCKWISE to 1 position. This
will light the burner. If needed, keep pressing
control knob until the burner lights and keep
pressing and turning from “O” (OFF) to 1 on
Piezo electric spark models
(1 on Model 40-GFA).
(See Figure 5)
6. Keep the valve knob depressed for at least
30 seconds after lighting the burner. After 30
seconds, release the valve knob.
7. If the burner does not stay lit, repeat the
lighting procedures.
8. When burner stays lit, turn gas valve knob
COUNTERCLOCKWISE to desired setting
(All models except 40-GFA).
Shutdown Instructions
To Shut Off the Heater:
1. Turn gas valve knob CLOCKWISE to
“O” (OFF) position. (See Figure 5)
2. Turn gas supply OFF by turning the LP
cylinder valve CLOCKWISE to close.
3. Disconnect the power cord.
Test Firing the Heater
Test fire your construction heater following the
lighting instructions applicable to the gas control
system employed.
Leak test all gas connections with 50/50 soap
and water solution prior to start-up. Soap bubbles
indicate a gas leak. DO NOT use a match or
flame to test for gas leaks.
NOTE: Heater surface temperature must be
cold before initiating service, cleaning or
storage.
1
O
1
3
2
O
40-GFA
Valve Knob
60V-GFA-A / 125V-GFA-A / 150V-GFA-A
Valve Knob
OFF
OFF
Ignition
Ignition
Figure 5
7