Keyboard, Removing the keyboard, Replacing the keyboard – Dell Inspiron 1300 User Manual
Page 24
Back to Contents Page
Keyboard
Dell™ Inspiron™ 1300/B120/B130 Service Manual
Removing the Keyboard
1.
Follow the instructions in
Before Working Inside Your Computer
.
2.
Remove the hinge cover. See
Removing the Hinge Cover
.
3.
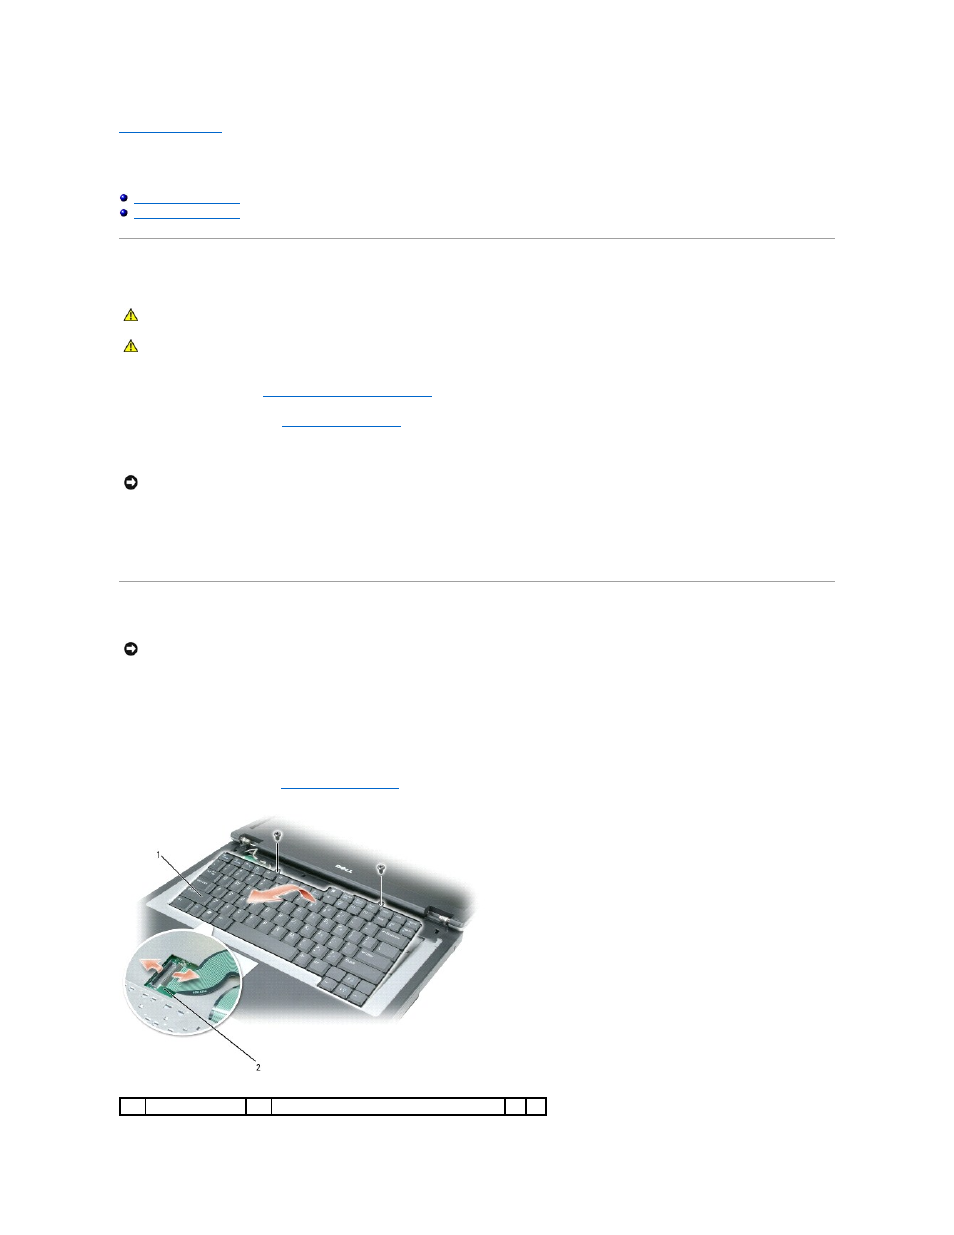
Remove the two screws at the top of the keyboard.
4.
Lift up the keyboard, and hold it up and slightly forward to allow access to the keyboard connector on the system board.
5.
Lift the keyboard connector and slide out the keyboard cable.
Replacing the Keyboard
1.
To replace the keyboard, connect the keyboard connector to the system board.
2.
Place the tabs along the front edge of the keyboard into the palm rest and lay the keyboard down on the palmrest.
3.
Replace the two screws at the top of the keyboard.
4.
Replace the hinge cover. See
Replacing the Hinge Cover
.
CAUTION:
Before working inside your Dell™ computer, read the safety instructions in your
Product Information Guide.
CAUTION:
To prevent static damage to components inside your computer, discharge static electricity from your body before you touch any of
your computer's electronic components. You can do so by touching an unpainted metal surface.
NOTICE:
The keycaps on the keyboard are fragile, easily dislodged, and time-consuming to replace. Be careful when removing and handling the
keyboard.
NOTICE:
To avoid scratching the palm rest when replacing the keyboard, hook the tabs along the front edge of the keyboard into the palm rest, and
then secure the keyboard in place.
1
keyboard
2
system board connector