Display, Display assembly – Dell Inspiron 1150 User Manual
Page 11
Back to Contents Page
Display
Dell™ Inspiron™ 1150 Service Manual
Display Assembly
1.
Follow the instructions in "
Before Working Inside Your Computer
."
2.
Remove the
hard drive
.
3.
Remove the
CD or DVD drive
.
4.
Remove the
keyboard
.
5.
Remove the
EMI shield
.
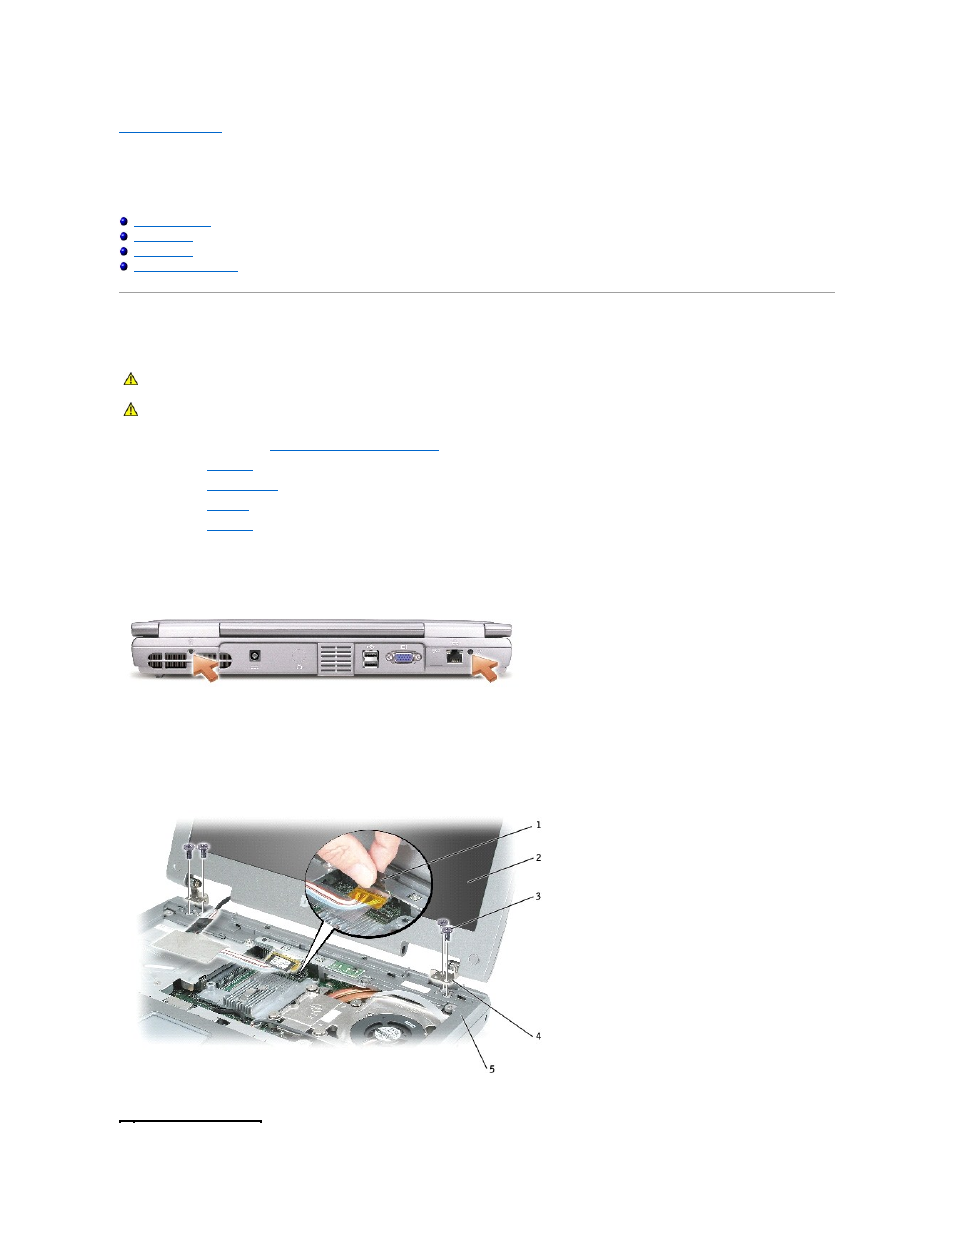
6.
Close the display.
7.
From the back of the computer, remove the two M2.5 x 5-mm screws.
8.
Open the display assembly approximately 180 degrees, and support the display assembly so that it does not open past this position.
9.
Pull straight up on the pull-tab that is attached to the display-feed flex cable to disconnect the cable from the system board.
10.
Remove the two M2.5 x 5-mm screws from each hinge bracket.
CAUTION:
Before performing the following procedures, read the safety instructions in your Owner's Manual.
CAUTION:
To prevent static damage to components inside your computer, discharge static electricity from your body before you touch any of
your computer's electronic components. You can do so by touching an unpainted metal surface.