Replacing the system board – Dell Vostro 1000 (Mid 2007) User Manual
Page 43
16.
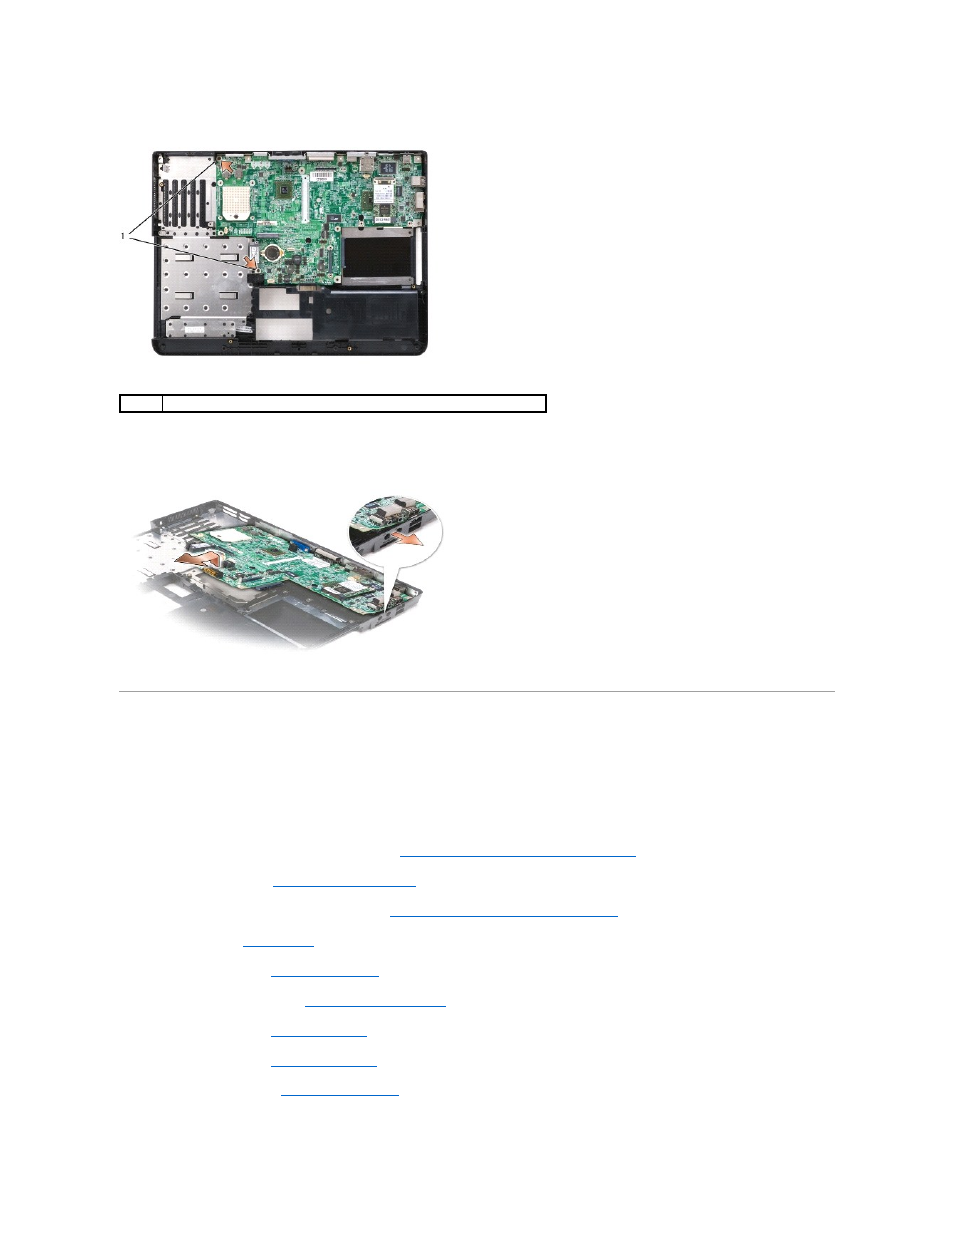
Remove the remaining two M2.5 x 5-mm screws from the system board.
17.
Pull out slightly on the back right side of the computer to release the connectors on the system board from the base.
18.
Lift the front of the system board and slowly ease the connectors out of the computer base and remove the system board.
Replacing the System Board
1.
Carefully place the system board into the computer base.
2.
Replace the two M2.5 x 5-mm screws in the system board.
3.
Replace the two hex-nut video screws in the back of the computer.
4.
Replace the ExpressCard/hard-drive bay assembly (see
Replacing the ExpressCard/Hard-Drive Bay Assembly
).
5.
Replace the processor (see
Replacing the Processor Module
).
6.
Replace the processor thermal-cooling assembly (see
Replacing the Processor Thermal-Cooling Assembly
).
7.
Replace the fan (see
Replacing a Fan
).
8.
Replace the palm rest (see
Replacing the Palm Rest
).
9.
Replace the display assembly (see
Replacing the Display Assembly
).
10.
Replace the Mini-Card (see
Replacing a Mini-Card
).
11.
Replace the keyboard (see
Replacing the Keyboard
).
12.
Replace the hinge cover (see
Replacing the Hinge Cover
).
1
M2.5 x 5-mm screws (2)