Organizing_your_cables, Removing_the_stand, Wall_mounting_(optional) – Dell P2014H Monitor User Manual
Page 13: Organizing the cables, Attaching the cable cover, Removing the stand
24
Setting Up the Monitor
Setting Up the Monitor
25
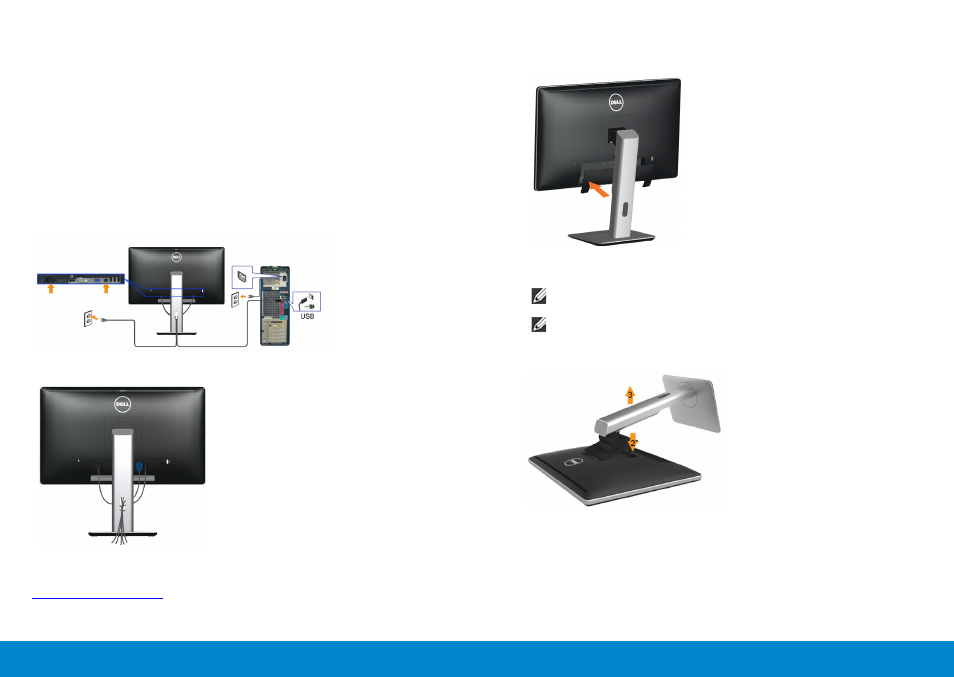
Connecting the USB Cable
After you have completed connecting the DVI/VGA/DisplayPort cable,
follow the procedures below to connect the USB cable to the computer and
complete your monitor setup:
1. Connect the upstream USB port (cable supplied) to an appropriate USB
port on your computer. (See bottom view for details.)
2. Connect the USB peripherals to the downstream USB ports on the
monitor.
3. Plug the power cables for your computer and monitor into a nearby outlet.
4. Turn on the monitor and the computer.If your monitor displays an image,
installation is complete. If it does not display an image, see Solving Problems.
5. Use the cable slot on the monitor stand to organize the cables.
Organizing the Cables
After attaching all necessary cables to your monitor and computer, (See
for cable attachment,) use the cable management
slot to organize all cables as shown above.
Attaching the Cable Cover
Removing the Stand
NOTE: To prevent scratches on the LCD screen while removing the
stand, ensure that the monitor is placed on a clean surface.
NOTE: This is applicable for a monitor with a stand. When any other
stand is bought, please refer to the respective stand setup guide for
set up instructions.
To remove the stand:
1. Place the monitor on a flat surface.
2. Press and hold the stand release button.
3. Lift the stand up and away from the monitor.