Display panel, Removing the display panel – Dell Inspiron 1520 (Mid 2007) User Manual
Page 27
2.
Starting at any corner, use your fingers to gently snap the bezel into place to secure it to the display panel.
3.
Replace the six M2.5 x 4.2-mm shoulder screws around the display bezel.
4.
Replace the four rubber display bumpers and two mylar screw covers around the display bezel.
5.
Replace the display assembly (see
Replacing the Display Assembly
6.
Replace the keyboard (see
Replacing the Keyboard
).
7.
Replace the hinge cover (see
Replacing the Hinge Cover
).
Display Panel
Removing the Display Panel
1.
Follow the instructions in
Before You Begin
.
2.
Remove the hinge cover (see
Removing the Hinge Cover
).
3.
Remove the keyboard (see
Removing the Keyboard
).
4.
Remove the display assembly (see
).
5.
).
6.
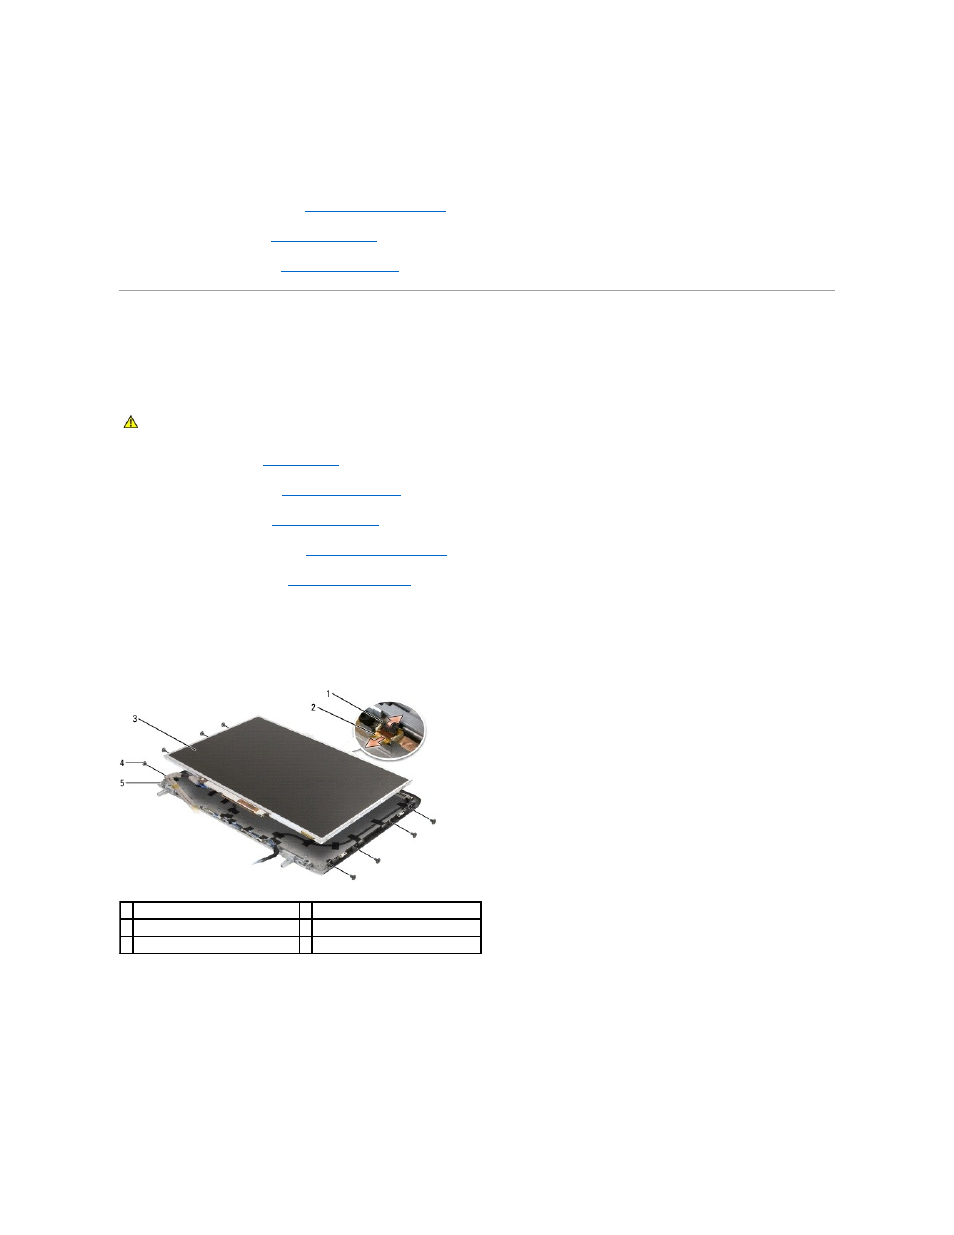
Remove the eight M2 x 3-mm screws (four on each side of the display panel) from around the display panel.
7.
Lift the top of the display panel, then rotate the camera/microphone connector latch upward to release the camera/microphone cable.
8.
Lift the display panel out of the display cover.
9.
Use the pull tab to disconnect the bottom flex-cable connector from the inverter connector.
10.
Press inward on the metal clamps on both sides of the top flex-cable connector and gently pull to disconnect the top flex-cable connector from the
display locking connector.
CAUTION:
Before you begin the following procedure, follow the safety instructions in the Product Information Guide.
1 camera/microphone connector latch 2 camera/microphone cable connector
3 display panel
4 M2 x 3-mm screws (8)
5 display cover