Replacing the floppy drive – Dell OptiPlex GX400 User Manual
Page 12
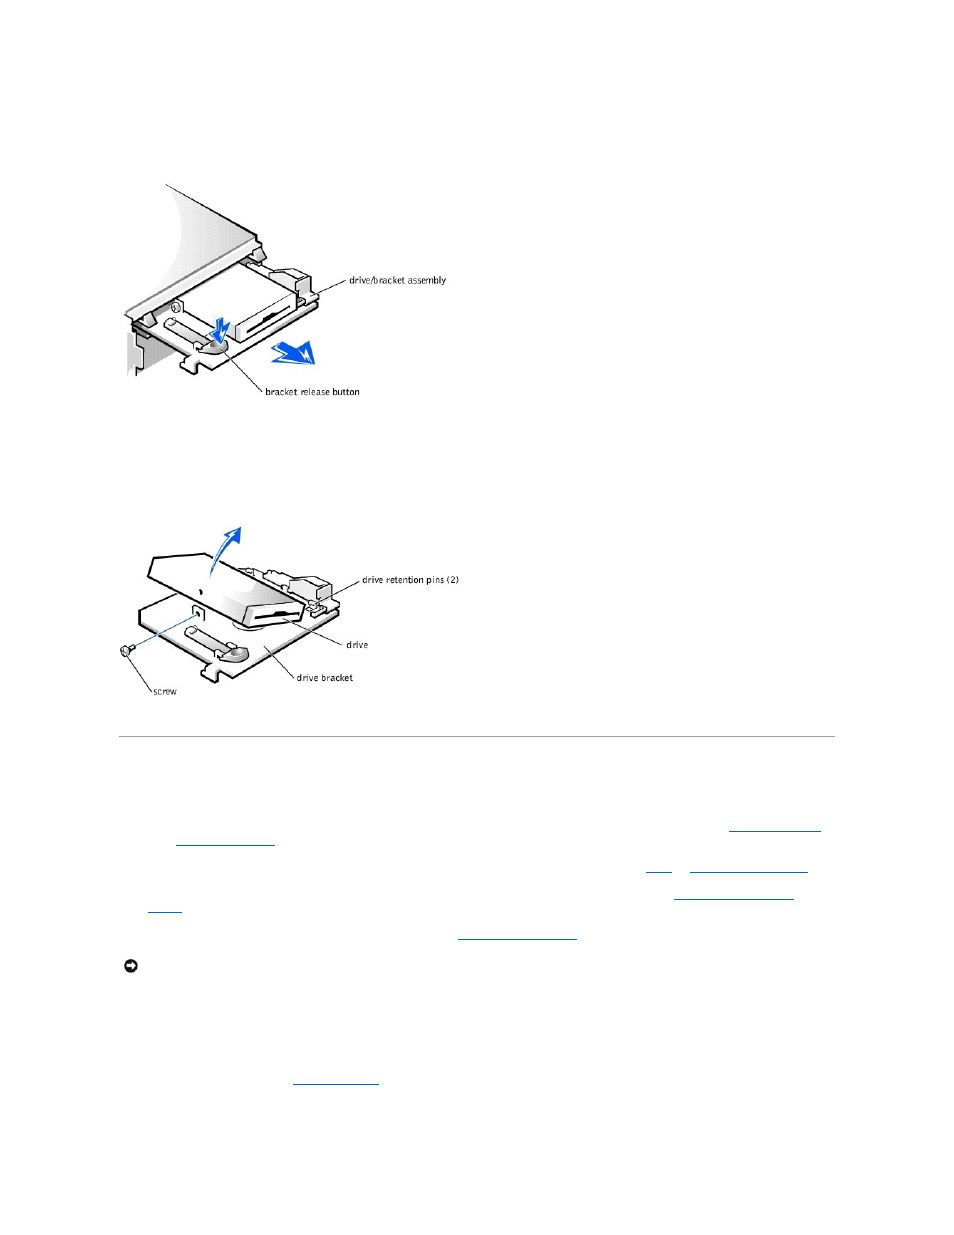
5. Press the green floppy-drive bracket release button and slide the drive assembly out of the chassis.
Removing the Floppy-Drive Bracket
6. Remove the mounting screw.
7. Rotate the left side of the floppy drive upward and lift it free from the drive bracket.
Removing the Floppy Drive from the Bracket
Replacing the Floppy Drive
1. Mount the floppy drive on the bracket:
b. Lower the left side of the floppy drive downward and secure it to the bracket with the screw you removed in
."
3. Connect the interface cable for the drive. To locate this connector, see "
System Board Components
."
4. Connect a DC power cable to the power input connector on the back of the drive.
5. Ensure that all cables are firmly connected. Fold cables out of the way to provide airflow for the fan and cooling vents.
6. Rotate the power supply back into position until the securing tab snaps into the release latch.
7. Replace the computer cover and
restart the computer
.
8. Run the Dell Diagnostics to verify that the drive is operating properly.
NOTICE:
To avoid possible damage, you must match the colored strip on the interface cable with pin 1 on both the drive and system board connectors.