Dell PowerVault 220S (SCSI) User Manual
Page 27
Removing and Replacing Parts : Dell PowerVault 220S and 221S Systems Service Manual
file:///C|/Users/rishi_sood/Desktop/220s/en/sm/remove.htm[3/7/2013 12:09:15 PM]
Replacing a Power Supply in Systems With Redundant Power Supplies
NOTICE:
If you have a system with two power supplies, the power supplies are hot-pluggable. You can install or remove one of the two power supplies while the system is turned
on. If you have a system with only one power supply, you must turn off the system before replacing the power supply (see "
Replacing a Power Supply in Systems With
NOTE:
When a power supply fails in systems using redundant power supplies, the fan speed of the cooling module attached to the redundant power supply increases to provide
additional cooling. However, if you are removing a fully functioning power supply, the fan speed of the cooling module attached to the redundant power supply will increase when
the power supply that is removed is turned off or unplugged, and will decrease when it is removed from the system.
1. Turn off the power on the failed power supply and then disconnect the power cable.
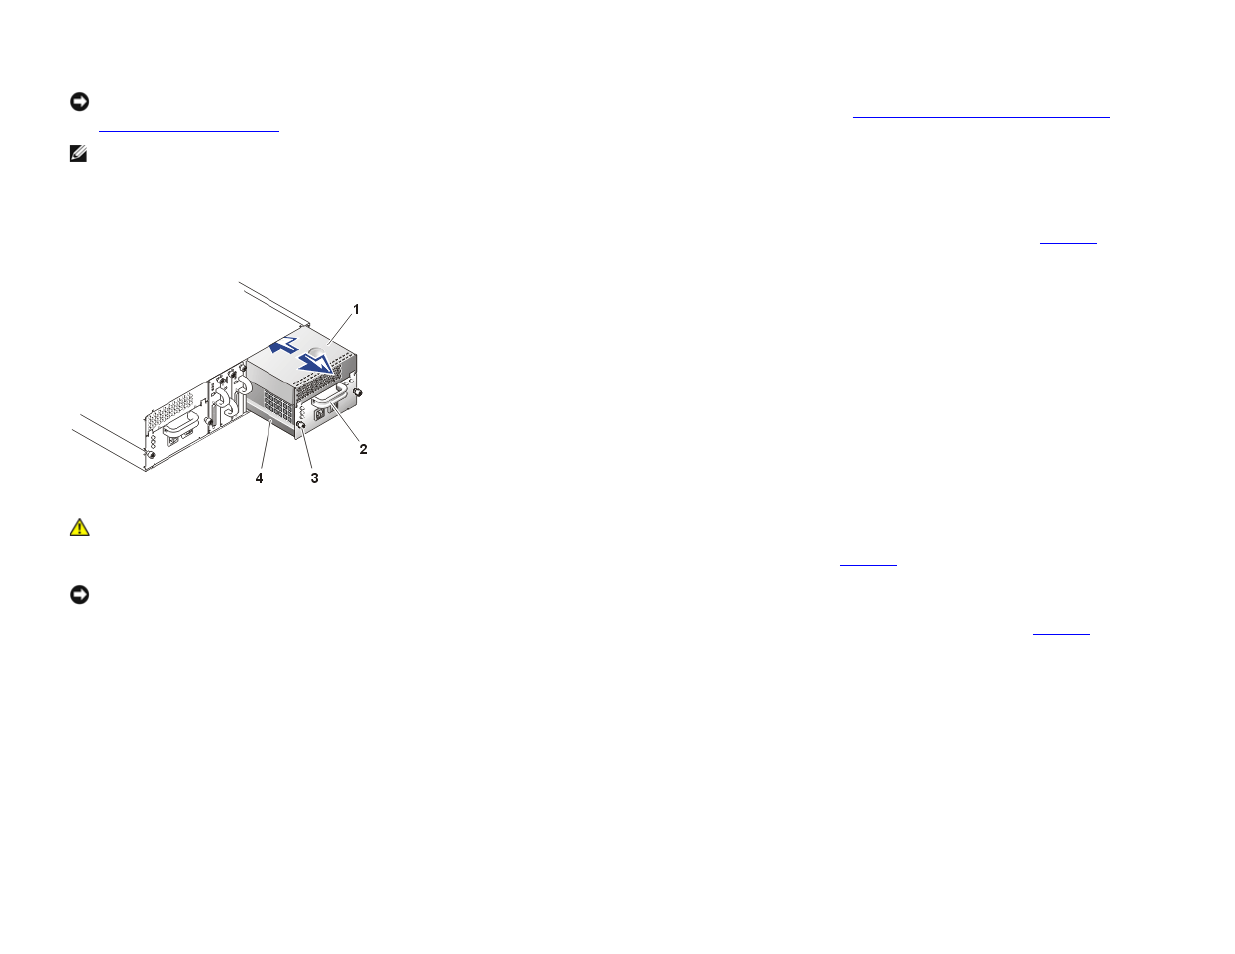
2. Using a Phillips-head screwdriver, turn the two captive screws counterclockwise to release the power supply and cooling module from the module bay (see
).
Figure 18. Replacing the Power Supply (Systems With Redundant Power Supplies)
1 cooling module
2 handle
3 captive screws (2)
4 power supply
CAUTION:
The power supply and cooling modules are heavy. Use both hands when removing.
3. Grasp the handle on the power supply and carefully pull the power supply and cooling module out of the module bay (see
NOTICE:
The power-supply handle is provided to ease the task of pulling the power supply free from the bay. Do not use this handle to carry the storage system.
4. Detach the cooling module from the power supply by pressing the tab on the back of the cooling module and sliding the cooling module back and up (see
Figure 19. Detaching the Cooling Module From the Power Supply
1 tab on back of cooling module
2 cooling module
3 captive screws (2)
4 power supply