Step 2 – Dell PowerVault 220S (SCSI) User Manual
Page 23
Removing and Replacing Parts : Dell PowerVault 220S and 221S Systems Service Manual
file:///C|/Users/rishi_sood/Desktop/220s/en/sm/remove.htm[3/7/2013 12:09:15 PM]
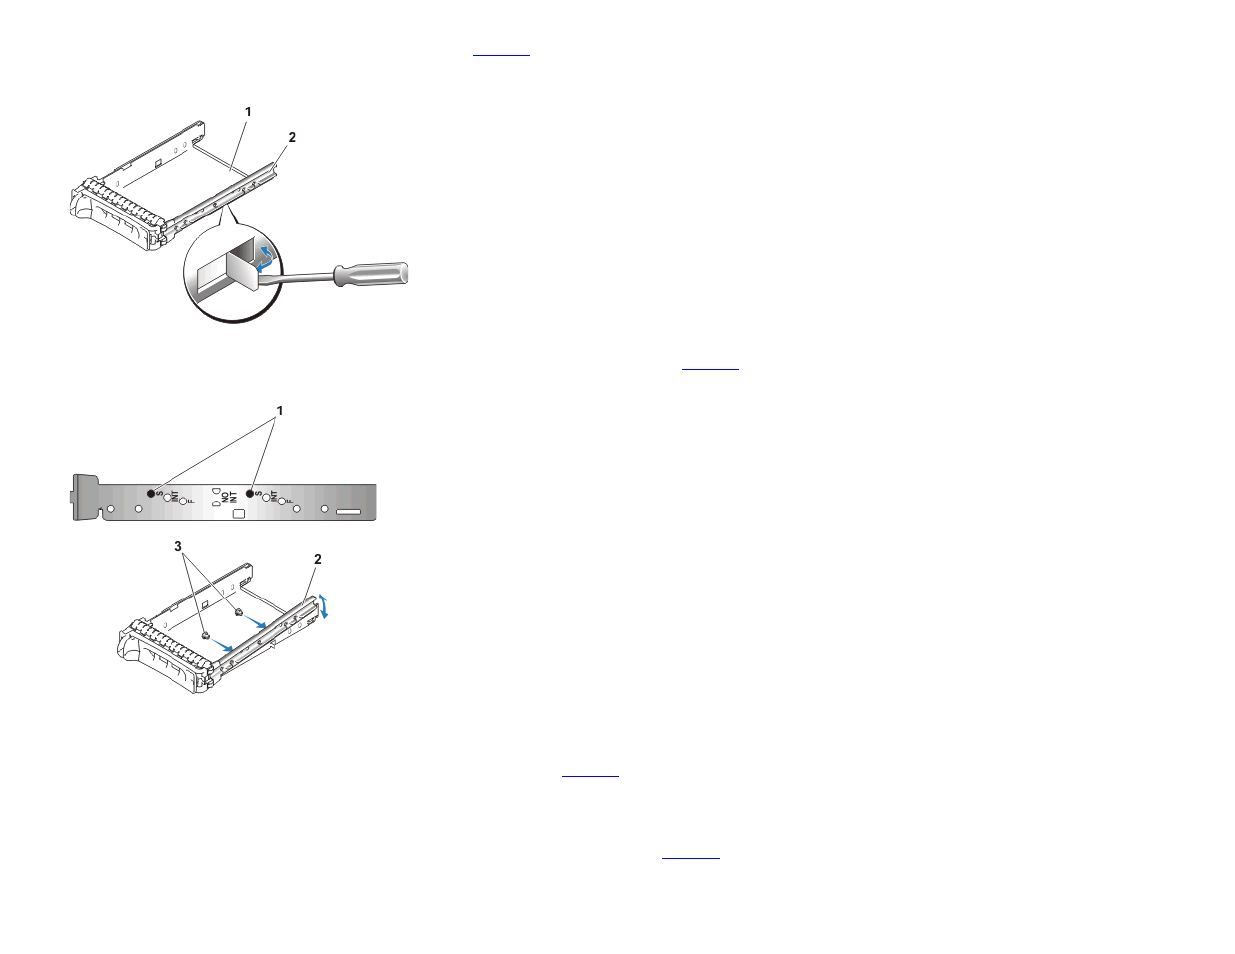
a. Using a standard screwdriver, detach the slide rail on the right (or hinge) side of the carrier from the metal carrier shield by bending away the metal tab located
beneath the rail that fastens the rail to the shield (see
).
Figure 13. Detaching the Carrier Slide Rail
1 carrier shield
2 carrier slide rail
b. Separate the rail from the carrier shield allowing enough space to access the pin holes.
c. From the inside of the drive carrier, insert the access pins into the holes labeled "S" (see
Figure 14. Configuring a SCSI Drive Carrier
1 pin holes for SCSI configuration (labeled "S")
2 detached drive rail
3 access pins (insert from inside the rail)
d. Reassemble the slide rail to the carrier shield and bend the metal retaining tab back into place.
2. If you are replacing a hard drive in a carrier, perform the following steps to install the new hard drive into the carrier:
a. Remove the four screws that secure the hard drive to its carrier (see
b. Position the replacement hard drive into the drive carrier with the hard drive's controller board facing the carrier shield.
c. Align the hard drive with the carrier by sliding the hard drive against the stop at the back of the carrier.
d. Secure the hard drive to the carrier using the four screws you removed in step a (see
Figure 15. Installing the Hard Drive in the Carrier
1 carrier shield