Dell PowerEdge C6145 User Manual
Page 6
Getting Started With Your System | 4
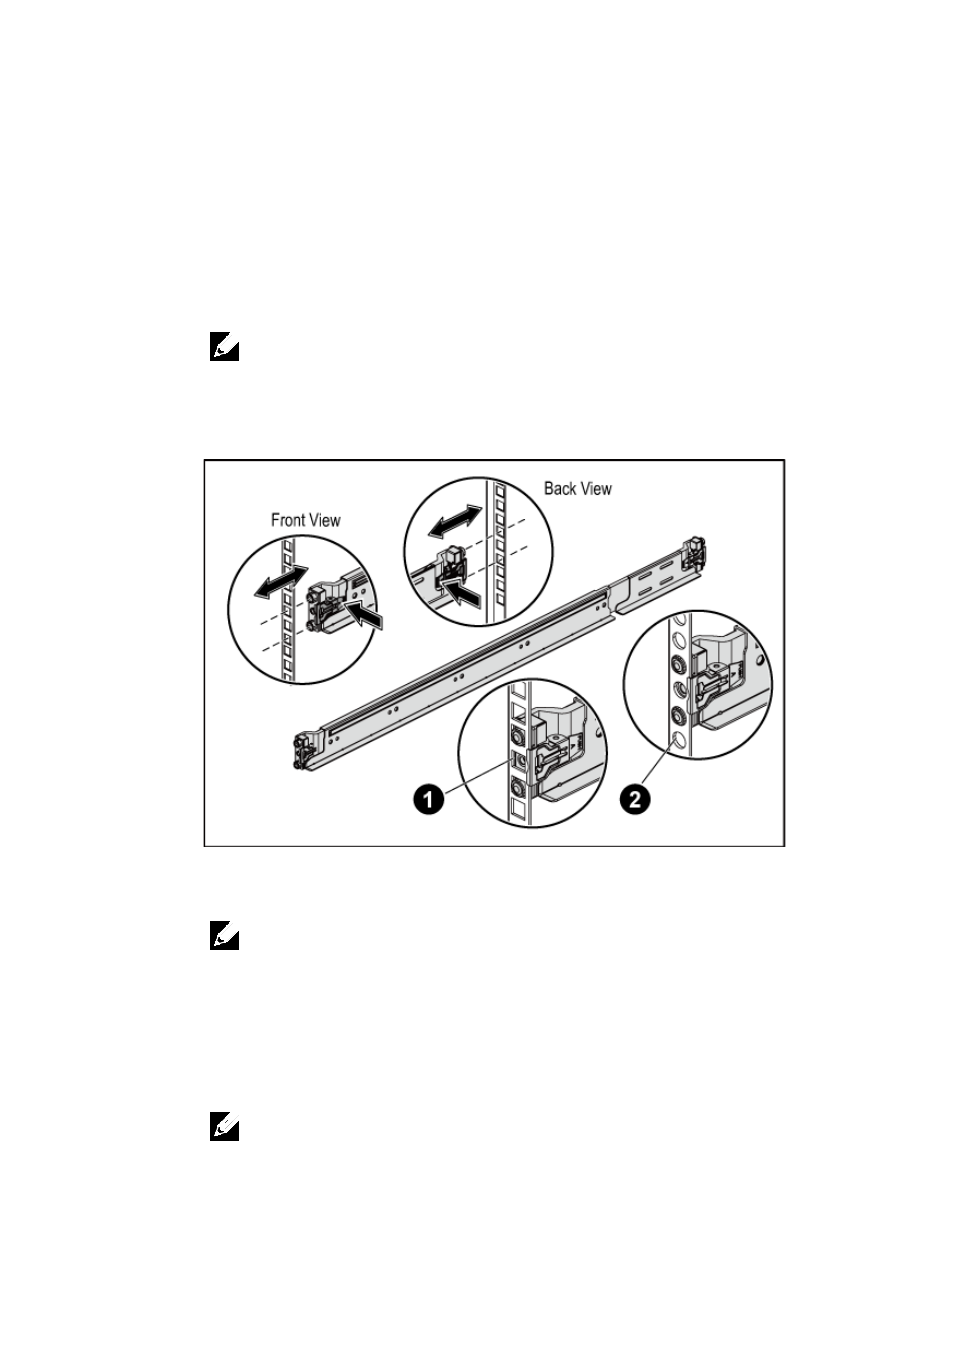
1 Pull on the latch release buttons on the midpoints of the end piece to
open the rail latches.
2 Align the end pieces of the rails on the vertical rack flanges to seat
the pegs in the bottom hole of the first U and the top hole of the
second U. Engage the back end of the rails until the latches lock in
place.
NOTE: The rails can be used in both square-hole (item 1 in the following figure)
and round-hole racks (item 2 in the following figure).
Figure 1. Pushing the Latch Release Buttons
3 Repeat Step 1 and Step 2 to position and seat the front end pieces on
the vertical flanges.
NOTE: To remove the rails, pull on the latch release button on the midpoints of
the end piece and unseat each rail.
4 On each vertical rack flange on the back, put two screw bases into
the two square holes right above the rail.
5 Install the chassis stabilizer shipping brackets (optional) on the back
rack flanges and simultaneously tighten the screws.
NOTE: To transport systems already installed in the rack, ensure that the two
chassis stabilizer shipping brackets (optional) are in place.