Step 1 – install the wi-fi module hardware, Tools and materials, To install the wi-fi module hardware – Baseline Systems BaseStation 1000 User Manual
Page 6: Step 1 – installing the wi-fi module hardware
BaseStation 1000 Wi-Fi Module Installation and User Guide
Step 1 – Install the Wi-Fi Module Hardware
Note: The Wi-Fi module hardware is compatible with BaseStation 1000 controllers in X cabinet
enclosures.
Tools and Materials
•
Philips head screwdriver
•
Needle-nose pliers
•
Wi-Fi module board with ribbon cable, connectors, antenna coax connector and cable, and
screws
•
Antenna (Baseline supplies an antenna from Laird Technologies that is commonly referred to
as a “salt shaker” antenna because of its shape. If you are not able to get a strong signal with
this antenna, other options are available. Contact Baseline Support at 866-294-5847.)
To install the Wi-Fi module hardware
1. We recommend that you back up your current configuration before starting this process in
case you need to restore your system. Refer to Backing Up the Controller Programming in the
BaseStation 1000 User Manual.
2. Press the OFF button to halt all watering
while you install the Wi-Fi module
hardware.
3. Open the internal door of the BaseStation
enclosure.
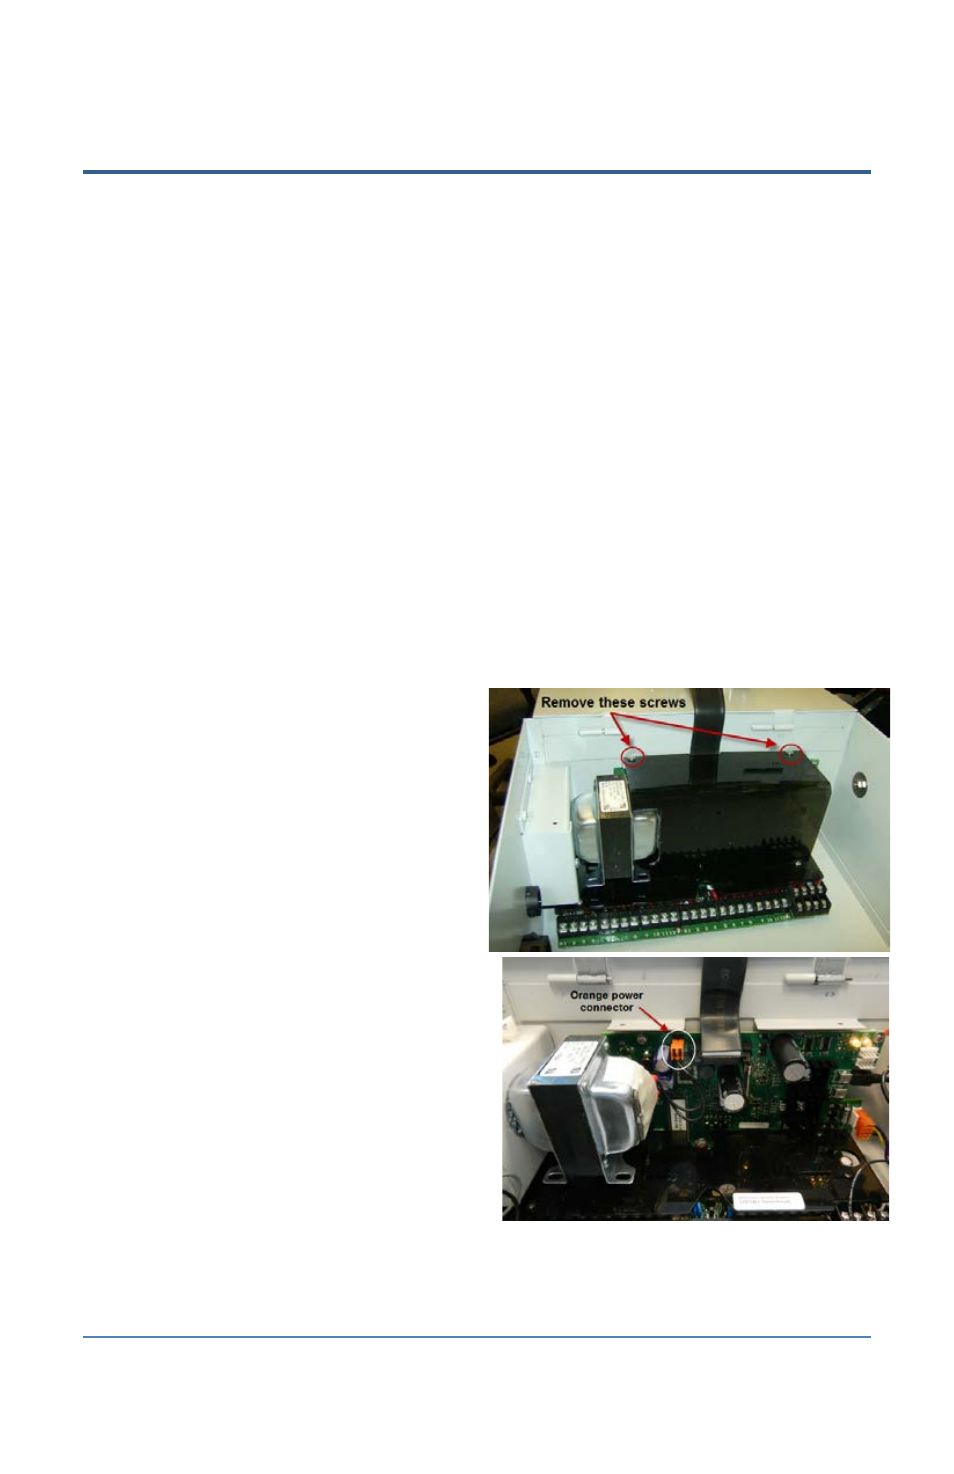
4. Remove the two screws that secure the
black plastic cover over the controller PCA
board. Put the cover and the screws in a
dust free location.
5. Find the orange power connector on the
wires coming from the transformer. Gently
pull the connector away from the board to
disconnect the power.
6. Remove the Wi-Fi module hardware and the
antenna from its packaging.
7. Use the needle-nose pliers to remove the
rubber plug from the antenna port on the
top of the enclosure.
Page 2